
 Carmen J. Moore

Deleting pictures off of a digital camera is a simple process that can help you free up space and organize your photo collection. Whether you’re looking to remove blurry shots, duplicates, or simply clear out old photos, knowing how to delete pictures off of your camera is an essential skill.
In this guide, we will walk you through the steps to delete pictures from your digital camera. From accessing the menu options on your camera to selecting and deleting individual or multiple photos, we’ll cover everything you need to know to keep your camera’s memory clean and ready for new memories.
By following these steps, you can ensure that your digital camera stays organized and efficient, allowing you to capture more moments without worrying about running out of storage space. Let’s dive in and learn how to delete pictures off of a digital camera!
Step-by-Step Guide: Removing Images from Your Camera
1. Turn on your digital camera and access the menu or settings.
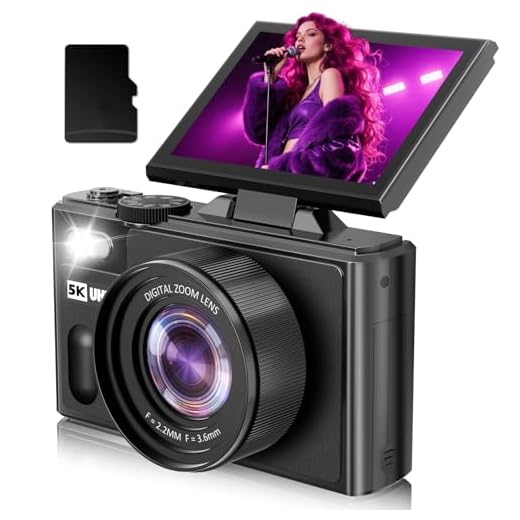



2. Navigate to the “Playback” or “View Images” option on the camera.
3. Scroll through the images using the arrow buttons or touchscreen to select the picture you want to delete.
4. Once the desired image is displayed, look for a “Delete” or trash can icon on the screen.
5. Confirm the deletion by pressing the appropriate button or selecting “Yes” on the screen.
6. Repeat steps 3-5 for each image you wish to remove from your camera.
7. After deleting all the unwanted pictures, exit the playback mode and return to the main menu.
8. Power off your camera to save the changes and ensure the images are permanently deleted.
Accessing the Camera’s Menu
Before you can delete pictures from your digital camera, you need to access the camera’s menu. Here’s how you can do it:
| 1. | Turn on the camera by pressing the power button. |
| 2. | Look for the menu button on the camera. It is usually labeled with the word “Menu” or represented by an icon. |
| 3. | Press the menu button to access the camera’s menu options. |
| 4. | Navigate through the menu using the arrow keys or buttons on the camera to find the option for deleting pictures. |
Selecting the Images to Delete
Before you begin deleting images from your digital camera, it’s important to carefully select the ones you want to remove. Here are some tips on how to choose which images to delete:
- Review each image: Take the time to go through each photo on your camera and decide if you really want to keep it. Look for blurry, overexposed, or duplicate images that you can safely delete.
- Consider storage space: If your camera is running out of memory, prioritize deleting larger files or videos to free up space for new photos.
- Organize by date or event: Sort your images by date or event to help you identify which ones are less important or can be deleted without hesitation.
- Backup before deleting: If you’re unsure about deleting certain images, consider transferring them to a computer or external storage device before removing them from your camera.
By following these steps, you can effectively select the images to delete from your digital camera and free up space for new memories.
Confirming Deletion Action
Once you have selected the pictures you want to delete from your digital camera, you will typically be prompted to confirm the deletion action. This is a crucial step to ensure that you do not accidentally delete any important photos.
When you receive the confirmation prompt, carefully review the selected pictures to make sure you are deleting the correct ones. Confirm the deletion by selecting “Yes” or “Delete” on your camera’s screen.
Removing Images from Camera’s Memory
If you want to delete pictures from your digital camera to free up space or remove unwanted images, follow these simple steps:
- Turn on your camera and navigate to the playback mode where you can view the images stored on the memory card.
- Scroll through the images using the camera’s controls to find the picture you want to delete.
- Once you have selected the image you wish to remove, look for the delete option on the camera’s menu. This is usually represented by a trash can icon or a delete button.
- Confirm the deletion by selecting the appropriate option on the camera’s screen. Some cameras may ask for a confirmation to ensure you don’t accidentally delete an important image.
- Repeat this process for any other images you want to remove from the camera’s memory.
- After deleting the pictures, you can also format the memory card to completely erase all the data and free up space for new images.
Checking for Successful Deletion
After deleting pictures from your digital camera, it’s important to verify that the deletion was successful. Here are some steps to ensure that the pictures have been properly removed:
- Review the camera’s display: Check the camera’s screen to see if the deleted pictures are no longer visible. If they are still showing up, try deleting them again.
- Connect the camera to a computer: Plug your camera into a computer and check the storage to see if the deleted pictures are no longer present. If they are still there, you may need to delete them using the computer.
By following these steps, you can confirm that the pictures have been successfully deleted from your digital camera.

Safely Ejecting the Camera
After you have deleted the pictures from your digital camera, it is important to safely eject the camera from your computer to prevent any data corruption or damage to the camera.
Step 1: Close any open files
Before ejecting the camera, make sure to close any files or folders that are currently open on your computer that are related to the camera.
Step 2: Eject the camera
Locate the camera icon on your computer’s desktop or in the devices section of your file explorer. Right-click on the camera icon and select “Eject” to safely remove the camera from your computer.
| Tip: | Wait for the confirmation message that it is safe to remove the device before physically disconnecting the camera from your computer. |
FAQ
How do I delete pictures from my digital camera?
To delete pictures from your digital camera, you first need to turn on the camera and navigate to the playback mode. Once you see the pictures on the screen, you can select the ones you want to delete. Look for a delete button or an option to erase the selected images. Follow the on-screen prompts to confirm the deletion. Make sure to double-check the pictures you are deleting to avoid removing any important ones.
Can I delete pictures directly from my digital camera or do I need to connect it to a computer?
You can typically delete pictures directly from your digital camera without the need to connect it to a computer. Most modern digital cameras have a delete function that allows you to remove unwanted photos directly on the camera’s screen. However, if you prefer to manage your photos on a computer, you can also connect the camera to a computer and delete images using the software provided by the camera manufacturer or a third-party photo management program.



I found it super useful to back up my photos on a computer before deleting. It saved me a few times!
What if I accidentally delete a photo I wanted to keep? Is there a way to recover it from the camera?
Unfortunately, once a photo is deleted from most digital cameras, it's often permanently removed. However, some cameras may have recovery software options, and if you have a backup, you can restore from there.
I understand the steps to delete images, but can you explain more about the formatting option? How is it different from just deleting pictures?
I don't think it's necessary to back up photos before deleting them. If you're sure about what you want to delete, just go for it!
It’s always better to be safe than sorry! I’ve lost good photos before.