
 Carmen J. Moore

Mounting a Blink security camera is a crucial step in setting up your home surveillance system. Whether you’re looking to keep an eye on your front porch, backyard, or any other area of your property, proper installation is key to ensuring optimal performance and coverage.
In this guide, we’ll walk you through the process of mounting your Blink security camera, from choosing the right location to securing it in place. By following these steps, you’ll be able to set up your camera quickly and efficiently, giving you peace of mind knowing that your home is well-protected.
Step-by-Step Guide to Mount Blink Security Camera
Mounting your Blink security camera is a straightforward process that can be done in a few simple steps. Follow this step-by-step guide to ensure a secure and proper installation:
Step 1: Choose the location for your Blink camera. Make sure it has a clear view of the area you want to monitor and is within range of your Wi-Fi signal.

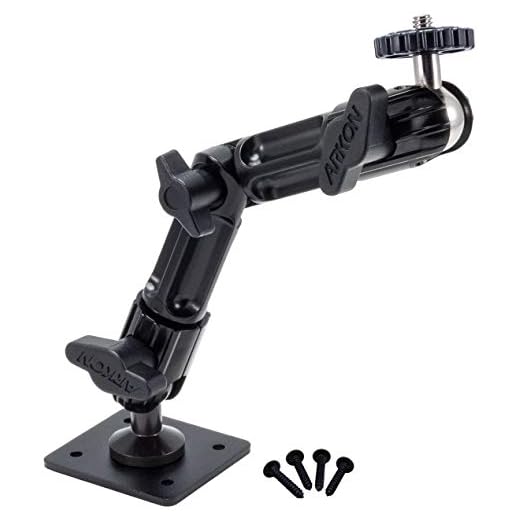
Step 2: Use the mounting bracket provided with your Blink camera to mark the drilling holes on the wall or ceiling.
Step 3: Drill the holes using a suitable drill bit and insert wall anchors if needed.
Step 4: Attach the mounting bracket to the wall or ceiling using the screws provided.
Step 5: Secure the Blink camera to the mounting bracket using the included screws.
Step 6: Adjust the camera angle to ensure the desired field of view.
Step 7: Connect the camera to your Blink app and follow the on-screen instructions to complete the setup process.
By following these simple steps, you can easily mount your Blink security camera and start monitoring your property with ease.
Determine Ideal Location
Before mounting your Blink security camera, it is important to determine the ideal location for optimal coverage and security. Consider the following factors:
1. Coverage Area:
Identify the areas you want to monitor and ensure the camera has a clear view of those locations. Make sure there are no obstructions that could block the camera’s view.
2. Power Source:
Choose a location near a power source or within range of the camera’s battery life. Ensure the camera is easily accessible for charging or battery replacement.
Gather Necessary Tools
Before you start mounting your Blink security camera, make sure you have all the necessary tools handy. Here’s a list of tools you may need:
- Drill
- Screwdriver
- Mounting screws
- Wall anchors
- Level
- Tape measure
- Power drill
- Mobile device with the Blink app installed
Having these tools ready will ensure a smooth and efficient installation process for your Blink security camera.
Install Mounting Bracket
Before mounting your Blink security camera, you need to install the mounting bracket. Follow these steps:
1. Choose the Location
Select a suitable location for your camera where it has a clear view of the area you want to monitor.
2. Attach the Bracket
Use the provided screws to attach the mounting bracket to the desired location. Make sure it is securely fastened.
Once the mounting bracket is in place, you can easily attach the Blink security camera to it for optimal positioning and coverage.
Secure Camera in Place
Once you have positioned your Blink security camera in the desired location, it’s important to secure it properly to ensure it stays in place. Use the provided mounting hardware to attach the camera securely to the surface. Make sure to tighten all screws and bolts to prevent the camera from moving or falling. Additionally, consider using adhesive strips or mounting brackets for extra security. Test the camera to ensure it is securely mounted and adjust if necessary. Properly securing your camera will help ensure optimal performance and coverage.
Connect Camera to Power Source
Before mounting your Blink security camera, you need to connect it to a power source to ensure it is operational. Follow these steps:
- Locate the power adapter that came with your Blink camera.
- Plug one end of the power adapter into the camera’s power port.
- Plug the other end of the power adapter into a power outlet.
- Ensure that the camera’s LED light turns on, indicating that it is receiving power.
Note:
Make sure the power source you are using is stable and reliable to avoid any interruptions in camera operation.
Configure Camera Settings
Once you have successfully mounted your Blink security camera, it’s important to configure the camera settings to ensure optimal performance. Follow these steps to adjust the settings:
1. Download the Blink App
Before you can start configuring the camera settings, you need to download the Blink app on your smartphone or tablet. The app is available for both iOS and Android devices.
2. Connect to Your Camera
Open the Blink app and follow the on-screen instructions to connect to your camera. Make sure your camera is powered on and within range of your Wi-Fi network.
Once connected, you can access the camera settings through the app. Here, you can adjust settings such as motion detection sensitivity, video quality, and recording duration.
Test Camera Functionality
Before mounting your Blink security camera, it’s important to test its functionality to ensure it’s working properly. Follow these steps to test your camera:
- Power on the Camera: Make sure the camera is powered on and connected to the Blink app on your smartphone or tablet.
- Check Live Feed: Open the Blink app and check the live feed from the camera to see if the video is clear and the audio is working.
- Trigger Motion Detection: Test the motion detection feature by moving in front of the camera to see if it captures motion and sends alerts.
By testing the functionality of your Blink security camera before mounting it, you can ensure that it will provide reliable surveillance once installed.



Remember to check the camera's Wi-Fi signal strength after mounting! A weak signal can affect performance.
I don't think it's necessary to have a clear view of the area you want to monitor. Sometimes, a little obstruction can help prevent thieves from easily spotting the camera.
I see your point, but I think having a clear view ensures better performance. You want to catch everything, right?
What’s the best height to mount the Blink camera for optimal coverage? I want to make sure I'm capturing everything.
I mounted my Blink camera last week, and I found that having a level was super helpful to ensure it wasn't crooked. Also, I made sure to test the camera's angle before securing it in place. A few adjustments made a big difference in the coverage area!
What tools do I really need to mount the Blink camera? The article lists a lot, but do I really need a drill?