
 Carmen J. Moore

Adjusting exposure time on your iPhone camera can greatly improve the quality of your photos, especially in low-light conditions. By increasing the exposure time, you allow more light to enter the camera sensor, resulting in brighter and more detailed images. In this article, we will explore how you can manually adjust the exposure time on your iPhone camera to capture stunning photos.
Step 1: Open the Camera App
To begin, open the Camera app on your iPhone. Make sure you are in the desired shooting mode, whether it’s Photo, Portrait, or Night mode. Next, tap on the screen to bring up the exposure slider.


Pro tip: You can also adjust the exposure by tapping and holding on the screen, then sliding your finger up or down to increase or decrease the exposure time.
Step 2: Adjust the Exposure Time
Once the exposure slider is visible, you can manually adjust the exposure time by sliding your finger left or right. Moving the slider to the right increases the exposure time, while moving it to the left decreases it. Find the perfect balance to achieve the desired brightness and detail in your photos.
Tips for Extending Exposure Time
If you want to increase the exposure time on your iPhone camera to capture stunning long-exposure shots, here are some tips to help you achieve that:
| 1. | Use Manual Camera Apps |
| 2. | Adjust ISO Settings |
| 3. | Experiment with Shutter Speed |
| 4. | Utilize ND Filters |
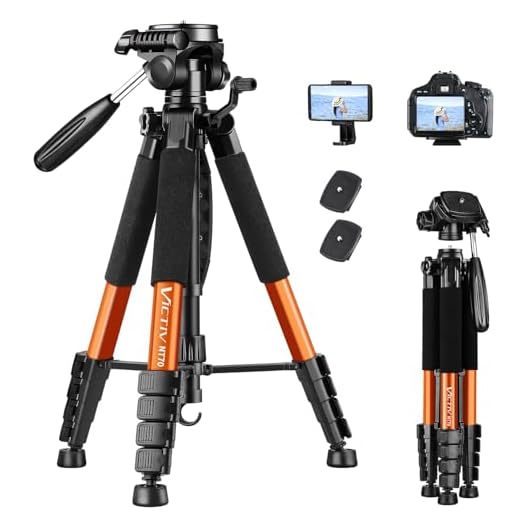
| 5. | Mount Your iPhone on a Tripod |
By following these tips, you can extend the exposure time on your iPhone camera and capture stunning long-exposure photographs.
Adjusting Camera Settings
If you want to increase the exposure time on your iPhone camera, you can adjust the camera settings to achieve the desired results. Here’s how you can do it:
1. Open the Camera App
Launch the Camera app on your iPhone to access the camera settings.
2. Adjust Exposure
To increase exposure time, tap on the screen where you want to focus and hold until you see a yellow box with a sun icon next to it. Swipe up or down to adjust the exposure manually. This will allow you to increase the exposure time for better results.
By adjusting the camera settings, you can increase the exposure time on your iPhone camera and capture stunning photos in low-light conditions or when you want to create long-exposure effects.
Using Third-Party Apps
If you want to increase exposure time on your iPhone camera beyond what the native camera app allows, you can consider using third-party apps. These apps offer advanced features and settings that give you more control over your exposure settings, including longer exposure times.
Some popular third-party camera apps that allow you to adjust exposure time include ProCam, Camera+, and Manual. These apps typically offer manual controls for exposure, focus, and other settings, allowing you to fine-tune your photos and capture long-exposure shots with ease.
Before using third-party apps, make sure to research and choose one that suits your needs and preferences. Experiment with different apps to find the one that works best for you and allows you to achieve the exposure times you desire.
Utilizing Tripods and Stabilizers
One of the most effective ways to increase exposure time on your iPhone camera is by using a tripod or stabilizer. These tools help eliminate camera shake, allowing you to take longer exposure shots without blurring. Here are some tips for using tripods and stabilizers with your iPhone:
1. Tripods
Invest in a sturdy tripod that is compatible with your iPhone model. Make sure the tripod is adjustable and can hold your phone securely in place. Set up the tripod on a stable surface and adjust the height and angle as needed. Use a timer or remote shutter to avoid touching the phone while taking the shot, which can cause vibrations.
2. Stabilizers
Consider using a handheld stabilizer or gimbal to reduce camera shake while shooting video or long exposure photos. These devices provide smooth and steady movement, resulting in sharp and clear images. Practice using the stabilizer to get comfortable with its controls and find the best angles for your shots.
Experimenting with Light Sources
One of the key factors in increasing exposure time on your iPhone camera is the availability of light sources. Experimenting with different light sources can help you achieve the desired exposure for your photos.
1. Natural Light
Using natural light from windows, doors, or outdoor settings can provide a soft and even illumination for your photos. Positioning your subject near a natural light source can help increase exposure time without compromising image quality.
2. Artificial Light
Experimenting with artificial light sources such as lamps, studio lights, or flashlight can also help you extend exposure time. Adjusting the intensity and direction of artificial light can create unique lighting effects and enhance the overall exposure of your photos.
Practicing Long Exposure Techniques
Long exposure photography requires practice and patience to achieve stunning results. Here are some tips to help you master this technique:
1. Use a tripod: To avoid camera shake during long exposure shots, it is essential to use a sturdy tripod. This will ensure sharp images even in low light conditions.
2. Set a low ISO: Keep your ISO low to reduce noise in your long exposure images. A lower ISO setting will result in cleaner and more detailed photos.
3. Experiment with different shutter speeds: Try varying shutter speeds to capture different effects in your long exposure shots. Longer shutter speeds can create smooth, flowing water or streaking lights, while shorter speeds can freeze motion.
4. Use a remote shutter release: To minimize camera shake further, consider using a remote shutter release or the self-timer function on your camera. This will help you capture sharp images without touching the camera.
5. Practice composition: Pay attention to your composition and framing when practicing long exposure photography. Experiment with different angles and perspectives to create visually engaging images.
By practicing these techniques and experimenting with different settings, you can improve your long exposure photography skills and capture stunning images with your iPhone camera.
Incorporating Slow Shutter Speed
If you want to increase the exposure time on your iPhone camera, you can incorporate the use of slow shutter speed. Slow shutter speed allows more light to enter the camera sensor, resulting in brighter and more detailed images, especially in low-light conditions.
To adjust the shutter speed on your iPhone, you can use third-party camera apps that offer manual controls. These apps allow you to set the shutter speed to a slower value, giving you more control over the exposure time and allowing you to capture long-exposure shots.
Benefits of Slow Shutter Speed:
- Long Exposure Shots: Slow shutter speed enables you to capture stunning long-exposure shots of moving subjects, such as light trails or flowing water.
- Low-Light Photography: By increasing the exposure time, you can take better low-light photos with less noise and improved clarity.
Enhancing Exposure in Low Light Conditions
When shooting in low light conditions with your iPhone camera, it’s important to enhance the exposure to capture clear and detailed images. Here are some tips to help you improve exposure in low light:
1. Adjust the Exposure Level
One way to increase exposure in low light is to manually adjust the exposure level on your iPhone camera. Simply tap on the screen where you want to focus and then slide your finger up or down to adjust the exposure. This will help brighten up the image and capture more details in dark areas.
2. Use Night Mode
If your iPhone model supports Night Mode, make sure to enable it when shooting in low light. Night Mode automatically adjusts the exposure and captures multiple images to create a well-exposed photo with reduced noise. This feature is especially useful in extremely low light conditions.
By following these tips, you can enhance exposure in low light conditions and capture stunning photos with your iPhone camera.


I have an older iPhone model without Night Mode. Are there any specific apps you recommend for manual exposure adjustments?
I've had good luck with the ProCam app! It lets you control the exposure manually and has a lot of other great features.
I’m not convinced that using third-party apps is worth it. The native camera app has all the basics covered, doesn’t it? Why complicate things?
Does sliding the exposure slider all the way up really make a noticeable difference, or is there a limit to how much light it can let in?