


Are you tired of your iPhone photos looking dark or washed out due to poor lighting? Don’t worry, there are simple steps you can take to improve the lighting in your iPhone camera shots. Whether you’re taking selfies, capturing landscapes, or snapping pics of your favorite foods, good lighting is key to getting great results.
One of the easiest ways to fix lighting on your iPhone camera is to adjust the exposure settings. By tapping on the screen before taking a photo, you can adjust the exposure to make the image brighter or darker. This simple trick can make a big difference in the quality of your photos.
Another tip is to make use of natural light whenever possible. If you’re shooting indoors, try to position yourself near a window or open door to let in natural light. Natural light is soft and flattering, making your photos look more natural and vibrant.
Essential Tips for Improving Lighting on iPhone Camera
Lighting plays a crucial role in capturing great photos with your iPhone camera. Here are some essential tips to help you improve the lighting in your photos:
| 1. Use Natural Light: | Try to capture photos in natural light whenever possible. Natural light provides a soft and flattering illumination that can enhance your photos. |
| 2. Avoid Harsh Shadows: | Avoid shooting in direct sunlight or under harsh lighting conditions that create strong shadows. Look for diffused or indirect light for more balanced lighting. |
| 3. Adjust Exposure: | Take advantage of the exposure adjustment feature on your iPhone camera to control the brightness of your photos. Tap on the screen to adjust the exposure manually. |
| 4. Use Reflectors: | If you need to fill in shadows or add more light to your subject, consider using reflectors to bounce light back onto the scene and create a more even illumination. |
| 5. Experiment with Light Sources: | Try using different light sources such as candles, fairy lights, or lamps to create unique lighting effects in your photos. Experimenting with different sources can add creativity to your shots. |
Adjusting Exposure Levels
To adjust the exposure levels on your iPhone camera, follow these steps:
- Tap on the screen: When you open the Camera app, tap on the area of the screen where you want to adjust the exposure. This will not only focus on that area but also adjust the exposure levels accordingly.
- Slide the exposure slider: After tapping on the screen, a small sun icon will appear next to the focus square. You can then slide your finger up or down on the screen to adjust the exposure levels manually.
By adjusting the exposure levels, you can ensure that your photos are well-lit and properly exposed, enhancing the overall quality of your iPhone camera shots.
Utilizing Natural Light Sources
One of the best ways to improve the lighting in your iPhone photos is to take advantage of natural light sources. Here are some tips:
- Shoot during the golden hour: The hour after sunrise and the hour before sunset provide soft, warm light that can enhance your photos.
- Position your subject near a window: Natural light coming through a window can create a beautiful, soft lighting effect.
- Avoid harsh sunlight: Direct sunlight can create harsh shadows and overexposed areas in your photos. Try to find shaded areas or use a diffuser to soften the light.
- Use reflectors: Reflectors can bounce light onto your subject, filling in shadows and creating a more balanced light.
By utilizing natural light sources, you can significantly improve the quality of your iPhone photos and create stunning images.
Avoiding Harsh Shadows
Harsh shadows can be distracting and unflattering in photos. To avoid them when taking pictures with your iPhone camera, try to shoot in soft, diffused light. This could mean shooting outdoors on a cloudy day or positioning your subject near a window with indirect sunlight.
If you’re shooting in bright sunlight, consider using a reflector or diffuser to soften the light and reduce harsh shadows. You can also adjust your camera settings to decrease the exposure and minimize the contrast between light and dark areas.
Another tip is to move your subject away from the background to create separation and minimize shadows. Experiment with different angles and positions to find the best lighting for your photo.
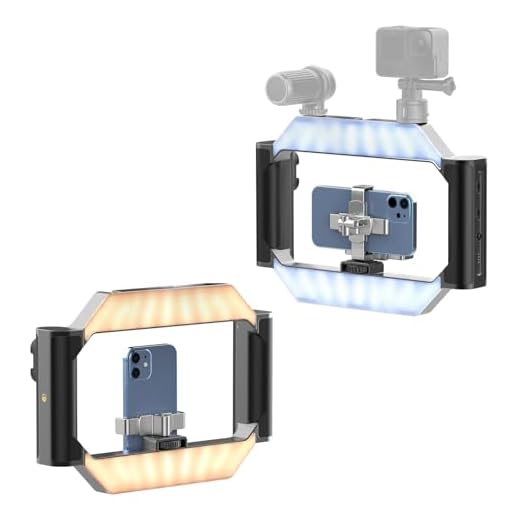
Using External Lighting Accessories
If the built-in flash or ambient lighting is not sufficient for your needs, consider using external lighting accessories. External LED lights, ring lights, or portable studio lights can help improve the lighting conditions for your iPhone camera. These accessories can provide a more natural and flattering light, reducing harsh shadows and creating a more professional look for your photos.
Adjust the Light Intensity
When using external lighting accessories, make sure to adjust the light intensity to achieve the desired effect. You can typically control the brightness of the light to suit different lighting conditions and create the atmosphere you want for your photos.
Experiment with Different Lighting Setups
Don’t be afraid to experiment with different lighting setups to find the best one for your subject. Try positioning the light source at different angles and distances to create interesting effects and enhance the mood of your photos. With a bit of practice and experimentation, you can achieve professional-looking results using external lighting accessories with your iPhone camera.
Setting White Balance Correctly
White balance is crucial for getting accurate colors in your photos. When the white balance is off, your images may have a yellow or blue tint that is unappealing. To fix this issue on your iPhone camera, follow these steps:
1. Use the Auto White Balance Setting
For most situations, the Auto White Balance setting on your iPhone camera should work just fine. This setting adjusts the color temperature based on the lighting conditions, ensuring your photos look natural and well-balanced.
2. Manually Adjust the White Balance
If the Auto White Balance setting doesn’t give you the desired results, you can manually adjust the white balance on your iPhone camera. To do this, tap on the screen to focus on your subject, then swipe up or down to adjust the white balance slider until the colors look accurate.

Editing and Enhancing Lighting in Post-Production
After capturing your photos on your iPhone camera, you can further enhance and correct the lighting in post-production to make your images more visually appealing. Here are some tips to help you improve the lighting in your photos:
1. Adjust Brightness and Contrast: Use photo editing apps or software to adjust the brightness and contrast levels of your images. Increasing the brightness can help lighten up dark areas, while adjusting the contrast can make the colors pop.
2. Fine-tune Exposure: If your photo is too dark or too bright, you can adjust the exposure to balance the lighting. Decrease the exposure for overly bright photos and increase it for dark photos.
3. Enhance Shadows and Highlights: Use editing tools to enhance the shadows and highlights in your photos. This can help bring out details in darker areas and prevent overexposure in brighter areas.
4. Use Filters and Presets: Experiment with filters and presets in editing apps to quickly enhance the lighting and overall look of your photos. Many apps offer a variety of options to choose from.
5. Apply Dodge and Burn Techniques: Dodge is a technique used to lighten specific areas of the photo, while burn is used to darken areas. These tools can help you adjust the lighting in specific areas of your image.
By utilizing these editing techniques in post-production, you can significantly improve the lighting in your iPhone photos and create stunning visuals.


