
 Carmen J. Moore

Do you have a collection of old camera film that you want to digitize? If so, you’re not alone. Many people have cherished memories captured on film that they want to preserve in a digital format. Fortunately, transferring camera film to digital is easier than you might think.
There are several methods you can use to convert your camera film to digital files, ranging from DIY techniques to professional services. In this article, we will explore some of the most popular methods and provide you with step-by-step instructions on how to transfer your camera film to a digital format.



Step-by-Step Guide: Transfer Camera Film to Digital
Transferring camera film to digital format allows you to preserve and share your precious memories in a modern and convenient way. Follow these steps to digitize your camera film:
Step 1: Gather Your Supplies
Before you start the transfer process, make sure you have all the necessary supplies. You will need a film scanner, a computer with editing software, cleaning materials for the film, and a safe space to handle the film.
Step 2: Prepare the Film
Carefully handle the camera film and clean it using a soft cloth to remove any dust or dirt. Make sure your film scanner is clean and ready for use.
| Step | Description |
|---|---|
| Step 3 | Scan the Film |
| Step 4 | Transfer to Computer |
| Step 5 | Edit and Save |
Gather Necessary Equipment
Before you begin transferring camera film to digital, make sure you have the following equipment ready:
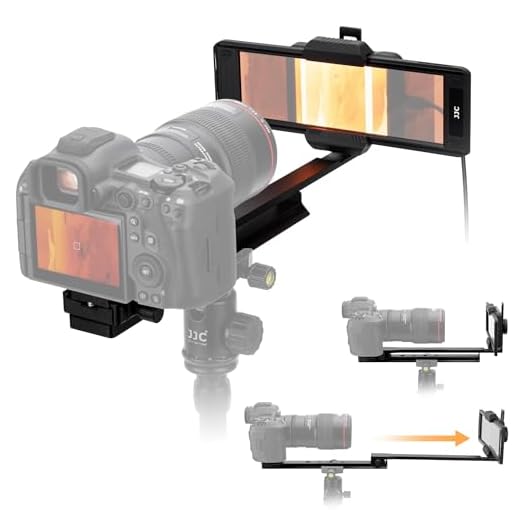
- A film scanner or a digital camera with a macro lens
- A computer with photo editing software
- Clean microfiber cloths for dusting film
- Film cleaning solution and cotton swabs for removing dirt and smudges
- A light table or a lightbox for examining and organizing film
- Anti-static gloves to prevent fingerprints on film
- A film holder or negative carrier for scanning film strips
Prepare Your Workspace
Before you start transferring your camera film to digital, it’s important to set up a clean and organized workspace. Here are some tips to help you prepare:

- Gather all the necessary tools and equipment, including a film scanner, a computer with editing software, and a clean microfiber cloth.
- Choose a well-lit area with minimal dust to work in. Dust and dirt particles can easily get on the film and scanner, affecting the quality of your digital images.
- Make sure your film scanner is set up and connected to your computer properly. Test it out to ensure it’s working correctly before you start transferring your film.
Set Up Your Film Scanner
Before you start transferring your camera film to digital format, you will need to set up your film scanner. Follow these steps to ensure a smooth process:
1. Choose a Suitable Location
Find a flat and stable surface to place your film scanner. Make sure there is enough space for the scanner and your computer or laptop nearby.
2. Connect the Scanner
Connect the film scanner to your computer using the appropriate cables. Make sure the scanner is correctly plugged in and powered on before proceeding.
Load the Film into the Scanner
Once you have your scanner set up and ready to go, it’s time to load the film into the scanner. Follow these steps to ensure a successful transfer:
Step 1: Prepare the Film
Ensure that the film is clean and free of dust or debris. Handle the film carefully to avoid scratching or damaging it.

Step 2: Place the Film in the Scanner
| 1. | Open the scanner lid and locate the film holder or film guide. |
| 2. | Slide the film into the holder or guide according to the manufacturer’s instructions. |
| 3. | Ensure that the film is positioned correctly and securely in place. |
By following these steps, you can ensure that the film is loaded properly and ready for scanning. Proceed with the scanning process according to your scanner’s instructions to digitize your film effectively.
Adjust Scanner Settings
Before scanning your camera film, it’s important to adjust the scanner settings to ensure you get the best possible digital image quality. Here are some key settings to consider:
Resolution
Choose a high resolution setting on your scanner to capture as much detail as possible from the film. A resolution of 300 dpi or higher is recommended for quality digital images.
Color Mode
Select the appropriate color mode for your film type, whether it’s color or black and white. Adjusting the color mode can help enhance the accuracy of colors in the digital image.
| Setting | Recommendation |
|---|---|
| Brightness | Adjust to achieve optimal brightness levels in the digital image. |
| Contrast | Modify to enhance the contrast and clarity of the digital image. |
| Sharpness | Fine-tune to improve the sharpness and detail in the digital image. |
Scan the Film Frames
To digitize your camera film, you will need to scan each individual frame using a film scanner. Follow these steps to scan the film frames:

- Set up your film scanner according to the manufacturer’s instructions.
- Carefully place the film strip in the scanner, ensuring it is positioned correctly.
- Open the scanning software on your computer and choose the appropriate settings for scanning film.
- Scan each frame individually, adjusting the settings as needed to achieve the desired quality.
- Save the scanned images to your computer in a high-resolution format for future editing or printing.
Save and Organize Digital Files
After you have transferred your camera film to digital format, it is important to save and organize your digital files properly to ensure easy access and preservation.
1. Create a Folder Structure
Start by creating a folder structure on your computer that makes sense to you. Organize your files by date, event, or any other criteria that you find useful.
2. Backup Your Files
Make sure to create backups of your digital files to prevent loss in case of a computer crash or other unforeseen circumstances. Consider using external hard drives, cloud storage, or other backup solutions.
FAQ
What equipment do I need to transfer camera film to digital?
To transfer camera film to digital, you will need a film scanner, a computer with photo editing software, a clean workspace, and some basic knowledge of digitizing photos. Film scanners come in various types and price ranges, so choose one that suits your needs and budget.
Is it difficult to transfer camera film to digital on your own?
Transferring camera film to digital can be a bit challenging if you’re new to the process, but with the right equipment and a little practice, you can achieve great results. Take your time to learn how to use the film scanner and photo editing software effectively, and don’t hesitate to seek help or tutorials if needed.



What type of film scanner do you recommend for someone just starting out with digitizing old film? I'm a bit overwhelmed with the options available.
Make sure to back up your digital files! It’s so easy to lose them if you don’t.
I recently tried digitizing my old family films using a DIY method. I used a digital camera with a macro lens and it worked surprisingly well! I just placed the film on a light table and adjusted the settings on my camera for clarity. It's a lot of work, but seeing those memories again was worth it!
Thanks for sharing your experience! Using a digital camera can definitely be a cost-effective alternative to a dedicated film scanner. Just be sure to handle the film carefully to avoid scratches.
I've read that some people prefer professional services over DIY methods. What are the main pros and cons of each?
I disagree that DIY is always the best route. I've seen professional services give much better results, particularly for old and damaged films. Sometimes, it’s better to leave it to the experts to avoid ruining precious memories.