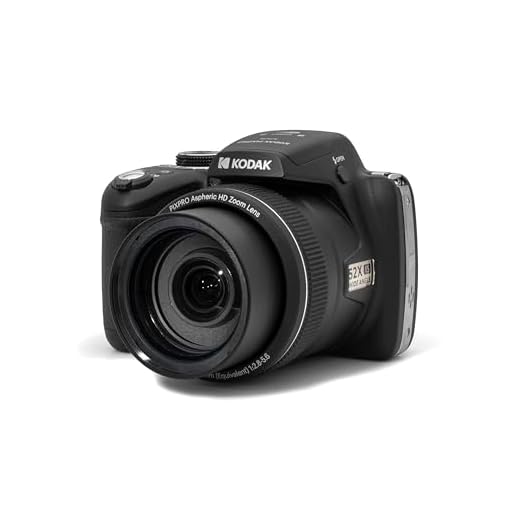

Using a compact digital camera is a convenient way to capture special moments and memories on the go. However, holding the camera properly is essential to ensure sharp, clear photos.
When holding a compact digital camera, it’s important to have a stable grip to avoid camera shake and blurry images. One effective technique is to use both hands: one hand to hold the camera and the other to support it from below.
Additionally, keeping your elbows close to your body can help stabilize the camera and reduce the risk of unwanted movement. Remember to breathe steadily and press the shutter button gently to capture the perfect shot.

Proper Grip Technique
When holding a compact digital camera, it is important to use the proper grip technique to ensure stability and reduce camera shake. Follow these steps for a secure grip:
1. Position your fingers
Hold the camera with your right hand, placing your index finger on the shutter button and your other fingers around the grip. Make sure your fingers are securely wrapped around the camera to avoid dropping it.
2. Support with your left hand
Use your left hand to support the camera from underneath, keeping it steady and balanced. This will help prevent camera shake and allow you to maintain a firm grip while shooting.
Adjusting Camera Settings
Before taking photos with your compact digital camera, it’s important to adjust the camera settings to ensure you get the best results. Here are some key settings you should consider:
1. Resolution
Set the resolution of your camera to the highest possible setting to capture images with the best clarity and detail. Keep in mind that higher resolution photos will take up more storage space on your memory card.
2. White Balance
Adjust the white balance setting based on the lighting conditions of your environment. This will help ensure that colors appear natural and accurate in your photos. You can choose from preset white balance settings or manually adjust the white balance for a custom look.
By adjusting these and other camera settings, you can enhance the quality of your photos and achieve the desired results when using your compact digital camera.
Using the Viewfinder
When holding a compact digital camera, it is important to utilize the viewfinder to ensure accurate framing and composition of your photos. Look through the viewfinder and adjust your position and angle until the desired subject is properly framed within the viewfinder. This will help you avoid cropping out important elements of your shot and improve the overall quality of your images.
Stabilizing the Camera
Stabilizing the camera is essential to avoid blurry photos. Here are some tips to help you stabilize your compact digital camera:
- Use a tripod or monopod: Tripods and monopods provide a stable base for your camera, reducing camera shake and resulting in sharper images.
- Hold the camera with both hands: Grip the camera firmly with both hands to minimize movement while taking photos.
- Tuck your elbows in: Keep your elbows close to your body to create a more stable shooting position.
- Lean against a stable surface: If possible, lean against a wall or a sturdy object to steady yourself while taking photos.
- Breathe steadily: Take a deep breath and exhale slowly while pressing the shutter button to minimize movement.
Understanding Exposure
Exposure is a key element in photography that determines how light or dark an image will appear. It is controlled by three main settings: aperture, shutter speed, and ISO. Understanding how these settings work together is essential for capturing well-exposed photos.
Aperture
Aperture refers to the opening in the lens through which light passes. It is measured in f-stops, with larger f-stop numbers indicating a smaller aperture (less light) and smaller f-stop numbers indicating a larger aperture (more light). A larger aperture lets in more light, resulting in a brighter image, while a smaller aperture lets in less light, resulting in a darker image.
Shutter Speed
Shutter speed determines how long the camera’s shutter remains open to allow light to reach the sensor. A faster shutter speed (e.g., 1/1000) means the shutter opens and closes quickly, allowing less light to reach the sensor and freezing motion. A slower shutter speed (e.g., 1/30) means the shutter remains open longer, allowing more light to reach the sensor and capturing motion blur.
Framing Your Shot
When holding a compact digital camera, framing your shot is crucial to capturing a great photograph. Here are some tips to help you frame your shot effectively:
1. Rule of Thirds
Use the rule of thirds to compose your shot. Imagine your frame divided into thirds both horizontally and vertically. Place your main subject along these lines or at their intersections to create a more visually appealing composition.
2. Leading Lines
Look for natural or man-made lines in your scene that can lead the viewer’s eye towards your subject. Use these lines to guide the viewer’s gaze through the image and create a sense of depth and movement.
Using the Zoom Function
Most compact digital cameras come with a zoom function that allows you to adjust the focal length of the lens. This feature is useful for getting closer to your subject without physically moving closer. Here are some tips for using the zoom function effectively:
1. Optical vs. Digital Zoom
It’s important to understand the difference between optical and digital zoom. Optical zoom uses the camera’s lens to magnify the image, resulting in higher image quality. Digital zoom, on the other hand, simply crops and enlarges the image, which can lead to a loss of image quality. Whenever possible, try to use optical zoom for better results.
2. Zooming In and Out
When using the zoom function, remember to zoom in or out slowly to avoid jerky movements that can affect the quality of your photos. Take your time to find the right framing and composition before taking the shot. Experiment with different zoom levels to see how they affect the final image.
Reviewing and Editing Photos
Once you have captured your photos using your compact digital camera, it’s important to review and edit them to enhance their quality and overall appeal. Here are some tips on how to effectively review and edit your photos:
1. Reviewing:
Take the time to carefully review each photo you have taken on your camera’s display screen. Look for aspects such as composition, lighting, and focus. Delete any photos that are blurry, poorly composed, or unflattering to free up space on your memory card for better shots.
2. Editing:
After reviewing your photos, consider editing them to make them even better. You can use photo editing software on your computer or smartphone to adjust elements such as brightness, contrast, color saturation, and cropping. Experiment with different editing techniques to enhance the overall look of your photos and make them stand out.
Practicing with Different Lighting
One of the key factors in capturing great photos with a compact digital camera is understanding how different lighting conditions can affect your images. By practicing with different lighting situations, you can learn how to adjust your camera settings to achieve the best results.
1. Natural Light
Take your camera outside during the day and experiment with natural light. Notice how the direction and intensity of the sunlight can create shadows and highlights in your photos. Try taking photos in different times of the day to see how the light changes.
2. Indoor Lighting
Practice taking photos indoors with various artificial lighting sources, such as lamps or overhead lights. Pay attention to the color temperature of the light and how it can affect the overall mood of your images. Experiment with different white balance settings to achieve accurate colors.
FAQ
What is the best way to hold a compact digital camera?
The best way to hold a compact digital camera is with both hands, ensuring a firm grip with your right hand while supporting the camera from below with your left hand. This helps to stabilize the camera and reduce the chance of blurry photos due to camera shake.
Should I use a camera strap when holding a compact digital camera?
It is always a good idea to use a camera strap when holding a compact digital camera, especially if you are shooting in crowded or outdoor locations where there is a risk of dropping the camera. The strap can help secure the camera to your wrist or neck, providing an extra level of safety.
Is there a proper way to position my fingers when holding a compact digital camera?
When holding a compact digital camera, try to keep your fingers away from the lens and flash to avoid accidentally blocking them. Position your fingers comfortably on the camera grip and shutter button to maintain a steady hold while shooting.
What are some tips for holding a compact digital camera steady?
To hold a compact digital camera steady, make sure to stand with your feet shoulder-width apart, tuck your elbows in close to your body, and take a deep breath before pressing the shutter button. Additionally, using a tripod or leaning against a stable surface can further help stabilize your shots.
Why is it important to hold a compact digital camera properly?
Holding a compact digital camera properly is important to prevent camera shake, resulting in blurry photos. By maintaining a steady grip and following proper holding techniques, you can improve the sharpness and clarity of your images, creating better overall results.