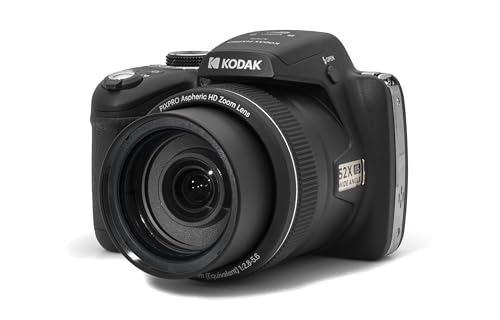
Wireless security cameras have become increasingly popular for homeowners and businesses looking to monitor their property. Unlike traditional wired systems, wireless cameras are easy to install and can be placed virtually anywhere without the need for extensive wiring. If you’re considering setting up a wireless security camera system, this guide will walk you through the process step by step.
Before you begin, make sure you have all the necessary equipment, including the cameras, a wireless receiver, power adapters, and any mounting hardware. You’ll also need a stable Wi-Fi connection to ensure your cameras can transmit footage effectively. Once you have everything you need, follow these steps to wire your wireless security camera system.

Step 1: Choose the location for your cameras. Determine the areas of your property that you want to monitor and select appropriate locations for your cameras. Make sure the cameras are positioned to capture the desired field of view and are within range of your Wi-Fi signal.
Overview of the Installation Process
Installing a wireless security camera system involves several key steps to ensure proper setup and functionality. Here is an overview of the installation process:
1. Plan Your Camera Placement: Before installing the cameras, carefully plan where you want to place them for optimal coverage of your property.
2. Mount the Cameras: Use the mounting hardware included with your camera system to securely attach the cameras to walls, ceilings, or other surfaces.
3. Power Up the Cameras: Connect the cameras to power sources, either through power outlets or batteries, depending on the camera model.
4. Connect to the DVR/NVR: Follow the manufacturer’s instructions to connect the cameras wirelessly to the DVR/NVR unit for recording and monitoring.
5. Configure the System: Set up your wireless security camera system by following the on-screen prompts and adjusting settings as needed for optimal performance.
6. Test the System: Once everything is set up, test the system to ensure that all cameras are functioning properly and that the wireless connection is stable.
7. Monitor Remotely (Optional): If your system allows for remote viewing, download the corresponding app and set up remote monitoring on your smartphone or computer.
By following these steps, you can successfully install a wireless security camera system to enhance the security of your home or business.
Choosing the Right Camera System
When selecting a wireless security camera system, there are several factors to consider to ensure you choose the right one for your needs:
- Camera Resolution: Higher resolution cameras provide clearer images, so consider the resolution you need based on the area you want to monitor.
- Camera Placement: Determine where you want to place the cameras and ensure they have a clear line of sight to the areas you want to monitor.
- Camera Features: Look for cameras with features like night vision, motion detection, two-way audio, and weatherproofing to suit your specific requirements.
- Number of Cameras: Decide how many cameras you need to cover all the areas you want to monitor effectively.
- Wireless Range: Consider the wireless range of the cameras to ensure they can communicate with the base station or router effectively.
Additional Considerations
- Cloud Storage: Check if the camera system offers cloud storage for easy access to recorded footage.
- Mobile App Integration: Look for systems that have a mobile app for remote monitoring and control of the cameras.
Identifying the Best Camera Locations
When installing a wireless security camera system, choosing the right locations for your cameras is crucial for maximizing their effectiveness. Here are some tips for identifying the best camera locations:
1. Entry Points
Place cameras near all entry points to your property, such as doors and windows. This will help you capture any suspicious activity as soon as it occurs.
2. Outdoor Areas
Install cameras in outdoor areas like the front yard, backyard, and driveway to monitor any movement outside your home. This can help deter potential intruders and provide valuable evidence in case of a break-in.
Deciding on Power Source Options
When setting up a wireless security camera system, you will need to consider the power source options available for your cameras. Here are some common power source options to choose from:
- Battery-powered: Cameras that are powered by batteries offer flexibility in terms of placement, as they don’t require a nearby power outlet. However, you will need to regularly replace or recharge the batteries.
- Solar-powered: Some wireless security cameras come with solar panels that can recharge the camera’s batteries using sunlight. This eco-friendly option can save you money on electricity bills.
- Hardwired: If you prefer a more reliable power source, you can opt for hardwired cameras that are connected to a power outlet. This ensures continuous power supply without the need for battery replacements.
Consider your specific needs and the installation environment when deciding on the power source for your wireless security cameras. Each option has its own advantages and limitations, so choose the one that best suits your requirements.
Setting Up the Cameras
Once you have all the necessary equipment, it’s time to set up your wireless security cameras. Follow these steps to ensure a proper installation:
| 1. | Choose the optimal location for each camera to ensure maximum coverage of the area you want to monitor. |
| 2. | Mount the cameras securely using the provided mounting hardware. Make sure they are positioned at the right angle for optimal viewing. |
| 3. | Connect the cameras to power sources and ensure they are receiving a stable power supply. |
| 4. | Follow the manufacturer’s instructions to connect the cameras to your wireless network. Make sure to enter the correct network credentials. |
| 5. | Install any additional software or apps required to access the camera feeds remotely. |
| 6. | Test the cameras to ensure they are functioning properly and adjust settings as needed to meet your security needs. |
Connecting to the Network
Once you have set up your wireless security camera system physically, the next step is to connect it to your network. Follow these steps to ensure a successful connection:
| 1. | Power on your wireless security camera system and ensure it is in the setup mode. |
| 2. | Access the camera’s settings through a web browser or mobile app using the provided IP address. |
| 3. | Enter your Wi-Fi network’s SSID and password in the camera’s settings to establish a connection. |
| 4. | Wait for the camera to connect to your network, which may take a few minutes. |
| 5. | Once connected, you can access the camera remotely through the app or web browser. |
Securing the Camera System
Securing your wireless security camera system is crucial to ensure the privacy and safety of your property. Here are some tips to help you secure your system:
1. Change Default Passwords
One of the first steps in securing your camera system is to change the default passwords that come with the cameras and the system itself. Use strong, unique passwords that are not easily guessable.
2. Enable Encryption
Make sure to enable encryption on your cameras and the network they are connected to. This will help protect your data and prevent unauthorized access to your camera feed.

By following these steps, you can enhance the security of your wireless security camera system and have peace of mind knowing that your property is well-protected.
Testing the System
Once you have completed the installation of your wireless security camera system, it is important to test the system to ensure that everything is functioning correctly. Here are some steps to follow when testing your system:
| 1. | Check the camera connections to ensure they are securely in place. |
| 2. | Power on the cameras and ensure that they are receiving power. |
| 3. | Check the video feed on the monitor or mobile device to verify that the cameras are capturing footage. |
| 4. | Test the motion detection and notification features to ensure they are functioning as intended. |
| 5. | Verify that the recording and storage functions are working properly by reviewing saved footage. |
| 6. | Test the remote access capabilities to ensure you can view the camera feed from anywhere with an internet connection. |
By following these testing steps, you can be confident that your wireless security camera system is set up correctly and ready to provide you with peace of mind.
Maintaining and Troubleshooting
Once your wireless security camera system is installed, it’s important to regularly maintain and troubleshoot it to ensure optimal performance. Here are some tips:

Regular Maintenance:
- Check the camera lenses for any dirt or debris that may obstruct the view.
- Ensure all cables and connections are secure and free from damage.
- Clean the camera housing and mounts to prevent dust buildup.
- Regularly update the firmware of the cameras and the system to fix any bugs and improve performance.
Troubleshooting:
- If you encounter connectivity issues, check the Wi-Fi signal strength and consider adding a Wi-Fi extender if needed.
- If the camera image quality is poor, adjust the camera settings or check for any obstructions in the camera’s field of view.
- If the cameras are not recording properly, check the storage capacity of the system and ensure it’s not full.
- If you experience frequent false alarms, adjust the motion detection sensitivity or the detection zones.