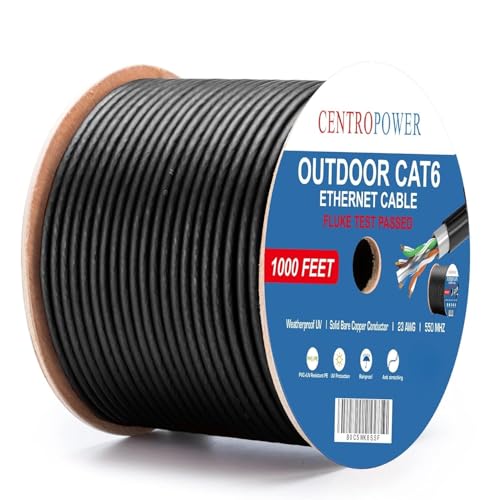


Security cameras are an essential tool for monitoring and protecting your property. They provide a sense of security and peace of mind, allowing you to keep an eye on your home or business even when you’re not there. One common way to connect security cameras to your network is through the use of Ethernet cables.
Ethernet cables are a reliable and secure way to connect your security cameras to your network. They provide a stable connection that is less susceptible to interference than wireless connections, making them ideal for surveillance purposes. In this article, we will discuss how to properly use Ethernet cables with security cameras to ensure optimal performance and security.
Choosing the Right Ethernet Cable for Your Security Camera System
When setting up a security camera system with Ethernet cables, it’s crucial to choose the right type of cable to ensure reliable and efficient connectivity. Here are some key factors to consider when selecting Ethernet cables for your security cameras:
- Cable Category: Opt for Cat5e, Cat6, or Cat6a cables, as they provide better performance and faster data transmission compared to older versions.
- Cable Length: Determine the distance between your security cameras and the network switch to select the appropriate cable length to avoid signal degradation.
- PoE Compatibility: If your security cameras support Power over Ethernet (PoE), make sure to choose Ethernet cables that are PoE compatible to power your cameras through the same cable.
- Weatherproofing: If you’re installing outdoor security cameras, consider using weatherproof Ethernet cables to protect them from environmental factors like rain, snow, and UV rays.
- Shielding: For areas with high interference or electromagnetic noise, opt for shielded Ethernet cables to minimize signal interference and ensure stable connectivity.
By carefully selecting the right Ethernet cables for your security camera system, you can ensure seamless data transmission, power delivery, and reliable performance for your surveillance setup.
Understanding Power over Ethernet (PoE) for Security Cameras
Power over Ethernet (PoE) is a technology that allows both power and data to be transmitted over a single Ethernet cable. This means that security cameras can be powered and connected to the network using just one cable, simplifying installation and reducing the need for additional power outlets.
How Does PoE Work?
With PoE, the power is sent over the same Ethernet cable that is used to transmit data. This is achieved by using a PoE injector or PoE switch at the network end to inject power into the cable. At the camera end, a PoE splitter or PoE-enabled camera can then separate the power from the data and power the camera while also allowing it to communicate with the network.
Benefits of PoE for Security Cameras
One of the main benefits of using PoE for security cameras is the simplicity and cost-effectiveness of installation. By eliminating the need for separate power cables, PoE reduces the time and effort required to set up a camera system. Additionally, PoE allows for greater flexibility in camera placement, as cameras can be installed in locations that may not have easy access to power outlets.
Setting Up Your Security Cameras with Ethernet Cable
When it comes to setting up security cameras for your home or business, using an Ethernet cable can provide a reliable and secure connection. Follow these steps to properly set up your security cameras with an Ethernet cable:
Step 1: Choose the Right Ethernet Cable
Make sure you have the appropriate Ethernet cable for your security cameras. Cat5e or Cat6 cables are recommended for high-quality video transmission. Ensure the cable length is sufficient to reach your cameras from the router or switch.
Step 2: Connect the Cameras
Connect one end of the Ethernet cable to the Ethernet port on your security camera and the other end to a PoE (Power over Ethernet) switch or injector. This will provide power and data connectivity to your cameras through a single cable.
By following these steps, you can easily set up your security cameras using Ethernet cables for a reliable and secure surveillance system.
Securing Your Ethernet Cable Connection for Maximum Safety
When using an Ethernet cable with security cameras, it is crucial to ensure that your connection is secure to prevent unauthorized access to your surveillance system. Here are some tips to help you secure your Ethernet cable connection:
1. Use high-quality Ethernet cables that are shielded and designed for outdoor use. This will help protect your connection from interference and tampering.
2. Install cable management tools such as cable clips and cable ties to keep your cables organized and secure. This will prevent accidental disconnection and damage to the cables.
3. Use Ethernet cable locks or cable locks to secure your cables to prevent them from being unplugged or tampered with.
4. Consider using a surge protector or Ethernet surge protector to protect your cameras and equipment from power surges and electrical damage.
5. Regularly inspect your Ethernet cable connection for any signs of wear or damage, and replace any damaged cables immediately to maintain a secure connection.
By following these tips, you can ensure that your Ethernet cable connection is secure and reliable, providing maximum safety for your security cameras and surveillance system.
Testing the Ethernet Cable Connection to Ensure Proper Functioning
Once you have connected your security cameras to the Ethernet cable, it is crucial to test the connection to ensure everything is working correctly. Follow these steps to test the Ethernet cable connection:
1. Check the Physical Connection
Make sure the Ethernet cable is securely connected to both the security camera and the network switch or router. Check for any loose connections or damage to the cable.
2. Test the Network Connection
Use a computer or laptop to access the network where the security cameras are connected. Check if the cameras are detected on the network and can be accessed remotely.
| Test | Result |
|---|---|
| Ping Test | Check if you can successfully ping the IP address of the security camera. |
| Bandwidth Test | Measure the bandwidth and speed of the network connection to ensure smooth video streaming. |
Troubleshooting Common Issues with Ethernet Cable and Security Cameras
When setting up security cameras using an Ethernet cable, you may encounter some common issues that can affect the performance and functionality of your system. Here are some troubleshooting tips to help you resolve these issues:
- Check cable connections: Ensure that the Ethernet cable is securely connected to both the camera and the network device. Loose connections can cause intermittent signal loss.
- Verify cable integrity: Inspect the Ethernet cable for any visible damage or wear. Replace the cable if there are any signs of physical damage.
- Test with a different cable: If you suspect a faulty cable, try using a different Ethernet cable to see if the issue persists. This can help you determine if the problem lies with the cable itself.
- Restart devices: Sometimes, simply restarting the camera and network device can resolve connectivity issues. Power cycle both devices and check if the camera is now accessible.
- Update firmware: Ensure that the camera’s firmware is up to date. Manufacturers often release firmware updates to improve performance and address compatibility issues.
- Check network settings: Verify that the network settings on the camera are configured correctly, including IP address, subnet mask, gateway, and DNS settings. Misconfigured settings can prevent the camera from connecting to the network.
- Test network connection: Use a network testing tool to check the connectivity between the camera and the network device. This can help identify any network issues that may be affecting the camera’s performance.
Upgrading Your Security Camera System with Advanced Ethernet Cable Solutions
When it comes to enhancing the performance of your security camera system, upgrading to advanced Ethernet cable solutions can make a significant difference. Ethernet cables offer fast and reliable data transmission, ensuring that your security cameras capture high-quality footage without any interruptions.
By using Ethernet cables, you can connect your security cameras directly to your network, providing a stable and secure connection. This allows you to access live footage and recordings remotely, giving you peace of mind knowing that your property is protected at all times.
Benefits of Using Ethernet Cables for Security Cameras:
- High-Speed Data Transmission: Ethernet cables provide fast data transmission speeds, allowing your security cameras to stream high-definition footage in real-time.
- Reliable Connection: Ethernet cables offer a stable and secure connection, ensuring that your security cameras are always online and accessible.
- Remote Access: By connecting your security cameras to your network via Ethernet cables, you can access live footage and recordings from anywhere, using a computer or mobile device.
Overall, upgrading your security camera system with advanced Ethernet cable solutions is a smart investment that can improve the performance and reliability of your surveillance setup.
Maintaining and Caring for Your Ethernet Cable to Prolong Its Lifespan
Proper maintenance of your Ethernet cable is essential to ensure optimal performance and longevity. Here are some tips to help you care for your Ethernet cable:
1. Avoid Physical Damage
Handle your Ethernet cable with care to prevent physical damage. Avoid bending the cable at sharp angles or stepping on it. Use cable clips or ties to secure the cable and prevent it from being pulled or stretched excessively.
2. Keep the Connectors Clean
Regularly inspect the connectors on your Ethernet cable for dirt, dust, or corrosion. Use a soft, dry cloth to gently clean the connectors if needed. Avoid using harsh chemicals or abrasive materials that could damage the connectors.
| Do | Avoid |
|---|---|
| Inspect connectors regularly | Using harsh chemicals |
| Clean with a soft cloth | Excessive bending |


