
Security cameras are an essential part of a comprehensive security system, providing surveillance and peace of mind for homeowners and businesses alike. However, even the best security camera is only as effective as its cable connection. Testing your security camera cable is crucial to ensure that your system is functioning properly and that your property is adequately protected.
Testing security camera cables can help identify issues such as faulty connections, cable damage, or signal interference that may compromise the effectiveness of your surveillance system. By following a few simple steps, you can easily test your security camera cable and make any necessary adjustments or repairs to maintain optimal performance.

Whether you are installing a new security camera system or troubleshooting an existing one, knowing how to test security camera cable is an important skill for any security system owner. In this article, we will provide you with a step-by-step guide on how to test your security camera cable to ensure that your property remains safe and secure.
Testing Security Camera Cable: A Step-by-Step Guide
Testing the security camera cable is crucial to ensure that your surveillance system operates effectively. Here is a step-by-step guide to help you test the security camera cable:
- Inspect the Cable: Start by visually inspecting the cable for any visible damage, cuts, or frayed wires. Make sure there are no signs of wear and tear on the cable.
- Check Connectors: Inspect the connectors on both ends of the cable to ensure they are clean and securely attached. Loose or dirty connectors can cause signal loss.
- Use a Multimeter: Use a multimeter to check for continuity in the cable. Connect the multimeter probes to each end of the cable and ensure that there is a complete circuit.
- Test the Video Signal: Connect the security camera to a monitor or recording device and check the video signal quality. Look for any distortion, flickering, or loss of signal.
- Check Power Supply: Verify that the power supply is providing the correct voltage to the camera. Use a voltmeter to measure the voltage at the camera end of the cable.
- Test for Interference: Ensure that there is no interference affecting the signal quality. Check for nearby sources of electromagnetic interference that could disrupt the camera signal.
- Perform a Distance Test: Test the cable over its maximum distance to ensure that the signal remains strong and clear. If there is signal degradation, consider using a signal booster.
By following these steps, you can effectively test the security camera cable and troubleshoot any issues that may arise, ensuring that your surveillance system functions properly.
Check Cable Connections
One of the first things to check when testing security camera cables is the connections. Ensure that all the cables are securely connected to the camera, power source, and recording device. Loose connections can lead to signal loss or intermittent interruptions in the video feed.
Inspect the cable ends for any signs of damage or corrosion. Clean the connectors if needed and make sure they are free from debris. Tighten any loose connections to ensure a stable and reliable connection.
Inspect Cable for Physical Damage
Before testing the security camera cable, it is important to inspect it for any physical damage that may affect its performance. Here are the steps to follow:
- Visually check the entire length of the cable for any cuts, nicks, or fraying.
- Look for any signs of wear or exposed wires.
- Check the connectors at both ends of the cable for any damage or corrosion.
If you notice any physical damage during the inspection, it is recommended to replace the cable before testing to ensure accurate results.
Test Cable Continuity with Multimeter
One of the most common tests to perform on a security camera cable is to check for continuity using a multimeter. This test helps to ensure that there are no breaks or interruptions in the cable, which could lead to signal loss or other issues with the camera feed.
Steps to test cable continuity:
- Set your multimeter to the continuity or resistance setting.
- Touch one probe to one end of the cable and the other probe to the other end of the cable.
- If the multimeter shows a reading close to zero or beeps, it indicates that there is continuity in the cable, meaning that the electrical signal can pass through without interruption.
- If the multimeter shows a high resistance or no continuity, it suggests that there may be a break or damage in the cable that needs to be repaired.
By performing this simple test with a multimeter, you can quickly identify any issues with the security camera cable and take appropriate action to ensure smooth and reliable operation of your security system.
Verify Power Supply to Camera
Before testing the security camera cable, it’s essential to ensure that the camera is receiving power. Here are the steps to verify the power supply:
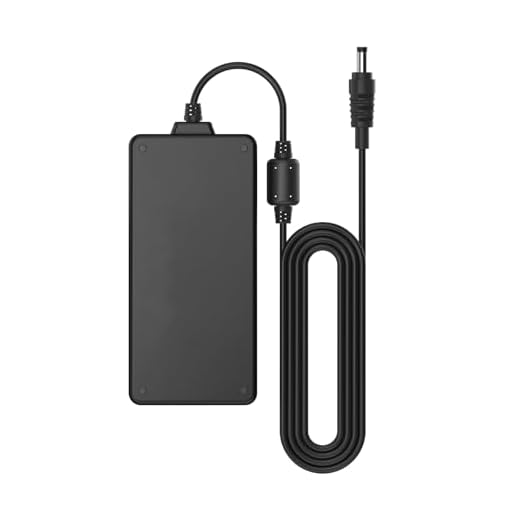
1. Check the Power Source: Make sure the power source is working and supplying electricity to the camera.
2. Inspect the Power Adapter: Ensure that the power adapter is plugged in correctly and there are no signs of damage.
3. Test the Voltage: Use a multimeter to test the voltage output of the power supply to ensure it matches the camera’s requirements.
4. Verify Connection: Check the connection between the power supply, cable, and camera to ensure there are no loose or damaged connections.
Once you have verified the power supply to the camera, you can proceed with testing the security camera cable.
Use TDR to Test Cable Length
Time Domain Reflectometry (TDR) is a technique used to measure the length of a cable by sending a signal down the cable and analyzing the reflections that bounce back. This method is commonly used to test the length of security camera cables to ensure they are properly installed and functioning correctly.
To test the cable length using TDR, you will need a TDR meter. Connect one end of the cable to the TDR meter and the other end to the security camera. The TDR meter will then send a signal down the cable and measure the time it takes for the signal to return. By calculating the time it takes for the signal to bounce back, the TDR meter can determine the length of the cable.
It is important to use TDR to test the cable length of security camera cables to ensure they are the correct length and properly installed. This can help prevent signal loss and ensure the security camera system functions optimally.
Check for Signal Interference
One common issue with security camera cables is signal interference, which can lead to poor image quality or even loss of connection. To test for signal interference, you can try the following:
1. Check for Nearby Electronics
Make sure there are no electronic devices near the security camera cable that could be causing interference. Devices such as microwaves, cordless phones, or Wi-Fi routers can disrupt the signal.
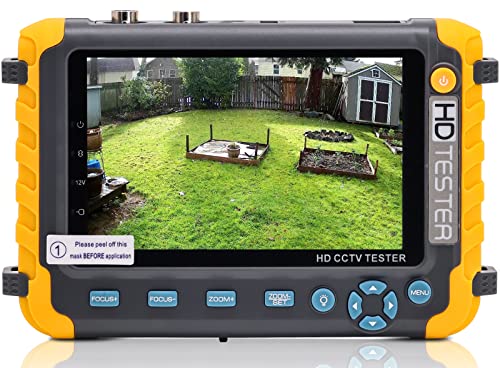
2. Use a Cable Tester
You can use a cable tester to check for any signal interference along the cable. The tester will indicate if there are any issues with the cable that could be affecting the signal quality.
Conduct Bandwidth Test for Data Transmission
Before installing security cameras, it is crucial to test the bandwidth of the cable to ensure smooth data transmission. Bandwidth refers to the maximum rate at which data can be transferred over a network. Conducting a bandwidth test will help you determine if the cable can support the data requirements of the security cameras.
To conduct a bandwidth test, you can use various online tools or software designed for this purpose. Connect one end of the cable to a network device, such as a router or switch, and the other end to a computer. Run the bandwidth test tool to measure the data transfer rate and check for any issues such as signal loss or interference.
Factors to Consider During Bandwidth Test:
- Speed: Check if the cable can handle the required speed for the security cameras.
- Interference: Look for any sources of interference that may affect data transmission.
- Distance: Test the cable over different distances to ensure consistent performance.


