Home security cameras are an essential tool in keeping your home safe and secure. With the rise of smart technology, setting up a home security camera system has never been easier.
There are a few key steps to follow when setting up your home security camera system. First, you’ll need to choose the right cameras for your needs. Consider factors like resolution, night vision capabilities, and whether you want indoor or outdoor cameras.
Next, you’ll need to decide where to place your cameras for maximum coverage. Common areas to install cameras include entryways, garages, and backyards. Make sure to position them in a way that captures important angles without any blind spots.
Once you have your cameras installed, you can connect them to your home network and set up monitoring through a mobile app or computer interface. This allows you to keep an eye on your home 24/7, whether you’re at work or on vacation.
Step-by-Step Guide on Setting Up Home Security Camera
Setting up a home security camera is an important step towards ensuring the safety of your household. Follow these steps to set up your home security camera system:
- Choose the right location for your camera: Select a strategic location that covers the areas you want to monitor.
- Install the camera mounting bracket: Use the provided bracket to securely mount the camera in place.
- Connect the camera to power: Plug the camera into a power source using the included power adapter.
- Connect the camera to the internet: If your camera is Wi-Fi enabled, follow the manufacturer’s instructions to connect it to your home network.
- Set up the camera software: Download the camera’s app or software and follow the on-screen instructions to complete the setup process.
- Adjust camera settings: Configure the camera settings, such as motion detection sensitivity and recording options, to suit your preferences.
- Test the camera: Make sure the camera is functioning properly by testing its live feed and recording capabilities.
- Monitor the camera: Access the camera’s feed remotely through the app or software to keep an eye on your property.
- Review footage: Regularly review the camera footage to check for any suspicious activity or incidents.
Choosing the Right Camera Model
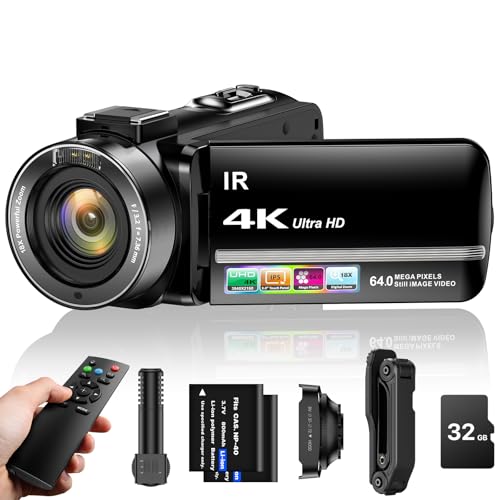
When setting up a home security camera system, it is crucial to choose the right camera model that fits your specific needs. Here are some factors to consider when selecting a camera:
Resolution: Opt for a camera with high resolution to ensure clear and crisp images and videos.
Field of View: Determine the field of view you need based on the area you want to monitor.
Night Vision: Choose a camera with night vision capabilities for round-the-clock surveillance.
Weather Resistance: If you plan to place the camera outdoors, make sure it is weatherproof.
Connectivity: Consider whether you want a wired or wireless camera based on your setup preferences.
Storage: Decide on the type of storage you prefer, whether it’s cloud storage or local storage.
By taking these factors into account, you can select the right camera model that best suits your home security needs.
Selecting the Best Location for Installation
When setting up your home security camera system, the location of the cameras plays a crucial role in their effectiveness. Here are some tips to help you select the best locations:
| 1. Entry Points: | Place cameras near all entry points to your home, such as doors and windows, to capture any potential intruders. |
| 2. High Traffic Areas: | Install cameras in high traffic areas, like hallways or living rooms, to monitor activity and movement throughout the house. |
| 3. Blind Spots: | Identify and cover any blind spots where intruders could potentially hide or break in without being detected. |
| 4. Outdoor Areas: | For outdoor security, place cameras to cover the perimeter of your property, including driveways, garages, and backyard entrances. |
| 5. Height and Angle: | Mount cameras at a height and angle that provides a clear view of the area without obstructions or glare from lights or windows. |
Setting Up the Camera Hardware
Setting up the camera hardware is the first step in installing a home security camera system. Follow these simple steps to get your camera up and running:
| Step 1: | Unbox the camera and all its components. |
| Step 2: | Mount the camera in the desired location using the included mounting hardware. |
| Step 3: | Connect the camera to a power source using the provided power adapter. |
| Step 4: | Connect the camera to your home network using an Ethernet cable or Wi-Fi connection. |
| Step 5: | Adjust the camera angle and settings to ensure proper coverage of the area you want to monitor. |
Connecting the Camera to Wi-Fi Network
Once you have installed the security camera at your desired location, it’s time to connect it to your Wi-Fi network. Follow these steps to ensure a smooth setup:
- Power on the camera and wait for the indicator lights to start blinking.
- Open the camera’s companion app on your smartphone or computer.
- Follow the on-screen instructions to add a new camera to the app.
- Select the Wi-Fi network you want the camera to connect to and enter the password when prompted.
- Wait for the camera to establish a connection with the Wi-Fi network, which may take a few minutes.
- Once the connection is successful, you should see a notification on the app confirming the setup.
Ensure that the camera is placed within the Wi-Fi range for a stable connection. You can now start monitoring your home remotely through the security camera.
Configuring Camera Settings and Features
After setting up your home security camera, it’s important to configure its settings and features to ensure optimal performance. Here are some key settings you may want to adjust:
| 1. Motion Detection | Adjust the sensitivity of the motion detection feature to reduce false alarms. |
| 2. Video Quality | Select the video resolution and quality settings based on your preferences and storage capabilities. |
| 3. Night Vision | Enable or adjust the night vision feature to enhance visibility in low-light or dark conditions. |
| 4. Recording Schedule | Set up a recording schedule to capture footage at specific times or when motion is detected. |
| 5. Alerts and Notifications | Configure alerts and notifications to receive real-time updates on your mobile device or email. |
By customizing these settings, you can tailor your home security camera to meet your specific needs and enhance the overall security of your home.
Testing and Troubleshooting the Camera System
Once you have set up your home security camera system, it is important to thoroughly test and troubleshoot it to ensure everything is working correctly. Here are some steps you can take to test and troubleshoot your camera system:
| Step 1: | Check the camera connections to make sure they are securely plugged in. |
| Step 2: | Verify that the power source is working and providing power to the cameras. |
| Step 3: | Access the camera feed on your mobile device or computer to see if the cameras are capturing video properly. |
| Step 4: | Test the motion detection and night vision features of the cameras to ensure they are functioning correctly. |
| Step 5: | If you encounter any issues, refer to the user manual or contact customer support for troubleshooting assistance. |