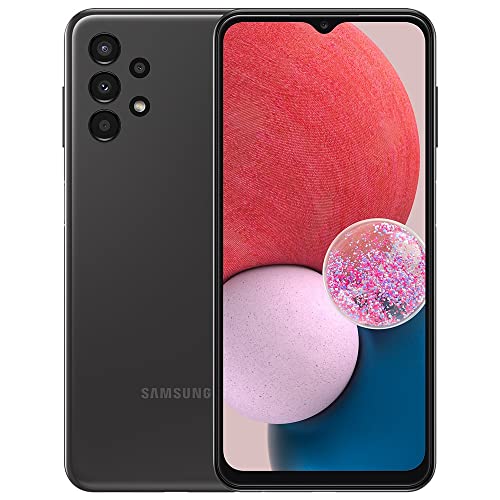
Are you looking to enhance the security of your home or business with a Swann security camera? Setting up your Swann camera for internet access is a crucial step in ensuring you can monitor your property remotely. In this guide, we will walk you through the process of connecting your Swann camera to the internet so you can keep an eye on your property from anywhere.
Swann security cameras are known for their reliability and advanced features, making them a popular choice for both residential and commercial applications. By following the steps outlined in this article, you can easily set up your Swann camera for internet access and enjoy the peace of mind that comes with knowing your property is secure.

Whether you’re a first-time Swann camera user or a seasoned pro, this guide will provide you with the information you need to get your camera connected to the internet quickly and efficiently. Let’s get started!
Step-by-Step Guide: Setting Up Swann Security Camera to Internet
Setting up your Swann security camera to the internet is an essential step to ensure remote access and monitoring. Follow these steps to connect your Swann camera to the internet:
Step 1:
Power on your Swann security camera and connect it to a power source using the provided adapter.
Step 2:
Connect the camera to your router using an Ethernet cable. Make sure the cable is securely plugged into both the camera and the router.
Step 3:
Access the camera’s settings through the Swann app or web interface. Follow the on-screen instructions to configure the camera’s network settings.
Step 4:
Enter your Wi-Fi network’s SSID and password to connect the camera wirelessly to your home network. Make sure the signal strength is adequate for reliable connectivity.
Step 5:
Once the camera is connected to your Wi-Fi network, test the connection by accessing the camera feed from your smartphone or computer. Ensure you can view the live feed remotely.
Step 6:
Enable remote access by setting up a Swann account and linking your camera to the account. This will allow you to access the camera feed from anywhere with an internet connection.
By following these steps, you can successfully set up your Swann security camera to the internet for remote monitoring and surveillance.
Unboxing and Preparing the Swann Security Camera
When you receive your Swann Security Camera, the first step is to carefully unbox it and ensure that all the components are included. Here is a list of items that should be in the package:
Package Contents:
| 1. Swann Security Camera | 4. Mounting Screws |
| 2. Power Adapter | 5. Quick Start Guide |
| 3. Ethernet Cable | 6. Warranty Information |
Once you have confirmed that all the components are present, you can start preparing the Swann Security Camera for installation. Make sure to read the Quick Start Guide carefully to familiarize yourself with the setup process.
Connecting the Camera to Power Source
To set up your Swann security camera, the first step is to connect it to a power source. Follow these steps to ensure a successful connection:
- Locate the power adapter that came with your camera.
- Plug the power adapter into a power outlet near where you want to install the camera.
- Connect the other end of the power adapter to the power input on the camera.
- Ensure that the power source is stable and reliable to prevent any interruptions in the camera’s operation.
- Once the camera is connected to the power source, you can proceed with the next steps to set it up for internet connectivity.
Downloading and Installing the Swann Security App
To access your Swann security camera remotely, you will need to download and install the Swann Security App on your mobile device. Follow these steps to get started:
- Download the App: Go to the App Store (for iOS devices) or Google Play Store (for Android devices) on your mobile device.
- Search for the App: In the search bar, type “Swann Security” and look for the official Swann Security App.
- Install the App: Tap on the “Install” button to download and install the app on your device.
- Open the App: Once the installation is complete, open the Swann Security App on your device.
- Sign In or Create an Account: If you already have a Swann account, sign in with your credentials. If not, create a new account by following the on-screen instructions.
Once you have successfully downloaded and installed the Swann Security App, you can start setting up your Swann security camera for remote access over the internet.
Creating an Account and Logging In
To set up your Swann security camera to the internet, you first need to create an account on the Swann website. Follow these steps to create an account:
- Visit the Swann website and click on the “Create Account” or “Sign Up” button.
- Fill in the required information such as your email address, password, and other details.
- Verify your email address by clicking on the verification link sent to your inbox.
Once you have created your account, you can log in using your email address and password. Follow these steps to log in:
- Go to the Swann website and click on the “Log In” button.
- Enter your email address and password in the respective fields.
- Click on the “Log In” button to access your account.
Adding the Camera to the App
Once your Swann security camera is connected to the internet and powered on, you can easily add it to the Swann Security app for remote viewing and management.
Step 1: Download the Swann Security App
Start by downloading the Swann Security app from the App Store or Google Play Store on your smartphone or tablet.
Step 2: Add the Camera to the App
Open the app and follow the on-screen instructions to add your Swann security camera to the app. This usually involves scanning a QR code on the camera or entering the camera’s serial number.
Connecting the Camera to Wi-Fi Network
Setting up your Swann security camera to connect to your Wi-Fi network is essential for remote access and monitoring. Follow these steps to ensure a successful connection:
- Power on the Camera: Plug in your camera and ensure it is properly powered on.
- Access Camera Settings: Use the Swann app or web interface to access the camera settings.
- Find Wi-Fi Network: Locate your Wi-Fi network in the camera settings and select it.
- Enter Wi-Fi Password: Input the password for your Wi-Fi network to connect the camera.
- Confirm Connection: Once the camera is connected to the Wi-Fi network, you should see a confirmation message.
- Test Remote Access: Test the connection by accessing the camera feed remotely using the Swann app or web interface.
By following these steps, you can easily connect your Swann security camera to your Wi-Fi network for convenient access and monitoring.
Adjusting Camera Settings and Preferences
After setting up your Swann security camera to the internet, you may want to adjust various settings and preferences to customize your camera’s functionality. Here are some common settings you can adjust:
1. Motion Detection
Configure the motion detection settings to receive alerts when motion is detected in the camera’s field of view. You can adjust the sensitivity level and set up specific zones for motion detection.
2. Recording Schedule
Set up a recording schedule to capture footage at specific times of the day or week. You can choose continuous recording or schedule recording based on specific events or triggers.
| Setting | Description |
|---|---|
| Resolution | Adjust the resolution of the camera to balance video quality and storage space. |
| Night Vision | Enable or disable night vision mode and adjust the infrared settings for better visibility in low-light conditions. |
| Audio | Configure audio settings to enable two-way communication or audio recording. |
| Notifications | Set up notifications to receive alerts on your mobile device or email when specific events occur. |
Testing the Camera and Remote Viewing
Once you have successfully set up your Swann security camera to the internet, it’s important to test the camera to ensure it’s working properly. You can do this by checking the live feed on the camera’s app or software on your computer or smartphone. Make sure the camera is capturing clear images and videos.
Additionally, test the remote viewing feature by accessing the camera feed from a different location using the internet. This will help you confirm that you can monitor your property or space from anywhere with an internet connection.
During the testing phase, pay attention to any delays in the live feed or connectivity issues. If you encounter any problems, refer to the camera’s manual or contact Swann’s customer support for assistance.