Security cameras are an essential component of any modern security system, providing valuable surveillance and peace of mind. Whether you’re looking to protect your home or business, setting up a series of security cameras can be a daunting task. However, with the right knowledge and tools, you can easily create a robust surveillance network that meets your needs.
In this guide, we will walk you through the steps of setting up a series of security cameras, from choosing the right equipment to positioning and configuring your cameras for optimal coverage. By following these steps, you can enhance the security of your property and deter potential threats.
Step-by-Step Guide to Setting Up Series of Security Cameras
1. Plan Your Camera Placement: Start by determining the areas you want to monitor and the best locations for your cameras. Consider factors such as visibility, range, and potential blind spots.
2. Purchase and Install Cameras: Choose high-quality cameras that fit your needs and budget. Install them securely using mounts and make sure they are positioned correctly for optimal coverage.
3. Set Up a Central Monitoring System: Connect your cameras to a central monitoring system or software that allows you to view live feeds, record footage, and receive alerts. Ensure the system is secure and accessible remotely.

4. Configure Camera Settings: Adjust camera settings such as resolution, motion detection, and recording schedules to suit your preferences and maximize security coverage.
5. Test and Fine-Tune: Test the cameras to ensure they are functioning properly and adjust their positioning or settings as needed. Regularly check for any issues or maintenance requirements.
6. Monitor and Maintain: Keep an eye on the camera feeds regularly, review recordings, and address any issues promptly. Maintain the cameras by cleaning lenses, updating software, and replacing batteries or components as necessary.
Choosing the Right Security Camera System
When setting up a series of security cameras, it is crucial to choose the right camera system that fits your needs. Here are some factors to consider when selecting a security camera system:
| 1. Resolution: | Consider the resolution of the cameras. Higher resolution cameras provide clearer images, which can be crucial for identifying details in case of an incident. |
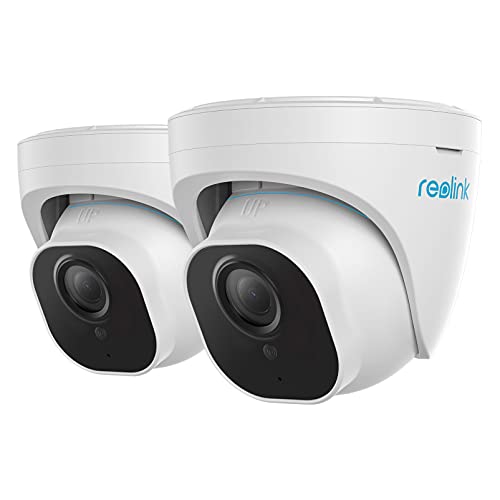
| 2. Camera Type: | Choose between bullet, dome, or PTZ cameras based on your surveillance needs. Each type has its own advantages and is suitable for different scenarios. |
| 3. Night Vision: | Ensure that the cameras have night vision capabilities if you need to monitor areas during low-light conditions. Infrared LEDs can enhance visibility in the dark. |
| 4. Weatherproof: | If you plan to install outdoor cameras, make sure they are weatherproof to withstand various weather conditions such as rain, snow, or extreme temperatures. |
| 5. Storage: | Determine how you want to store your camera footage. Options include local storage on a DVR/NVR system or cloud storage for remote access and backup. |
| 6. Connectivity: | Consider whether you need wired or wireless cameras. Wired cameras provide a stable connection, while wireless cameras offer more flexibility in installation. |
By considering these factors, you can choose the right security camera system that meets your requirements and helps enhance the security of your property.
Determining the Placement of Cameras
Before setting up your security cameras, it is crucial to determine the best placement for each camera to maximize coverage and effectiveness. Here are some key factors to consider:
1. Identify Vulnerable Areas
Start by identifying the vulnerable areas around your property where potential threats or intruders are most likely to enter. These could include entry points like doors and windows, as well as blind spots that offer cover for unauthorized individuals.
2. Consider Range and Field of View
Ensure that each camera’s field of view covers the desired area with no obstructions. Consider the range of the camera to determine if it can capture clear footage of the entire space. Position cameras at a height and angle that provides the best coverage.
Installing the Cameras Outdoors
When installing security cameras outdoors, it is important to consider weatherproofing and visibility.
- Choose cameras specifically designed for outdoor use with weatherproof housing.
- Position cameras in areas with good visibility to capture clear images.
- Mount cameras at a height that provides a wide field of view and is out of reach of potential tampering.
- Securely attach cameras to walls or posts using appropriate mounting hardware.
- Ensure cables are properly protected from the elements and securely connected to power sources.
Following these installation tips will help ensure your outdoor security cameras are effective in monitoring your property.
Installing the Cameras Indoors
When installing security cameras indoors, it’s important to strategically place them in areas that provide optimal coverage. Start by identifying high-traffic areas, entry points, and valuable assets that you want to monitor.
Mount the cameras at a height that allows for a clear view of the room or space you want to surveil. Make sure the cameras are securely attached to the walls or ceilings using the appropriate mounting hardware.
Ensure that the cameras are positioned to avoid obstructions such as furniture, plants, or decorations that could block their view. Additionally, consider the lighting conditions in the area and adjust the camera settings accordingly for optimal performance.
Connect the cameras to a power source and to your monitoring system. Test each camera to ensure that it is capturing clear footage and adjust the positioning if necessary. Finally, set up any motion detection or recording settings to enhance the security capabilities of your indoor camera system.
Connecting Cameras to a Network
Once you have installed your security cameras in the desired locations, the next step is to connect them to a network for remote access and monitoring. Follow these steps to ensure a smooth setup:
- Connect the cameras to a power source using the provided power adapters.
- Use Ethernet cables to connect each camera to a network switch or router.
- Access the camera’s settings through a web browser by entering the camera’s IP address.
- Configure the network settings of each camera to match your network’s configuration, including IP address, subnet mask, gateway, and DNS servers.
- Enable port forwarding on your router to allow external access to the cameras from the internet.
- Set up a DDNS (Dynamic Domain Name System) service to assign a domain name to your network’s public IP address for easy remote access.
- Install the camera’s viewing software on your computer or mobile device to monitor the camera feeds remotely.
Setting Up Remote Access to Cameras
Setting up remote access to your security cameras allows you to monitor your property from anywhere in the world. Follow these steps to enable remote access:
- Configure your router to allow remote access to the cameras. Set up port forwarding for the cameras’ IP addresses.
- Install the camera viewing software on your computer or mobile device. This software will allow you to access the cameras remotely.
- Create a secure login for remote access. Use a strong password and consider enabling two-factor authentication for added security.
- Test the remote access by accessing the cameras from a different network, such as your mobile data connection.
By following these steps, you can ensure that your security cameras are accessible remotely, giving you peace of mind knowing that you can check in on your property at any time.
Adjusting Camera Settings for Maximum Security
When setting up a series of security cameras, it is crucial to adjust the camera settings properly to ensure maximum security. Here are some key settings to consider:
- Resolution: Set the camera resolution to the highest possible quality for clear images.
- Frame Rate: Adjust the frame rate to capture smooth video footage without missing any crucial details.
- Motion Detection: Enable motion detection to trigger recording when movement is detected, saving storage space.
- Night Vision: If your cameras have night vision capabilities, adjust the settings for optimal performance in low-light conditions.
- Privacy Masking: Use privacy masking to block out sensitive areas from being recorded, such as windows or neighbor’s property.
By adjusting these settings, you can ensure that your security cameras are optimized for maximum security and efficiency.
Testing the Camera System
Once you have set up your series of security cameras, it is essential to test the system to ensure everything is functioning correctly. Follow these steps to test your camera system:
1. Check Camera Connections
Start by checking the connections of each camera to ensure they are properly plugged in and receiving power. Make sure all cables are securely connected and there are no loose connections.
2. Test Camera Views
Access the camera system’s viewing interface and check the live feed from each camera. Verify that the cameras are capturing clear images and that there are no obstructions blocking the view. Adjust camera angles if necessary to ensure optimal coverage.
Maintaining and Troubleshooting Security Cameras
Proper maintenance of security cameras is essential for their optimal performance and longevity. Here are some tips for maintaining and troubleshooting security cameras:
Regular Cleaning
Regularly clean the camera lenses and housings to remove dust, dirt, and debris that can affect image quality. Use a soft, lint-free cloth and a mild cleaning solution to gently wipe the lenses and housings.
Check Connections
Periodically check the connections between the cameras, cables, and recording devices to ensure they are secure and free of corrosion. Loose or damaged connections can cause image loss or distortion.
| Issue | Solution |
|---|---|
| Image Quality Issues | Adjust camera settings or clean the lens |
| Camera Not Recording | Check power supply and recording device settings |
| No Video Signal | Inspect cables and connections for damage |