

When it comes to home security, having a reliable and effective camera system in place is crucial. The Ring Floodlight Security Camera is a popular choice for many homeowners due to its advanced features and ease of installation. If you’re looking to set up your own Ring Floodlight Security Camera, you’ve come to the right place. In this guide, we’ll walk you through the steps to get your camera up and running in no time.
Before you begin the setup process, make sure you have all the necessary components on hand: the Ring Floodlight Security Camera, a power source, a smartphone or tablet with the Ring app installed, and a stable Wi-Fi connection. Once you have everything you need, you’re ready to start setting up your camera.
First, you’ll need to choose the optimal location for your Ring Floodlight Security Camera. Ideally, it should be mounted high enough to capture a wide field of view and positioned in a way that minimizes obstructions. Once you’ve found the perfect spot, securely mount the camera using the provided hardware.
Step-by-Step Guide to Setting Up Ring Floodlight Security Camera
Setting up a Ring Floodlight Security Camera is a straightforward process that can enhance the security of your home. Follow these steps to get your camera up and running:
Step 1: Unbox your Ring Floodlight Camera and make sure you have all the necessary components, including the camera unit, mounting hardware, and power supply.
Step 2: Choose a suitable location to mount the camera that provides a clear view of the area you want to monitor.
Step 3: Install the mounting bracket securely using the provided hardware, ensuring that the camera is positioned correctly.
Step 4: Connect the camera to a power source and ensure that it is receiving power. Follow the manufacturer’s instructions for the specific power requirements.
Step 5: Download the Ring app on your smartphone and create an account if you haven’t already. Follow the on-screen instructions to set up your camera within the app.
Step 6: Connect the camera to your Wi-Fi network using the app and follow the prompts to complete the setup process.
Step 7: Adjust the camera settings and customize the motion detection zones to suit your preferences.
Step 8: Test the camera to ensure it is functioning correctly and capturing the desired footage.
Step 9: Congratulations! Your Ring Floodlight Security Camera is now set up and ready to enhance the security of your home.
Unboxing and Checking Contents
When you receive your Ring Floodlight Security Camera, it is essential to unbox it carefully to ensure all the necessary components are included. Here is a step-by-step guide to unboxing and checking the contents:
Step 1: Open the Box
Start by opening the box containing the Ring Floodlight Security Camera. Carefully remove any packaging material and set it aside.
Step 2: Check the Contents
Inspect the contents of the box to ensure that the following items are included:
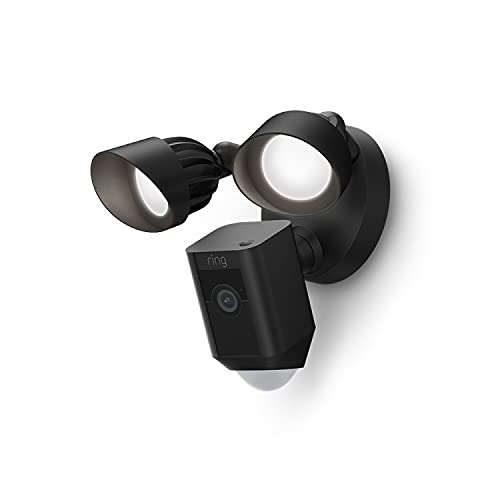
- Ring Floodlight Security Camera: The main camera unit with built-in floodlights.
- Mounting Bracket: The bracket used to install the camera on the wall or ceiling.
- Screws and Anchors: Hardware required for mounting the camera.
- Power Cable: The cable used to connect the camera to a power source.
- Quick Start Guide: Instructions for setting up and installing the camera.
Ensure that all the components are present and in good condition before proceeding with the installation process.
Choosing the Right Location
When setting up your Ring Floodlight Security Camera, choosing the right location is crucial for optimal performance. Here are some key factors to consider:
1. Coverage Area
Determine the areas you want to monitor with the camera and ensure that the chosen location provides adequate coverage. Consider the camera’s field of view and angle to maximize its effectiveness.

2. Accessibility
Ensure that the location is easily accessible for maintenance and adjustments. You may need to reach the camera for cleaning, battery replacement, or repositioning, so choose a spot that is convenient to reach.
| Location | Consideration |
| Height | Mount the camera at an appropriate height to capture clear images and avoid tampering. |
| Power Source | Ensure the camera is located near a power source for continuous operation. |
| Wi-Fi Signal | Check the Wi-Fi signal strength at the location to ensure a stable connection for remote access. |
Mounting the Camera and Floodlights
Before mounting the camera and floodlights, make sure to choose a suitable location that provides optimal coverage of the area you want to monitor. The camera should be placed at a height that allows for a clear view of the surroundings.
Start by attaching the mounting bracket to the chosen surface using the provided screws. Ensure that the bracket is securely in place before attaching the camera and floodlights.
Next, attach the camera to the mounting bracket using the included hardware. Make sure the camera is positioned correctly and tightened securely to prevent any movement or misalignment.
Once the camera is mounted, connect the necessary cables and power source according to the manufacturer’s instructions. Test the camera and floodlights to ensure they are functioning properly before completing the installation.
Finally, adjust the camera angle and floodlight settings as needed to optimize the security coverage of your property. Regularly check and maintain the camera and floodlights to ensure they continue to provide reliable security monitoring.
Connecting to Power Source
Before setting up your Ring Floodlight Security Camera, you need to connect it to a power source. Follow these steps to ensure a proper connection:
- Locate a suitable outdoor power outlet near the installation area.
- Ensure the power outlet is functional and can provide the necessary power for the camera.
- Use the included power cable to connect the camera to the power outlet.
- Make sure the power cable is securely plugged in to avoid any interruptions to the camera’s operation.
Important Note:
It is recommended to consult a professional electrician if you are unsure about connecting the camera to the power source to ensure safety and proper installation.
Setting Up the Ring App
Once you have installed the Ring Floodlight Security Camera, the next step is to set up the Ring app on your smartphone or tablet. Here’s how you can do it:
1. Download the Ring app from the App Store (for iOS devices) or Google Play Store (for Android devices).
2. Open the app and create a new account or log in to your existing Ring account.
3. Follow the on-screen instructions to set up your Ring Floodlight Security Camera. Make sure to connect the camera to your Wi-Fi network and customize the settings according to your preferences.
4. Once the camera is successfully set up, you can access live video feeds, receive motion alerts, and adjust other features using the Ring app.
5. You can also link your Ring Floodlight Security Camera with other Ring devices, such as doorbells or other cameras, to create a comprehensive home security system.
Adjusting Camera Settings
After setting up your Ring Floodlight Security Camera, it’s important to adjust the camera settings to ensure optimal performance and security. Here are the steps to adjust the camera settings:
- Open the Ring App: Launch the Ring app on your smartphone or tablet.
- Select Your Camera: From the app’s dashboard, select the Ring Floodlight Security Camera you want to adjust.
- Access Settings: Tap on the settings icon or option to access the camera settings menu.
- Adjust Motion Detection: Customize the motion detection settings to suit your preferences. You can adjust the motion sensitivity, motion zones, and motion schedules.
- Set Up Lights: Configure the floodlight settings, including brightness levels, motion-triggered lights, and schedule for the lights to turn on/off.
- Enable Notifications: Turn on notifications to receive alerts on your phone when the camera detects motion or activates the lights.
- Save Changes: Once you’ve adjusted the settings to your liking, save the changes to apply them to your Ring Floodlight Security Camera.
By adjusting the camera settings, you can customize the functionality of your Ring Floodlight Security Camera to meet your specific needs and enhance your home security.
Testing and Troubleshooting
Once you have successfully set up your Ring Floodlight Security Camera, it is important to test it to ensure it is functioning properly. Here are some steps for testing and troubleshooting:
Testing the Camera:
1. Check the live feed: Use the Ring app to access the live feed from your camera to verify that the camera is capturing footage.
2. Test the motion detection: Walk in front of the camera to see if the motion detection feature is working correctly. You should receive notifications on your phone when motion is detected.
Troubleshooting:
If you encounter any issues with your Ring Floodlight Security Camera, try the following troubleshooting steps:
| Issue | Solution |
| Camera not connecting to Wi-Fi | Check your Wi-Fi connection and ensure it is strong enough for the camera to connect. Restart your router and camera. |
| Poor video quality | Adjust the camera’s positioning and ensure there are no obstructions blocking the lens. Check your internet connection speed. |
| Notifications not working | Ensure that the Ring app has the necessary permissions to send notifications. Check your phone’s notification settings. |


