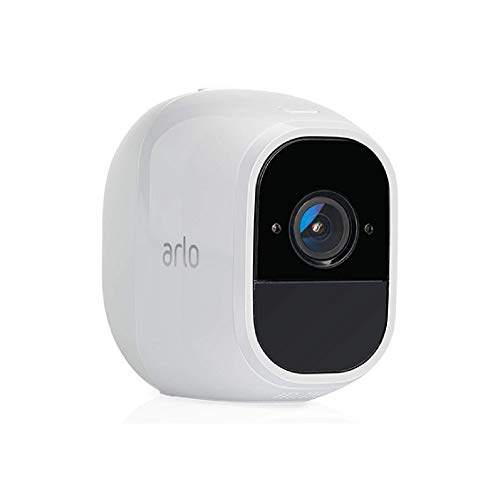


Arlo Pro 2 security cameras are a popular choice for home and business surveillance. With their wireless design and advanced features, they offer a convenient and effective way to monitor your property. If you’re considering installing Arlo Pro 2 cameras, it’s important to follow the proper setup process to ensure they work correctly.
Setting up your Arlo Pro 2 cameras involves several steps, from syncing them with the base station to adjusting settings in the Arlo app. In this guide, we’ll walk you through the entire setup process, so you can start enjoying the peace of mind that comes with having a reliable security system in place.
Whether you’re a tech-savvy individual or a beginner in the world of smart home devices, this guide will provide you with the information you need to set up your Arlo Pro 2 cameras quickly and easily.
Step-by-Step Guide to Setting Up Arlo Pro 2 Security Cameras
Setting up your Arlo Pro 2 security cameras is a straightforward process that can be completed in a few simple steps. Follow this guide to get your cameras up and running in no time:
- Unbox your Arlo Pro 2 cameras and make sure you have all the necessary components.
- Download the Arlo app on your smartphone or tablet and create an account.
- Follow the on-screen instructions to set up your Arlo base station and connect it to your Wi-Fi network.
- Sync your Arlo Pro 2 cameras with the base station by pressing the sync button on both devices.
- Mount your cameras in the desired locations, making sure they have a clear view of the area you want to monitor.
- Adjust the camera settings in the Arlo app to customize motion detection, video recording, and other features.
- Test your cameras to ensure they are working properly by triggering motion events or manually recording video.
- Monitor your cameras remotely through the Arlo app to keep an eye on your property from anywhere.
With these simple steps, you’ll have your Arlo Pro 2 security cameras set up and ready to protect your home or business in no time. Enjoy the peace of mind that comes with having a reliable surveillance system in place.
Unboxing and Checking Contents
When you receive your Arlo Pro 2 security camera system, the first step is to unbox it carefully. Make sure to check the contents of the package to ensure everything is included:
Contents:
– Arlo Pro 2 cameras (quantity based on your purchase)
– Rechargeable battery packs
– Camera mounts
– Base station
– Ethernet cable
– Power adapter
– Quick start guide and other documentation
It is important to verify that all the components are present before proceeding with the setup process to ensure a smooth installation experience.
Installing the Arlo Pro 2 Base Station
Before setting up your Arlo Pro 2 security cameras, you need to install the base station. Follow these steps:
- Connect the power adapter to the base station and plug it into an outlet.
- Connect the Ethernet cable to the base station and your router.
- Wait for the Internet LED on the base station to turn green.
- Download the Arlo app on your smartphone and create an account.
- Follow the on-screen instructions in the app to add the base station to your account.
- Once the base station is successfully added, you can now proceed to set up your Arlo Pro 2 cameras.
Placing and Mounting the Cameras
Before installing your Arlo Pro 2 security cameras, it’s important to carefully choose their placement to ensure optimal coverage and performance. Here are some tips for placing and mounting the cameras:
- Identify the areas you want to monitor, such as entry points, driveways, and backyards.
- Position the cameras at a height of 7-9 feet for the best angle and coverage.
- Ensure the cameras have a clear line of sight and are not obstructed by objects like trees or walls.
- Use the magnetic mounts or adjustable mounts included with the cameras to secure them in place.
- Consider using weatherproof mounts if installing the cameras outdoors to protect them from the elements.
By following these guidelines, you can ensure that your Arlo Pro 2 security cameras are positioned correctly for maximum security and surveillance coverage.
Powering On the Cameras and Base Station
Before setting up your Arlo Pro 2 security cameras, you need to power on the cameras and base station. Here’s how to do it:
- Connect the base station to a power outlet using the provided power adapter.
- Wait for the base station to power on and connect to your Wi-Fi network.
- Insert the rechargeable battery into each Arlo Pro 2 camera.
- Press the sync button on the base station and then on each camera to sync them.
- Once the cameras are synced, position them in the desired locations for optimal coverage.
Connecting the Cameras to the Base Station
After setting up the Arlo Pro 2 base station, you can start connecting your cameras. Follow these steps:
- Place the camera within range of the base station, ideally within 300 feet in direct line of sight.
- Press the Sync button on the base station until the LED blinks amber.
- Press the Sync button on the camera for two seconds until the blue LED blinks rapidly.
- Wait for the camera to sync with the base station. The LED on the camera will blink blue when successfully connected.
- Repeat this process for each camera you want to connect.
Once all cameras are connected, you can adjust their settings through the Arlo app and start monitoring your property.
Setting Up Arlo Pro 2 on the Mobile App
To set up your Arlo Pro 2 security camera using the mobile app, follow these steps:
| 1. | Download and install the Arlo app on your mobile device from the App Store (iOS) or Google Play Store (Android). |
| 2. | Open the Arlo app and create an account or log in if you already have one. |
| 3. | Tap on the “+” icon to add a new device and select “Camera” from the list of options. |
| 4. | Follow the on-screen instructions to connect your Arlo Pro 2 camera to your Wi-Fi network. |
| 5. | Scan the QR code on the camera or enter the serial number manually to add it to your account. |
| 6. | Position the camera in the desired location and adjust the angle as needed. |
| 7. | Once the camera is set up, you can customize settings, set up alerts, and view live footage from the Arlo app. |
Customizing Camera Settings and Modes
Arlo Pro 2 security cameras offer a range of customizable settings and modes to fit your specific security needs. Here’s how you can customize your camera settings:
1. Adjust Camera Sensitivity
You can adjust the sensitivity of your Arlo Pro 2 camera to detect motion based on your preferences. Higher sensitivity settings will trigger recordings more frequently, while lower settings may reduce false alarms.
2. Set Up Activity Zones
Create specific activity zones within your camera’s field of view to focus on areas where you want to monitor motion. This can help reduce unnecessary notifications and recordings.
- Access the Arlo app on your mobile device.
- Go to the camera settings and select “Activity Zones”.
- Draw custom zones on the camera’s view to define specific areas for monitoring.
By customizing camera settings and modes, you can optimize the performance of your Arlo Pro 2 security cameras for enhanced security and peace of mind.
Testing and Adjusting Camera Placement
After installing your Arlo Pro 2 security cameras, it’s important to test and adjust their placement to ensure optimal coverage and performance. Here are some tips:
- Check the camera’s field of view by accessing the live feed through the Arlo app. Make sure there are no blind spots or obstructions.
- Test the camera’s motion detection by walking around the monitored area to see if it captures movement effectively.
- Adjust the camera angle and mounting height if needed to improve coverage and reduce false alerts.
- Consider factors like lighting conditions and potential sources of interference when finalizing the camera placement.
By testing and adjusting the placement of your Arlo Pro 2 cameras, you can maximize their effectiveness in monitoring your home or property.


