


Replacing the hard drive in your Samsung security camera system can be a straightforward process if you follow the right steps. Whether your current hard drive is failing or you simply want to upgrade to a larger capacity, this guide will walk you through the necessary steps to successfully replace the hard drive in your system.
Before you begin, make sure to back up any important footage or settings stored on your current hard drive. Additionally, ensure that you have the necessary tools and a compatible replacement hard drive on hand before starting the process.
By following the steps outlined in this guide, you can ensure that your Samsung security camera system continues to operate smoothly and efficiently with a new hard drive in place.
Importance of Hard Drive in Security Camera System
When it comes to a security camera system, the hard drive plays a crucial role in storing and managing the recorded footage. The hard drive is where all the video data is stored, ensuring that you have a record of all the activities captured by the cameras.
Having a reliable hard drive is essential for the proper functioning of your security camera system. It allows you to store a large amount of footage for extended periods, ensuring that you can review past events when needed. A high-quality hard drive also ensures smooth playback and easy access to recorded videos.
Key Points:
- Data Storage: The hard drive stores all recorded footage from security cameras.
- Reliability: A reliable hard drive ensures that your system functions smoothly and that footage is safely stored.
Overall, the hard drive is a critical component of a security camera system, and choosing the right one is essential for optimal performance and peace of mind.
Signs of a Failing Hard Drive in Samsung Security Camera System
If you suspect that the hard drive in your Samsung security camera system is failing, there are several signs to look out for:
- Constant freezing or crashing of the system
- Unusual noises coming from the hard drive
- Error messages indicating disk failure
- Slow performance or difficulty accessing footage
- Files becoming corrupted or inaccessible
It’s important to regularly monitor the health of your hard drive to prevent data loss and ensure the smooth functioning of your security system. If you notice any of these signs, it may be time to replace the hard drive.
Steps to Replace the Hard Drive in Samsung Security Camera System
If you need to replace the hard drive in your Samsung security camera system, follow these steps:
Step 1: Power Off the System
Before you begin, make sure to power off the Samsung security camera system and disconnect it from the power source.
Step 2: Open the System
Locate the hard drive compartment on the system and open it using the appropriate tools. Carefully remove the old hard drive from the compartment.
Note: Make sure to handle the hard drive with care to avoid any damage.
Follow the manufacturer’s instructions for replacing the hard drive with a new one that is compatible with your Samsung security camera system.
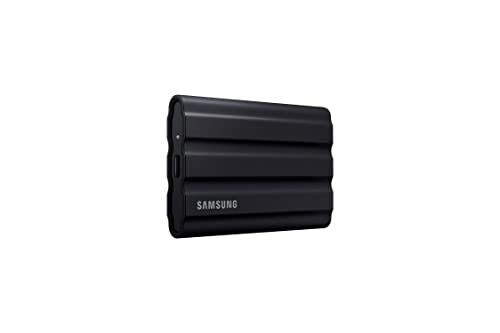
Choosing the Right Replacement Hard Drive for Samsung Security Camera System
When replacing the hard drive in your Samsung security camera system, it is crucial to choose the right one to ensure optimal performance and storage capacity. Here are some key factors to consider when selecting a replacement hard drive:
1. Compatibility: Make sure the replacement hard drive is compatible with your Samsung security camera system. Check the system specifications and requirements to ensure a seamless fit.
2. Storage Capacity: Determine the amount of storage space you need based on the number of cameras, resolution, and recording settings. Choose a hard drive with sufficient capacity to store your video footage effectively.
3. Speed and Performance: Opt for a hard drive with fast read and write speeds to ensure smooth recording and playback of video footage. Consider using a solid-state drive (SSD) for enhanced performance.
4. Reliability: Select a replacement hard drive from a reputable manufacturer known for reliability and durability. Look for drives with a good track record for longevity.
By considering these factors, you can choose the right replacement hard drive for your Samsung security camera system, ensuring efficient operation and reliable storage of your video recordings.
Formatting the New Hard Drive for Samsung Security Camera System
Once you have purchased a new hard drive for your Samsung security camera system, it is important to format it properly before installing it. Here are the steps to format the new hard drive:
- Connect the hard drive: Install the new hard drive into the system following the manufacturer’s instructions. Make sure it is securely connected.
- Access the settings: Log in to the Samsung security camera system interface and navigate to the settings or configuration menu.
- Find the storage options: Look for the storage or hard drive options within the settings menu.
- Select format: Choose the option to format the new hard drive. Confirm the action when prompted.
- Wait for the formatting: The system will start formatting the hard drive. This process may take some time depending on the size of the drive.
- Complete the process: Once the formatting is complete, the new hard drive will be ready for use with your Samsung security camera system.
By following these steps, you can ensure that the new hard drive is properly formatted and ready to store footage from your security cameras.
Installing the New Hard Drive in Samsung Security Camera System
Once you have purchased a new hard drive for your Samsung security camera system, follow these steps to install it:
- Power off the Samsung security camera system and unplug it from the power source.
- Locate the hard drive bay on the DVR unit. It is usually located on the back or side of the unit.
- Remove the screws that secure the hard drive bay cover and carefully slide the cover off.
- Disconnect the power and data cables from the old hard drive.
- Remove the old hard drive from the bay and place the new hard drive in the same position.
- Connect the power and data cables to the new hard drive securely.
- Secure the hard drive bay cover back in place with the screws.
- Plug the Samsung security camera system back into the power source and power it on.
- Follow the on-screen instructions to initialize the new hard drive and format it for use with the system.
- Your new hard drive is now installed and ready to use with your Samsung security camera system.
Configuring the Settings for the New Hard Drive in Samsung Security Camera System
Once you have replaced the hard drive in your Samsung security camera system, you will need to configure the settings to ensure proper functioning. Follow these steps to set up the new hard drive:
- Access the system settings menu on your Samsung security camera system.
- Select the storage or hard drive option from the settings menu.
- Choose the new hard drive from the list of available storage devices.
- Format the new hard drive to prepare it for use with the system.
- Adjust the recording settings to specify how footage should be saved to the new hard drive.
- Set up any motion detection or scheduled recording options based on your preferences.
- Save the settings and exit the system menu.
By following these steps, you can successfully configure the settings for the new hard drive in your Samsung security camera system and ensure that your surveillance system is up and running smoothly.
Testing the New Hard Drive in Samsung Security Camera System
Once you have replaced the hard drive in your Samsung security camera system, it is important to test the new hard drive to ensure that it is functioning properly. Follow these steps to test the new hard drive:
- Power on the Samsung security camera system and wait for it to boot up.
- Access the system settings and navigate to the storage or hard drive section.
- Check if the new hard drive is recognized by the system. It should be listed with the correct storage capacity.
- Format the new hard drive if necessary to ensure compatibility with the system.
- Test the recording functionality by setting up a test recording and verifying that the footage is being saved to the new hard drive.
- Monitor the system for any errors or issues that may arise during testing.
By following these steps, you can ensure that the new hard drive in your Samsung security camera system is working properly and ready to store your surveillance footage.
Maintenance Tips for the Hard Drive in Samsung Security Camera System
Regular maintenance of the hard drive in your Samsung security camera system is essential to ensure smooth operation and longevity of the device. Here are some tips to help you keep your hard drive in top condition:
1. Keep the System Cool
Heat can damage the hard drive in your security camera system, so make sure the system has proper ventilation and is not placed in direct sunlight or near heat sources. Keeping the system cool will help extend the life of the hard drive.
2. Regularly Check for Errors
Periodically check the hard drive for any errors or bad sectors. Use the system’s built-in diagnostic tools or third-party software to scan the drive for issues and address them promptly to prevent data loss.
| Tip | Description |
|---|---|
| 3. Backup Important Data | Regularly back up the footage and important data stored on the hard drive to an external storage device or cloud storage to prevent loss in case of drive failure. |
| 4. Avoid Power Surges | Use a surge protector to protect the security camera system from power surges that can damage the hard drive. Unplug the system during thunderstorms or when not in use for extended periods. |


