


Security cameras are essential for monitoring and protecting your property. With advancements in technology, it is now possible to connect your security cameras to the internet, allowing you to access live footage remotely from anywhere in the world. This provides an added layer of security and peace of mind.
Putting security cameras on the internet involves setting up a network connection and configuring the cameras to stream footage online. By following a few simple steps, you can ensure that your security cameras are online and accessible at all times. In this article, we will guide you through the process of connecting your security cameras to the internet.

Whether you want to keep an eye on your home, business, or any other property, having security cameras connected to the internet can provide you with real-time monitoring and alerts. Read on to learn how to set up your security cameras on the internet and enhance the security of your premises.
Step-by-step guide to connecting security cameras to the internet
Security cameras are an essential part of keeping your property safe. Here is a step-by-step guide to help you connect your security cameras to the internet:
1. Choose the right camera:
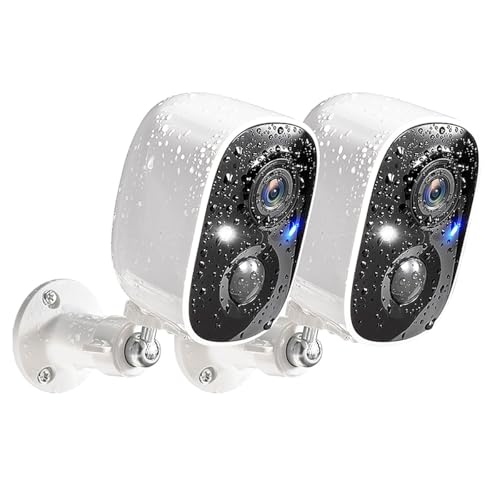
Before you can connect your security camera to the internet, you need to choose the right camera for your needs. Consider factors like resolution, night vision, and connectivity options when making your selection.
2. Install the camera:
Once you have chosen your camera, install it in the desired location. Make sure it is positioned to capture the area you want to monitor effectively.
3. Connect the camera to a power source:
Most security cameras require a power source to function. Connect your camera to a power outlet using the provided power adapter.
4. Connect the camera to your Wi-Fi network:
Follow the manufacturer’s instructions to connect your camera to your Wi-Fi network. This usually involves using a mobile app or a web interface to enter your network details.
5. Configure your camera settings:
Once your camera is connected to the internet, configure its settings to suit your needs. This may include setting up motion detection, adjusting video quality, and setting recording schedules.
6. Access your camera remotely:
To access your security camera remotely, you may need to set up a cloud service or use a mobile app provided by the camera manufacturer. This will allow you to view live footage and receive alerts on your smartphone or computer.
By following these steps, you can easily connect your security cameras to the internet and ensure the safety of your property.
Choosing the right security cameras
When selecting security cameras for your home or business, it’s important to consider your specific needs and goals. Here are some key factors to keep in mind:
1. Resolution: Choose cameras with high resolution to capture clear images and videos.
2. Field of view: Consider the coverage area you need and select cameras with the appropriate field of view.
3. Night vision: Opt for cameras with night vision capabilities for around-the-clock surveillance.
4. Connectivity: Choose cameras that can connect to the internet for remote monitoring and access.
5. Weather resistance: If you plan to install outdoor cameras, make sure they are weatherproof and built to withstand the elements.
6. Motion detection: Look for cameras with motion detection features to alert you of any suspicious activity.
7. Storage: Decide whether you want cameras with local storage or cloud-based storage options.
By considering these factors, you can choose the right security cameras that best meet your needs and provide peace of mind.
Setting up your internet network
Before connecting your security cameras to the internet, it is important to ensure that your internet network is set up properly. Here are some steps to help you with the process:
- Choose a secure Wi-Fi network for your cameras to connect to.
- Ensure that your internet router is properly configured and working.
- Check the internet speed and stability in the area where the cameras will be installed.
- Make sure that the Wi-Fi signal reaches all the areas where the cameras will be placed.
- Consider setting up a separate network for your security cameras to enhance security.
By following these steps, you can ensure that your internet network is ready to support your security cameras and provide a reliable connection for monitoring your property.
Configuring the IP address of the security cameras
To access your security cameras over the internet, you need to configure the IP address of each camera. Here’s how you can do it:
- Log in to the camera’s web interface using the default IP address provided by the manufacturer.
- Navigate to the network settings or configuration page within the camera’s interface.
- Assign a static IP address to the camera that is within the same subnet as your network.
- Make sure the IP address is unique and not conflicting with any other devices on the network.
- Save the changes and reboot the camera to apply the new IP address.
Once you have configured the IP address of your security cameras, you can access them remotely over the internet using the assigned IP address and appropriate port forwarding settings on your router.
Connecting the cameras to your router
After setting up your security cameras, the next step is to connect them to your router for remote access. Follow these steps to ensure a successful connection:
- Locate the Ethernet port: Find the Ethernet port on each camera and on your router. Use an Ethernet cable to connect each camera to an available port on your router.
- Configure network settings: Access the camera’s settings interface through a web browser and configure the network settings. Ensure each camera has a unique IP address and is set to connect to your home network.
- Test the connection: Once the cameras are connected to the router, test the connection by accessing the camera feeds from a computer or mobile device connected to the same network. Make sure you can view the live video stream.
- Set up remote access: To access the cameras over the internet, you’ll need to set up port forwarding on your router. Log in to your router’s settings and forward the necessary ports to the IP addresses of your cameras. This will allow you to access the cameras from anywhere with an internet connection.
By following these steps, you can securely connect your security cameras to your router and access them remotely over the internet for enhanced surveillance and peace of mind.
Testing the camera connection
Once you have set up your security cameras and connected them to the internet, it is important to test the camera connection to ensure everything is working properly. Follow these steps to test the camera connection:
- Check the camera feed on your computer or mobile device to verify that the cameras are connected and transmitting video.
- Test the remote access feature by accessing the camera feed from a different location or device.
Tip:
If you encounter any issues during the testing process, troubleshoot the connection by checking the camera settings, internet connection, and network configuration.

Securing your camera network
When setting up security cameras on the internet, it is crucial to ensure that your camera network is secure to prevent unauthorized access and protect your privacy. Here are some key steps to secure your camera network:
- Change default passwords: Always change the default passwords on your security cameras to strong, unique passwords to prevent unauthorized access.
- Enable encryption: Make sure that your camera network uses encryption protocols such as WPA2 to secure the data transmitted between the cameras and the internet.
- Update firmware: Regularly update the firmware of your security cameras to patch any security vulnerabilities and ensure they are up to date with the latest security features.
- Use a VPN: Consider setting up a Virtual Private Network (VPN) to add an extra layer of security to your camera network and encrypt the data traffic.
- Disable UPnP: Disable Universal Plug and Play (UPnP) on your router to prevent potential security risks associated with this feature.
- Monitor access: Keep track of who has access to your camera network and regularly review the access logs to detect any suspicious activity.
Monitoring your security cameras online
Once you have set up your security cameras to connect to the internet, you can easily monitor them online from anywhere in the world. Here are a few steps to help you access your security cameras remotely:
Step 1: Set up remote access
Make sure your security cameras are connected to a network that has internet access. You will need to configure your cameras to allow remote access through a secure login system. This may involve setting up a username and password for access.
Step 2: Access the camera feed
Once you have set up remote access, you can log in to your security camera system using a web browser or a dedicated mobile app. You will be able to view live feeds from your cameras, as well as access recorded footage and adjust camera settings.
| Tip: | Make sure to choose a strong password for your security camera system to prevent unauthorized access. |
|---|


