

Security cameras are an essential part of any home or business security system. Installing cameras outside your property can help deter crime and provide valuable footage in case of incidents. However, mounting security cameras outside requires careful planning and execution to ensure optimal performance and coverage.
In this guide, we will walk you through the steps to properly mount security cameras outside your home or business. From choosing the right location to ensuring proper wiring and weatherproofing, we will cover everything you need to know to set up your outdoor security cameras effectively.
Whether you are a security system novice or a seasoned DIY enthusiast, this guide will equip you with the knowledge and skills to install outdoor security cameras like a pro. Let’s dive in and learn how to enhance your property’s security with strategically placed and well-mounted cameras.
Choosing the Right Location
When choosing the location for your outdoor security cameras, there are several factors to consider:
- Visibility: Place the cameras in a location where they will have a clear view of the area you want to monitor.
- Access to Power: Ensure that the cameras are located near a power source or have a power supply nearby.
- Weatherproofing: Select a location that is sheltered from the elements to protect the cameras from rain, snow, and extreme temperatures.
- Height: Mount the cameras at a height that provides a good vantage point without being easily accessible to intruders.
- Obstructions: Avoid placing the cameras where they may be obstructed by trees, bushes, or other objects.
Required Tools and Equipment
1. Security Cameras: Choose outdoor security cameras with weatherproof housing to withstand the elements.
2. Mounting Bracket: Ensure the mounting bracket is sturdy and adjustable to achieve the desired angle for the camera.
3. Power Drill: A power drill will be needed to create holes for mounting the cameras and running cables.
4. Screws and Anchors: Use screws and anchors to securely attach the mounting bracket to the wall or other surfaces.
5. Cable Clips: Cable clips will help keep the cables organized and hidden for a neat installation.
6. Ladder: A ladder will be necessary for reaching high places where the cameras will be mounted.
7. Ethernet Cable or Wi-Fi Extender: Depending on your camera’s connectivity, you may need an Ethernet cable or Wi-Fi extender for a reliable connection.
8. Power Source: Ensure there is a nearby power source for the cameras to operate.
Checking Local Regulations
Before installing security cameras outside your property, it is crucial to check and comply with local regulations regarding surveillance cameras. Some areas have specific rules and restrictions on where cameras can be placed, how they can be used, and the privacy of neighbors.
Research the laws in your city or county to ensure that you are following all guidelines and obtaining any necessary permits. Failure to comply with regulations could result in fines or legal consequences, so it is essential to do your due diligence before mounting security cameras outside.
Proper Camera Positioning
When mounting security cameras outside, it is crucial to ensure proper positioning to maximize their effectiveness. Here are some tips for positioning your cameras:
1. Height
Mount your cameras at a height that is out of reach from potential intruders but still provides a clear view of the area you want to monitor. A recommended height is around 9-10 feet above the ground.
2. Angle
Position your cameras at an angle that covers the most vulnerable areas of your property. Avoid pointing them directly into the sun or other sources of glare to prevent washed-out footage.
Power Source Options
When installing security cameras outside, one of the key considerations is the power source. Here are some common power source options:
- Hardwired: Hardwiring your security cameras involves running wires from the cameras to a power source, such as an outlet or a junction box. This provides a reliable power supply but may require professional installation.
- Solar: Solar-powered security cameras use solar panels to generate power from sunlight. They are eco-friendly and can be a good option for locations with ample sunlight.
- Battery: Battery-powered security cameras are easy to install and can be placed in remote locations without access to power outlets. However, you will need to regularly replace or recharge the batteries.
Considerations:
- Choose a power source based on your specific needs and the location of your security cameras.
- Ensure the power source you choose provides a reliable and continuous power supply to keep your cameras functioning properly.
Weatherproofing Your Cameras
When mounting security cameras outside, it is crucial to weatherproof them to ensure their longevity and functionality. Here are some tips to weatherproof your cameras:
1. Choose Weatherproof Cameras
Start by selecting cameras that are specifically designed for outdoor use. These cameras are built to withstand various weather conditions, including rain, snow, and extreme temperatures.
2. Use Protective Housing
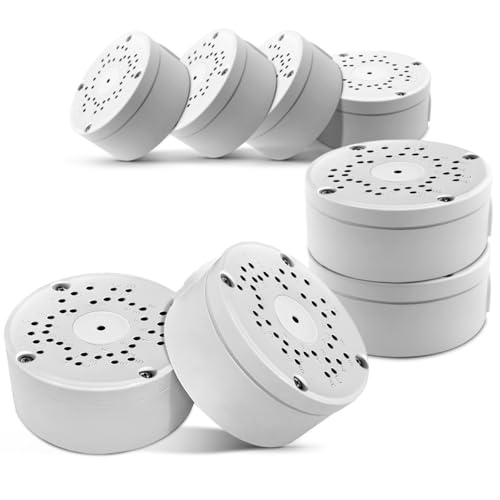
For added protection, consider installing protective housing around your cameras. This will shield them from direct exposure to elements and prevent damage from debris or vandalism.
Tip: Make sure the housing you choose allows for proper ventilation to prevent overheating.
By taking these weatherproofing measures, you can ensure that your security cameras remain operational and provide reliable surveillance for the long term.
Connecting Cameras to the Network
Once you have mounted your security cameras outside, the next step is to connect them to your network for monitoring and recording. Follow these steps to ensure a successful connection:
- Locate the Ethernet port on each camera.
- Use Ethernet cables to connect the cameras to a network switch or router.
- Ensure that the network switch or router is connected to your home network.
- Assign static IP addresses to each camera to easily identify them on the network.
- Access the camera’s settings through a web browser and configure the network settings.
- Test the connection by accessing the camera’s live feed from a computer or mobile device on the same network.
- Install any necessary software or apps for remote monitoring and recording.
By following these steps, you can ensure that your security cameras are properly connected to your network and ready to provide surveillance for your outdoor areas.
Setting Up Remote Access
Once your security cameras are installed, you’ll want to set up remote access so you can view the footage from anywhere. Here’s how to do it:
1. Choose a Remote Access Method
There are several ways to access your security camera footage remotely, including through a mobile app, a web browser, or a dedicated software program. Decide which method works best for you.
2. Configure Remote Access
Follow the instructions provided by your camera manufacturer to configure remote access. This typically involves creating an account, connecting your camera to your network, and setting up port forwarding on your router.
Adjusting Camera Settings
After mounting your security cameras outside, it’s important to adjust the settings to ensure optimal performance. Here are some key settings to consider:
- Resolution: Set the resolution to the highest possible for clear images.
- Frame Rate: Adjust the frame rate to capture smooth video footage.
- Exposure: Set the exposure to balance light and dark areas for better visibility.
- Motion Detection: Enable motion detection to receive alerts when activity is detected.
- Night Vision: Configure night vision settings for clear footage in low light conditions.
By adjusting these settings, you can enhance the effectiveness of your security cameras and improve surveillance of your property.
Regular Maintenance and Monitoring
Once you have installed your security cameras outside, it is important to perform regular maintenance and monitoring to ensure they are functioning correctly and providing the necessary security coverage. Here are some key steps for maintaining and monitoring your outdoor security cameras:
1. Check Camera Positioning: Regularly inspect the positioning of your cameras to ensure they are still capturing the desired areas. Make adjustments if necessary to maintain optimal coverage.
2. Clean Camera Lenses: Clean the camera lenses regularly to remove dirt, dust, and debris that can affect image quality. Use a soft, lint-free cloth to gently wipe the lenses.
3. Test Camera Functionality: Periodically test each camera to ensure they are functioning properly. Check for any issues with recording, connectivity, or image quality.
4. Monitor Footage: Review footage from your security cameras on a regular basis to check for any suspicious activity or security breaches. This will help you identify any issues early on.
5. Check Power Supply: Ensure that your cameras have a reliable power supply and backup power source in case of outages. Check the power cables and connections regularly.
| 6. Update Firmware: | Regularly check for firmware updates for your cameras and install them to ensure they have the latest security features and performance enhancements. |
| 7. Secure Camera Mounting: | Check the mounting hardware of your cameras to ensure they are securely attached to the mounting surface. Tighten any loose screws or brackets. |


