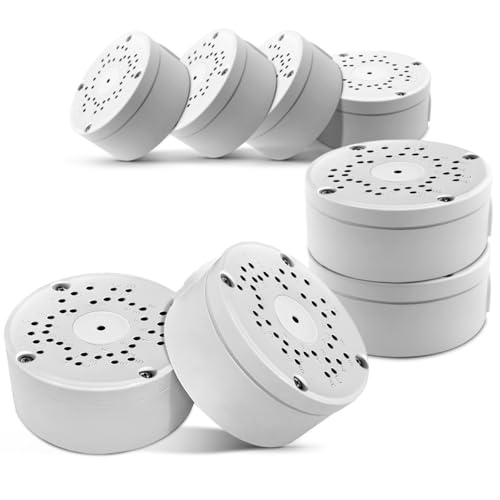


Installing a security camera on a stucco wall can be a challenging task, but with the right tools and techniques, it can be done efficiently and securely. Stucco walls are a popular choice for many homes due to their durability and aesthetic appeal, but they can pose unique challenges when it comes to mounting devices.
Before you begin the installation process, it’s important to choose the right location for your security camera. Make sure to select a spot that provides a clear view of the area you want to monitor, while also taking into account factors such as lighting and potential obstructions.
When it comes to mounting the camera itself, it’s crucial to use the appropriate tools and hardware. For stucco walls, it’s recommended to use masonry anchors or screws designed specifically for this type of surface. These will provide the necessary support and stability to ensure your camera stays in place.
Step-by-Step Guide to Mounting Security Camera on Stucco Wall
Mounting a security camera on a stucco wall can be a challenging task, but with the right tools and techniques, you can do it successfully. Follow these steps to ensure a secure and stable installation:
- Choose the right location for your security camera on the stucco wall. Make sure it provides a clear view of the area you want to monitor.
- Use a stud finder to locate the studs in the wall. This will help you find a solid anchor point for mounting the camera.
- Mark the location for drilling pilot holes for the mounting screws. Use a pencil or marker to make accurate marks.
- Drill pilot holes into the stucco wall at the marked locations. Be sure to use a masonry drill bit that is suitable for drilling into stucco.
- Insert wall anchors into the pilot holes. These anchors will provide additional support and stability for the mounting screws.
- Attach the mounting bracket of the security camera to the stucco wall using the screws provided. Make sure the bracket is securely fastened.
- Mount the security camera onto the bracket according to the manufacturer’s instructions. Ensure it is positioned correctly for optimal performance.
- Connect the camera to a power source and test the camera to make sure it is functioning properly.
- Adjust the camera angle and settings as needed to get the desired view of the monitored area.
By following these steps carefully, you can successfully mount a security camera on a stucco wall and enhance the security of your property.
Determine the Ideal Location for Your Security Camera
Before mounting your security camera on a stucco wall, it’s crucial to determine the ideal location for maximum coverage and effectiveness. Here are some key factors to consider:
1. Surveillance Area
Identify the specific areas you want to monitor with your security camera. This could include entry points, driveways, yards, or any other vulnerable spots. Make sure the camera has a clear line of sight to these areas.
2. Height and Angle
Position the camera at an appropriate height and angle to capture the best view of the surveillance area. Mounting it too high or too low can affect the quality of the footage. Use a mounting bracket to adjust the angle if needed.
| Tip: Test the camera’s view before permanently mounting it to ensure optimal coverage. |
Gather the Necessary Tools and Materials
Before you begin mounting your security camera on a stucco wall, make sure you have all the required tools and materials handy. Here’s what you’ll need:
- Security camera
- Mounting bracket
- Drill with masonry bit
- Anchors or screws
- Screwdriver
- Level
- Tape measure
- Pencil
- Ladder or step stool
Having these tools and materials prepared will help you complete the installation process smoothly and efficiently.
Prepare the Stucco Wall for Installation
Before mounting your security camera on a stucco wall, you need to properly prepare the surface to ensure a secure and stable installation. Here are the steps to follow:
- Locate Studs: Use a stud finder to locate the studs in the stucco wall. Mounting your camera on a stud will provide the most stable support.
- Mark Drill Holes: Once you’ve located the studs, mark the positions where you will drill holes for the mounting screws. Make sure the holes are level and evenly spaced.
- Drill Pilot Holes: Use a masonry drill bit to drill pilot holes into the stucco wall at the marked positions. This will make it easier to screw in the mounting hardware.
- Insert Anchors: If the screws provided with your camera are not suitable for stucco, insert plastic anchors into the pilot holes to provide a secure grip for the screws.
- Attach Mounting Bracket: Once the anchors are in place, attach the mounting bracket to the stucco wall using the screws provided. Make sure the bracket is securely fastened.
By properly preparing the stucco wall, you can ensure that your security camera is securely mounted and will provide reliable surveillance for your property.
Mark the Drill Holes for Mounting
Before drilling into the stucco wall, use a pencil to mark the locations where you want to mount the security camera. Make sure the camera is level and in the desired position. Use a tape measure to ensure accurate spacing between the drill holes.
Once you have marked the drill hole locations, double-check the alignment and make any necessary adjustments. It’s crucial to get this step right to avoid any unnecessary holes in the wall.
Drill Holes in the Stucco Wall
Before mounting your security camera on a stucco wall, you’ll need to drill holes to anchor the camera securely. Here’s how to do it:
| 1. | Choose the location where you want to install the camera and mark the positions for the holes. |
| 2. | Use a masonry drill bit that is suitable for stucco walls and start drilling the holes at the marked spots. |
| 3. | Make sure to drill straight and apply steady pressure to avoid damaging the stucco surface. |
| 4. | Once the holes are drilled, insert anchors into them to provide a secure hold for the screws. |
| 5. | Now you’re ready to mount your security camera on the stucco wall using the screws provided with the camera. |
Attach the Mounting Bracket to the Wall
Before mounting your security camera on a stucco wall, it’s important to securely attach the mounting bracket. Here’s how to do it:
1. Choose the Right Location
Identify the best location on the stucco wall where you want to install the camera. Make sure it has a clear view of the area you want to monitor and is within reach of a power source and Wi-Fi signal.
2. Mark the Holes
Hold the mounting bracket against the wall and use a pencil to mark the locations of the screw holes. Make sure the bracket is level before marking the holes.
Install and Secure Your Security Camera
When installing a security camera on a stucco wall, it is important to ensure that the camera is securely mounted to prevent it from falling or being tampered with. Follow these steps to properly install and secure your security camera:
- Choose a suitable location on the stucco wall where you want to mount the camera.
- Use a pencil to mark the spots where you will drill holes for the mounting brackets.
- Drill pilot holes into the stucco wall using a masonry drill bit to prevent the stucco from cracking.
- Insert wall anchors into the pilot holes to provide additional support for the mounting brackets.
- Attach the mounting brackets to the stucco wall using screws and a screwdriver.
- Securely mount the security camera onto the brackets, making sure it is level and pointing in the desired direction.
- Connect the camera to a power source and your monitoring system to ensure it is functioning properly.
By following these steps, you can install and secure your security camera on a stucco wall effectively, providing reliable surveillance for your property.
Test Your Security Camera for Proper Functionality
Before permanently mounting your security camera on the stucco wall, it is crucial to test its functionality to ensure it is working correctly. Follow these steps to test your security camera:
- Power On: Connect the camera to power and turn it on to check if it boots up properly.
- Connectivity: Ensure the camera is properly connected to your network or recording device to transmit video feed.
- Image Quality: Check the image quality and resolution to ensure clear video footage.
- Field of View: Adjust the camera to capture the desired area and check the field of view.
- Night Vision: Test the night vision capability of the camera in low-light conditions.
- Motion Detection: Verify the motion detection functionality by moving in front of the camera.
- Remote Access: Ensure you can access the camera remotely through the app or software.
Once you have tested all the essential functions of the security camera and are satisfied with its performance, you can proceed with mounting it securely on the stucco wall.


