In today’s digital age, keeping a close eye on your home and loved ones has never been easier. With the advancement of technology, it is now possible to repurpose a standard security camera into a DIY nanny cam to monitor your children, pets, or elderly family members while you are away.
By following a few simple steps and utilizing some basic tools, you can transform your existing security camera into a powerful home surveillance system without breaking the bank. This DIY project not only provides peace of mind but also gives you the flexibility to customize and control your home monitoring setup according to your specific needs.
Whether you’re a tech-savvy individual looking to enhance your home security or a concerned parent wanting to keep an eye on your children, this guide will walk you through the process of creating your own nanny cam using a security camera and a few handy accessories. Let’s dive into the world of DIY home surveillance and take control of your home’s security.
DIY Nanny Cam: Step-by-Step Guide
Creating your own nanny cam from a security camera can be a cost-effective and efficient way to monitor your home when you’re not around. Follow these steps to make your DIY nanny cam:
1. Choose a suitable security camera: Select a small, discreet security camera that can easily blend into your home environment.
2. Position the camera strategically: Find a location in your home where the camera has a clear view of the area you want to monitor, such as the living room or nursery.
3. Set up the camera: Follow the manufacturer’s instructions to set up the camera and connect it to your home Wi-Fi network.
4. Install monitoring software: Download and install monitoring software on your smartphone or computer to view the camera feed remotely.
5. Test the camera: Ensure the camera is working properly by testing the live feed and adjusting the angle if needed.
6. Hide the camera: Conceal the camera in a discreet location, such as behind a bookshelf or plant, to keep it hidden from view.
7. Monitor remotely: Use the monitoring software to check the camera feed from anywhere, giving you peace of mind when you’re away from home.
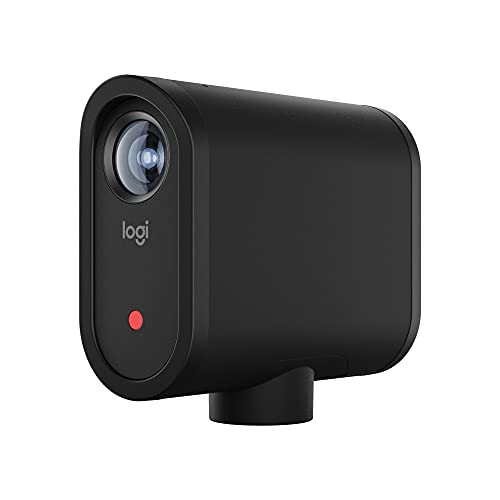
Choose the Right Security Camera
When creating a nanny cam DIY, selecting the right security camera is crucial to ensure optimal performance and functionality. Here are some key factors to consider when choosing a security camera:
Resolution:
Opt for a security camera with high resolution to capture clear and detailed footage. A resolution of at least 1080p is recommended for better image quality.
Field of View:
Consider the field of view of the security camera to ensure adequate coverage of the area you want to monitor. A wider field of view can capture more of the room or space.
Additionally, look for features such as night vision, motion detection, two-way audio, and remote access to enhance the functionality of your nanny cam DIY.
Select a Suitable Location
When choosing a location for your DIY nanny cam, consider areas where it can discreetly capture the desired footage without drawing attention. Ideal spots include bookshelves, plants, or other decorative objects that can camouflage the camera.
Make sure the location provides a good view of the room or area you want to monitor. Avoid placing the camera in direct sunlight or near bright light sources that could affect the quality of the video recording.
Power Source Considerations
When creating a DIY nanny cam out of a security camera, one crucial aspect to consider is the power source. Most security cameras require a constant source of power to function properly. You can power your DIY nanny cam using either a direct electrical connection or by using rechargeable batteries.
Direct Electrical Connection
If you opt for a direct electrical connection, you will need to ensure that the camera is located near a power outlet. This method provides a continuous power source, eliminating the need to recharge batteries regularly. However, it limits the placement of the camera as it must be within reach of the power outlet.
Rechargeable Batteries
Alternatively, you can power your DIY nanny cam with rechargeable batteries. This option offers more flexibility in camera placement as you are not limited by the need for a nearby power outlet. However, you will need to monitor the battery levels regularly and recharge as needed to ensure uninterrupted surveillance.
Set Up the Camera System
Once you have gathered all the necessary materials, it’s time to set up your DIY nanny cam. Follow these steps to get your security camera system up and running:
- Choose the Location: Decide where you want to place the camera for optimal coverage of the area you want to monitor.
- Mount the Camera: Use the mounting hardware included with your security camera to securely attach it to the chosen location.
- Connect the Camera: Connect the camera to the power source and ensure that it is receiving power.
- Set Up the Monitoring Device: Install the monitoring software on your computer or smartphone and configure it to connect to the camera.
- Test the System: Make sure the camera is capturing clear video and that you can view the feed on your monitoring device.
Once you have completed these steps, your DIY nanny cam will be ready to use for monitoring your home or any other space you want to keep an eye on.
Configure the Camera Settings
Before setting up your DIY nanny cam, it’s important to configure the camera settings to ensure optimal performance. Here are some key settings you should consider:
1. Network Settings
Make sure the camera is connected to your home Wi-Fi network. Access the camera’s settings menu to input your network SSID and password. This will allow the camera to transmit live footage to your smartphone or computer.
2. Motion Detection
Enable motion detection on the camera to receive alerts whenever movement is detected in the camera’s field of view. Adjust the sensitivity level to avoid false alarms while ensuring important events are captured.
Ensure Remote Viewing Capability
Once you have set up your DIY nanny cam using a security camera, it’s important to ensure remote viewing capability so you can monitor the footage from anywhere. Here are the steps to make sure you can access the live feed remotely:
Step 1: Set Up Remote Access
Access the settings of your security camera and enable remote access. This usually involves setting up a username and password for your camera and configuring port forwarding on your router.
Step 2: Install Viewing Apps
Download the corresponding viewing app for your security camera on your smartphone or computer. Make sure to follow the instructions to connect the app to your camera using the login credentials you set up.
| Brand | App Name | Platforms |
| Wyze | Wyze App | iOS, Android |
| Ring | Ring – Always Home | iOS, Android |
| Nest | Google Home | iOS, Android |
Secure the Camera Placement
Once you have chosen the location for your DIY nanny cam, it’s important to secure the camera in place to ensure it remains discreet and functional. Here are some tips to help you secure the camera placement:
1. Mount the Camera
Use mounting brackets or adhesive strips to securely attach the camera to the desired location. Make sure the camera is positioned in a way that provides a clear view of the area you want to monitor.
2. Conceal the Camera
If you want to keep the nanny cam hidden, consider placing it behind objects like plants, books, or picture frames. Ensure that the camera lens is not obstructed and that it can still capture clear footage.
By taking these steps to secure the camera placement, you can ensure that your DIY nanny cam remains inconspicuous and effectively monitors the desired area.
Test the Camera Functionality
Before setting up your DIY nanny cam, it’s crucial to test the functionality of the security camera you plan to use. Follow these steps to ensure the camera works properly:
| 1. | Connect the camera to a power source and turn it on. |
| 2. | Adjust the camera angle and settings to capture the desired area. |
| 3. | Check the camera feed on a monitor or your phone to ensure the video quality is clear. |
| 4. | Test the audio recording functionality if your camera has a microphone. |
| 5. | Activate any motion detection or alert features to confirm they are working correctly. |
| 6. | Run a test recording to verify that the camera can capture and save footage effectively. |
Once you have confirmed that the camera functions as expected, you can proceed with setting it up as a nanny cam in your home.
Monitor the Nanny Cam Feed
Once you have set up your DIY nanny cam using a security camera, it’s important to monitor the feed regularly to ensure the safety of your loved ones. Here are some tips on how to effectively monitor the nanny cam feed:
1. Check the Feed Regularly
Make it a habit to check the live feed from the nanny cam at regular intervals to keep an eye on what’s happening in your absence. This will help you stay informed and address any issues immediately.
2. Use a Monitoring App
Consider using a monitoring app on your smartphone or tablet to access the nanny cam feed remotely. This way, you can check in from anywhere and at any time to ensure everything is running smoothly.
Maintain and Update Your Nanny Cam
Once you have set up your DIY nanny cam using a security camera, it’s important to regularly maintain and update it to ensure optimal performance. Here are some tips:
| 1. Check the Camera Placement: | Regularly inspect the camera placement to make sure it provides a clear view of the area you want to monitor. Adjust the angle if needed. |
| 2. Clean the Lens: | Keep the camera lens clean from dust and dirt to maintain clear video quality. Use a soft cloth to gently wipe the lens when necessary. |
| 3. Test the System: | Periodically test the nanny cam system to ensure that the camera, microphone, and recording functions are working properly. |
| 4. Update Firmware: | Check for firmware updates for your security camera to improve performance and security. Follow the manufacturer’s instructions to update the firmware. |
| 5. Secure the Network: | Ensure that your network is secure to prevent unauthorized access to the nanny cam feed. Use strong passwords and encryption. |
By maintaining and updating your DIY nanny cam regularly, you can have peace of mind knowing that your home or loved ones are being monitored effectively.