


Security cameras are an essential component of any modern home security system. They provide valuable surveillance and monitoring capabilities, helping to keep your home safe and secure. However, to fully leverage the benefits of security cameras, it is important to integrate them into your home network.
Integrating security cameras into your home network allows you to access live video feeds, receive alerts, and remotely control your cameras from anywhere, using your smartphone or computer. This level of connectivity and control enhances the overall security of your home and provides peace of mind when you’re away.

Setting up security cameras on your home network involves configuring the cameras to connect to your Wi-Fi network, installing the necessary software or apps, and ensuring proper network security measures are in place. By following a few simple steps, you can seamlessly integrate security cameras into your home network, enhancing the protection of your property and loved ones.
Step-by-step guide to integrating security camera into home network
Integrating a security camera into your home network can provide you with peace of mind and added security. Follow these steps to seamlessly connect your security camera to your network:
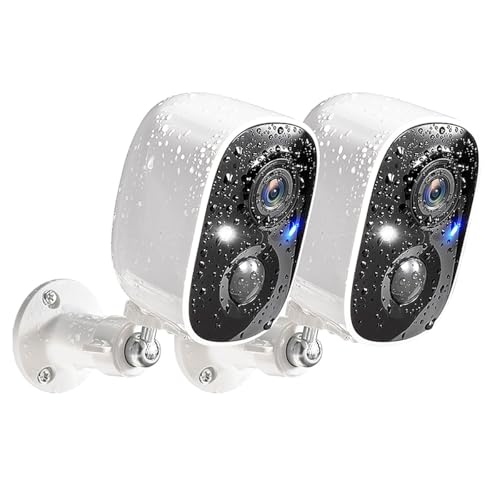
- Choose the right security camera: Select a security camera that is compatible with your home network and meets your specific needs.
- Install the camera: Follow the manufacturer’s instructions to install the security camera in the desired location.
- Connect the camera to your router: Use an Ethernet cable to connect the security camera to your router or follow the camera’s wireless setup instructions if it supports Wi-Fi.
- Configure the camera: Access the camera’s settings through a web browser or mobile app to configure the camera’s network settings, such as IP address and port number.
- Assign a static IP address: To ensure stable connectivity, assign a static IP address to the security camera within your network settings.
- Set up remote access: Enable remote access to view the camera feed from anywhere by configuring port forwarding on your router or using a cloud-based service provided by the camera manufacturer.
- Test the connection: Ensure that the camera is successfully connected to your home network and that you can access the live feed remotely before relying on it for security monitoring.
Choose the right security camera for your home
When selecting a security camera for your home network, it’s important to consider a few key factors to ensure you choose the right one:
1. Camera Resolution
Higher resolution cameras provide clearer images, making it easier to identify details such as faces and license plates. Consider a camera with at least 1080p resolution for optimal clarity.
2. Field of View
Determine the area you want to monitor and choose a camera with an appropriate field of view. Wide-angle lenses are ideal for capturing larger spaces, while cameras with pan-tilt-zoom capabilities offer flexibility in adjusting the viewing angle.
Decide on the placement of the security camera
Before integrating a security camera into your home network, it’s crucial to decide on the ideal placement for the camera. Consider the areas you want to monitor and ensure the camera has a clear view of those spaces.
Key factors to consider:
- Entry points: Install cameras near entry points like doors and windows to capture any potential intruders.
- High traffic areas: Place cameras in high traffic areas to monitor activities and ensure the safety of your home.
- Valuables: Position cameras to cover areas where valuables are stored to deter theft and keep them secure.
By carefully planning the placement of your security camera, you can maximize its effectiveness in protecting your home and enhancing your overall security system.
Connect the security camera to your home network
Once you have set up your security camera hardware, the next step is to connect it to your home network. Follow these steps to ensure a successful connection:
| Step 1: | Locate the Ethernet port on your security camera. |
| Step 2: | Connect one end of an Ethernet cable to the Ethernet port on the camera. |
| Step 3: | Connect the other end of the Ethernet cable to an available Ethernet port on your router. |
| Step 4: | Power on your security camera and wait for it to boot up. |
| Step 5: | Check the network settings of your camera to ensure it has obtained an IP address from your router. |
| Step 6: | Access the camera’s web interface using a web browser on a device connected to the same network. |
| Step 7: | Follow the on-screen instructions to configure the camera settings, including setting up Wi-Fi if desired. |
Set up the security camera’s software and settings
After physically installing the security camera, the next step is to set up the camera’s software and configure its settings. Here is a step-by-step guide to help you with this process:
| 1. | Connect the camera to your home network using an Ethernet cable or Wi-Fi connection. |
| 2. | Access the camera’s user manual or online guide to find the default IP address and login credentials. |
| 3. | Open a web browser on a computer connected to the same network and enter the camera’s IP address. |
| 4. | Log in using the default username and password provided in the user manual. |
| 5. | Follow the on-screen instructions to set up the camera’s basic settings, such as date and time, resolution, and motion detection. |
| 6. | Configure the network settings to ensure the camera is connected to your home network properly. |
| 7. | Set up remote viewing by enabling port forwarding on your router and configuring the camera’s settings for remote access. |
| 8. | Test the camera’s functionality by viewing the live feed on a computer or mobile device. |
Test the security camera’s connection and functionality
Once you have successfully connected your security camera to your home network, it is important to test its connection and functionality to ensure that it is working properly. Here are a few steps you can take to test your security camera:
1. Check the live feed:
Access the camera’s live feed through the manufacturer’s app or web interface to see if the camera is capturing footage and streaming it to your device. Make sure the video quality is clear and the camera is capturing the desired area.
2. Test the motion detection:
Trigger the camera’s motion detection feature by moving in front of the camera or creating movement in the camera’s field of view. Verify that the camera detects motion accurately and sends you notifications if configured to do so.
Ensure adequate security measures are in place
When integrating a security camera into your home network, it is crucial to ensure that adequate security measures are in place to protect your privacy and data. Here are some key steps to follow:
1. Change default passwords: Make sure to change the default password on your security camera to a strong, unique password that is not easily guessable.
2. Enable encryption: Ensure that your security camera supports encryption protocols such as WPA2 or WPA3 to secure the data transmitted over your network.
3. Update firmware: Regularly update the firmware on your security camera to patch any vulnerabilities and improve security features.
4. Use a firewall: Set up a firewall on your home network to monitor and control incoming and outgoing traffic to and from your security camera.
5. Enable two-factor authentication: If available, enable two-factor authentication for an additional layer of security when accessing your security camera remotely.
6. Secure your network: Ensure that your home network is secure by using strong passwords, disabling remote access to your router, and regularly monitoring for unauthorized devices.
By following these security measures, you can help protect your privacy and ensure that your security camera is integrated into your home network securely.
Monitor and manage your security camera remotely
Once you have successfully integrated your security camera into your home network, you can easily monitor and manage it remotely. Here are some steps to help you:
- Access the camera feed through the camera’s app or web interface.
- Set up alerts and notifications for motion detection or other events.
- Check the camera status regularly to ensure it is working properly.
- Adjust camera settings as needed, such as adjusting the sensitivity of motion detection.
- View recorded footage or snapshots from your camera.
By following these steps, you can effectively monitor and manage your security camera from anywhere, giving you peace of mind and enhancing the security of your home.

Regularly update and maintain your security camera system
Keeping your security camera system up to date is crucial for ensuring its effectiveness in protecting your home. Regular software updates help patch any vulnerabilities that could be exploited by cybercriminals.
Make sure to check for firmware updates provided by the manufacturer and install them promptly. Additionally, regularly inspect and clean your cameras to ensure clear visibility and optimal performance.


