

When it comes to ensuring the safety and security of your home or business, installing outdoor security cameras is a crucial step. Wired outdoor security cameras provide reliable surveillance and peace of mind, as they are not dependent on Wi-Fi signals like their wireless counterparts. In this guide, we will walk you through the steps to properly install wired outdoor security cameras to protect your property.
Step 1: Choose the Right Location
Before you start the installation process, carefully select the locations where you want to place the security cameras. Ideally, you should cover all entry points, such as doors and windows, as well as vulnerable areas like driveways and backyards. Make sure the chosen locations have access to power outlets for the cameras.
Step 2: Mount the Cameras
Once you have determined the placement of the cameras, it’s time to mount them. Use the mounting brackets and screws provided with the cameras to securely attach them to the walls or ceilings. Make sure the cameras are angled correctly to capture the desired areas and adjust them as needed.
Step-by-step guide to installing wired outdoor security cameras
Installing wired outdoor security cameras can enhance the safety and security of your property. Follow these steps to set up your surveillance system:
1. Choose the right location:
Decide where you want to install the cameras. Opt for strategic locations that cover entry points and vulnerable areas.
2. Mount the cameras:
Mount the cameras securely using the provided mounting hardware. Ensure they are positioned at the desired angle for optimal coverage.
Pro tip: Consider the camera’s field of view and adjust its positioning to capture the necessary areas.
Continue with the remaining steps to complete the installation process.
Choose the right location
When installing wired outdoor security cameras, choosing the right location is crucial for optimal surveillance coverage. Here are some factors to consider when selecting the placement:
| Visibility: | Ensure the camera has a clear line of sight to the area you want to monitor without obstructions like trees or walls. |
| Weatherproofing: | Place the camera in a location that is protected from direct exposure to harsh weather conditions to prevent damage. |
| Height: | Mount the camera at a suitable height to capture the desired field of view while keeping it out of reach from potential tampering. |
| Power source: | Ensure there is a nearby power source for the camera to connect to or consider using a power over Ethernet (PoE) setup. |
Prepare the necessary tools
Before you begin the installation process, make sure you have all the necessary tools and equipment ready. Here is a list of tools you will need:
| – Power drill | – Screwdriver |
| – Hammer | – Level |
| – Tape measure | – Ladder |
| – Outdoor-rated extension cords | – Mounting hardware |
Optional tools:
If you have access to these tools, they can also be helpful during the installation process:
- – Wire stripper
- – Fish tape
- – Silicone sealant
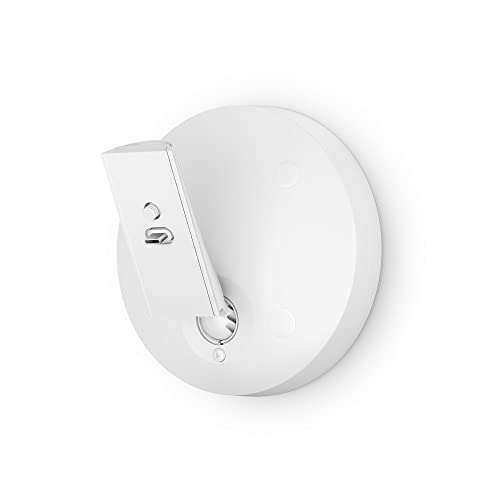
Mount the camera bracket
Once you have identified the ideal location for your outdoor security camera, it’s time to mount the camera bracket. Follow these steps:
| 1. | Use a pencil to mark the spots where you will be drilling holes for the bracket. |
| 2. | Secure the bracket in place using screws or bolts, depending on the surface material. |
| 3. | Make sure the bracket is securely attached to the wall or ceiling to provide a stable base for the camera. |
| 4. | Adjust the bracket to the desired angle for optimal camera positioning. |
| 5. | Double-check the stability and alignment of the bracket before mounting the camera. |
Run the cable to the camera
Now that you have selected the ideal location for your outdoor security camera, it’s time to run the cable to the camera. Follow these steps:
- Determine the best path for the cable from the DVR or power source to the camera location. Make sure to avoid any obstacles or potential hazards.
- Use cable clips or staples to secure the cable along the chosen path. This will help protect the cable and ensure a clean installation.
- If the cable needs to pass through walls or ceilings, use a cable pass-through kit to create a neat and professional-looking entry point.
- Connect the cable to the camera following the manufacturer’s instructions. Make sure the connection is secure to prevent any signal loss.
By running the cable carefully and securely, you can ensure a reliable connection and optimal performance from your outdoor security camera.
Connect the camera to the DVR
Once you have positioned the outdoor security camera and run the cables, it’s time to connect the camera to the DVR. Follow these steps:
- Locate the BNC connector: The camera cable will have a BNC connector on one end. Plug this connector into the BNC input port on the DVR.
- Connect the power supply: Attach the power adapter to the camera and the DVR. Make sure the power supply is properly connected and secure.
- Check the video feed: Turn on the DVR and monitor to ensure the camera is transmitting a clear video feed. You may need to adjust the camera angle or settings for the best view.
Once you have successfully connected the camera to the DVR, you can move on to setting up the recording and monitoring features of your outdoor security system.
Adjust the camera angle
Once you have mounted your outdoor security camera, it is important to adjust the camera angle to ensure optimal coverage of the area you want to monitor. Follow these steps to adjust the camera angle:
| 1. | Loosen the screws that secure the camera in place, allowing you to move the camera up, down, left, and right. |
| 2. | Position the camera so that it covers the desired area, such as your front door or driveway. |
| 3. | Tighten the screws to secure the camera in its new position. |
| 4. | Check the camera’s view on the monitor or smartphone app to ensure it captures the desired field of view. |
| 5. | Make any necessary adjustments to the camera angle until you are satisfied with the coverage. |
Test the camera’s functionality
Once you have completed the installation of your wired outdoor security camera, it is important to test its functionality to ensure that it is working properly. Here are some steps you can take to test your camera:
| 1. | Check the camera’s power source to make sure it is properly connected and receiving power. |
| 2. | Verify that the camera is connected to your recording device or monitor and that the video feed is clear and stable. |
| 3. | Test the camera’s night vision capabilities by checking the quality of the video in low light or dark conditions. |
| 4. | Adjust the camera’s angle and settings to ensure that it captures the desired area effectively. |
| 5. | Trigger the camera’s motion detection feature to see if it detects movement and records footage as expected. |
Secure the Camera and Cables
Once you have positioned the camera and connected the cables, it is important to secure them properly to prevent tampering or damage. Follow these steps to secure your outdoor security camera:
- Use mounting brackets or screws to attach the camera to a sturdy surface, such as a wall or ceiling. Make sure the camera is securely fastened and angled correctly to capture the desired area.
- Secure the cables by running them along a safe and discreet path, such as under eaves or through conduit. Avoid exposing cables where they can be easily accessed or cut by intruders.
- Use cable clips or ties to secure the cables in place and prevent them from dangling or getting tangled. This will help maintain a clean and professional installation.
By securely mounting the camera and organizing the cables, you can ensure your outdoor security system functions effectively and remains protected against potential threats.
Monitor and maintain the camera system
Once you have installed your wired outdoor security cameras, it is crucial to regularly monitor and maintain the camera system to ensure optimal performance and security. Here are some tips to help you keep your system in top condition:
1. Check camera angles: Periodically review the camera angles to ensure they cover the desired areas without obstructions.
2. Clean the lenses: Clean the camera lenses regularly to maintain clear image quality. Use a soft, lint-free cloth to wipe away any dust or dirt.
3. Test the cameras: Conduct regular tests to make sure all cameras are functioning properly and capturing footage as expected.
4. Review recordings: Regularly review the camera recordings to check for any suspicious activity or incidents that may require further investigation.
5. Update firmware: Keep the camera firmware up to date to ensure the latest security patches and features are installed.
6. Secure connections: Check and secure all camera connections to prevent tampering or unauthorized access to the system.
By following these maintenance tips, you can ensure that your wired outdoor security camera system remains effective and reliable in protecting your property.


