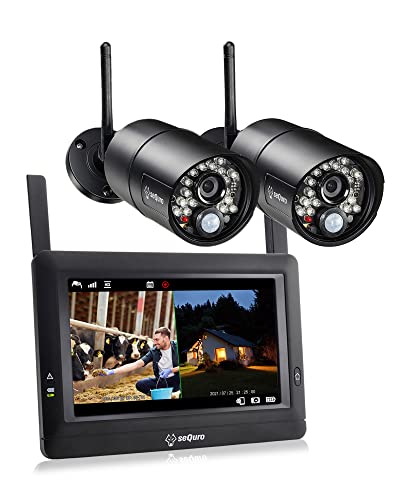
Uniden security cameras are a popular choice for home and business surveillance due to their reliability and advanced features. If you’re looking to enhance the security of your property, installing a Uniden security camera can be a great investment. In this guide, we’ll walk you through the steps to install your Uniden security camera effectively.
Before you begin the installation process, it’s essential to choose the right location for your security camera. Make sure to select a spot that provides optimal coverage of the area you want to monitor. Additionally, ensure that the camera is placed out of reach from potential tampering or vandalism.
Once you’ve identified the ideal location, the next step is to mount the camera securely. Most Uniden security cameras come with mounting hardware and instructions for easy installation. Follow the manufacturer’s guidelines to mount the camera properly and ensure it is positioned at the desired angle for optimal surveillance.
Step-by-step guide to install Uniden security camera
Installing a Uniden security camera is a straightforward process that can help enhance the security of your property. Follow these steps to successfully install your Uniden security camera:
Step 1: Choose the installation location
Decide where you want to install the Uniden security camera. Make sure it has a clear view of the area you want to monitor and is within range of your Wi-Fi network.
Step 2: Mount the camera
Use the included mounting hardware to securely attach the camera to the chosen location. Ensure it is positioned at the right angle for optimal coverage.
Tip: Consider installing the camera at a height that is out of reach to prevent tampering.
Step 3: Connect the camera to power
Plug the power adapter into a nearby outlet and connect it to the camera. Make sure the power source is stable and reliable to ensure uninterrupted surveillance.
Note: Some Uniden security cameras may be battery-powered, so follow the manufacturer’s instructions for charging and installation.
By following these steps carefully, you can successfully install your Uniden security camera and enjoy enhanced security and peace of mind.
Preparing your installation site
Before installing your Uniden security camera, it is crucial to properly prepare the installation site to ensure optimal performance and functionality. Follow these steps to get your site ready:
- Choose the location: Select a suitable location for your camera that provides a clear view of the area you want to monitor.
- Check the Wi-Fi signal: Ensure that the installation site has a strong Wi-Fi signal to maintain a stable connection with your camera.
- Clear obstructions: Remove any obstacles or obstructions that could block the camera’s view, such as branches, walls, or other objects.
- Secure mounting surface: Make sure the mounting surface is stable and secure to prevent the camera from falling or shifting once installed.
- Consider weather conditions: If installing the camera outdoors, choose a location that is protected from extreme weather conditions to prolong the camera’s lifespan.
- Access to power source: Ensure that the installation site has access to a power source for the camera to function properly.
Mounting the Camera
Before mounting the Uniden security camera, make sure to choose a suitable location that provides a clear view of the area you want to monitor. Here are the steps to mount the camera:

- Use the mounting template provided with the camera to mark the screw holes on the wall or ceiling.
- Drill pilot holes at the marked locations using a suitable drill bit.
- Securely attach the mounting bracket to the wall or ceiling using screws and anchors.
- Attach the camera to the mounting bracket using the provided screws.
- Adjust the camera angle to ensure it captures the desired area effectively.
- Make sure the camera is securely mounted and the connections are properly secured.
Once the camera is securely mounted, you can proceed with the setup and configuration process to start using your Uniden security camera.
Running the cables
Before installing your Uniden security camera, you need to run the cables from the camera to the power source and the recording device. Start by determining the best route for the cables to ensure they are hidden and protected from the elements.
Use cable clips or cable channels to secure the cables along the chosen route, making sure they are not pinched or twisted. If running the cables outdoors, consider using weatherproof cable protectors to shield them from rain and other environmental factors.
Once the cables are in place, connect them to the power source and the recording device according to the manufacturer’s instructions. Test the connections to ensure the camera is receiving power and transmitting video feed properly.
Connecting the camera to power
Before installing your Uniden security camera, you need to connect it to power. Follow these steps to ensure proper power connection:
- Locate a nearby power outlet where you can plug in the camera’s power adapter.
- Plug one end of the power adapter into the camera’s power input port.
- Plug the other end of the power adapter into the power outlet.
- Ensure the power adapter is securely connected and the camera’s LED indicator lights up to indicate power.
- You may need to use an extension cord if the power outlet is not within reach of the camera.
Once the camera is connected to power, you can proceed with the installation process as per the manufacturer’s instructions.
Configuring the camera settings
After successfully installing your Uniden security camera, it is essential to configure the camera settings to ensure optimal performance. Follow these steps to set up your camera:
- Access the camera’s settings menu by logging into the camera’s web interface using the IP address provided in the user manual.
- Once logged in, navigate to the settings tab to customize various features such as motion detection, recording schedule, image quality, and more.
- Adjust the motion detection sensitivity to ensure accurate alerts when motion is detected within the camera’s view.
- Set up a recording schedule based on your preferences, whether you want continuous recording or motion-triggered recording.
- Configure the image quality settings to balance between image clarity and storage space consumption.
- Ensure that the camera is connected to the internet to enable remote access and monitoring through the Uniden security camera app.
By configuring the camera settings according to your needs, you can maximize the functionality of your Uniden security camera and enhance your home or business security system.
Testing the camera
Once the Uniden security camera is successfully installed and connected to the power source and network, it is essential to test its functionality to ensure proper operation. Follow these steps to test the camera:
- Access the camera feed through the designated app or software on your smartphone, tablet, or computer.
- Verify that the camera is capturing clear and high-quality footage of the monitored area.
- Test the camera’s motion detection feature by moving in front of the camera and checking if it triggers alerts or recordings.
- Adjust the camera’s settings, such as sensitivity and recording duration, to meet your specific security needs.
- Test the night vision capabilities of the camera by checking the quality of footage in low-light or dark conditions.
- Ensure that the camera is securely mounted and positioned to provide optimal coverage of the monitored area.
- Perform a connectivity test to ensure that the camera remains connected to the network without any interruptions.
By thoroughly testing the Uniden security camera, you can troubleshoot any issues and optimize its performance for reliable surveillance and security monitoring.


