


Ensuring the safety of your home or business is crucial in today’s world. Smonet security cameras offer a reliable and effective way to monitor your property and deter potential intruders. However, installing these cameras may seem like a daunting task for those who are not familiar with the process. In this guide, we will walk you through the steps to install Smonet security cameras and help you set up a robust surveillance system.
Before you begin the installation process, it’s essential to gather all the necessary tools and equipment. Make sure you have the Smonet security camera kit, a power adapter, a monitor or a smartphone for viewing, and any additional cables or mounting accessories that may be required. Once you have everything you need, you can start the installation process by following these simple steps.

Step-by-Step Guide to Installing Smonet Security Cameras
Installing Smonet security cameras is a relatively straightforward process that can enhance the security of your property. Follow these steps to set up your Smonet security cameras:
Step 1: Choose Camera Locations
Decide where you want to place your Smonet security cameras. Consider areas with high traffic or points of entry for optimal coverage.
Step 2: Mount the Cameras
Use the mounting hardware provided to securely install the cameras in the chosen locations. Ensure they are positioned at the desired angle for maximum visibility.
Tip: Make sure the cameras are mounted at a height that is out of reach to prevent tampering.
Step 3: Connect the Cameras
Connect the cameras to the DVR or NVR system using the provided cables. Follow the manufacturer’s instructions for proper connection and setup.
With these steps completed, your Smonet security cameras should be successfully installed and ready to monitor your property.
Choosing the Right Location for Your Cameras
When installing your Smonet security cameras, it is essential to carefully choose the right location for each camera to maximize their effectiveness. Here are some key factors to consider:
1. Coverage Area:
Determine the areas you want to monitor and ensure that the camera’s field of view covers those areas effectively. Consider the angle and range of the camera to ensure optimal coverage.
2. Accessibility:
Place the cameras in locations that are easily accessible for maintenance and adjustments. Avoid placing them too high or in hard-to-reach areas to ensure you can easily check and maintain them when needed.
By carefully selecting the right locations for your Smonet security cameras, you can enhance the security of your property and enjoy peace of mind knowing that your surveillance system is effectively monitoring your premises.
Mounting the Cameras Properly
Properly mounting your Smonet security cameras is crucial to ensure optimal performance. Follow these steps to mount your cameras securely:
- Choose the right location: Select a spot that provides a clear view of the area you want to monitor without obstructions.
- Use the mounting template: Align the mounting template with the chosen location to mark the drilling holes accurately.
- Drill holes: Use a drill to create holes for mounting the camera bracket securely.
- Attach the bracket: Securely attach the camera bracket to the drilled holes using screws.
- Mount the camera: Place the camera on the bracket and adjust its position for the desired angle of view.
- Secure the camera: Tighten the screws on the bracket to secure the camera in place.
- Check the positioning: Ensure that the camera is positioned correctly and has a clear view of the monitoring area.
Connecting the Cameras to Power
Once you have positioned your security cameras in the desired locations, it’s time to connect them to power. Follow these steps to ensure a proper power connection:
- Locate the power adapter that came with your security camera system.
- Connect the power adapter to a power outlet near each camera location.
- Use the provided cables to connect the power adapter to the camera.
- Make sure the power connections are secure and that the camera receives power.
Once you have successfully connected the cameras to power, you can move on to setting up the recording system and configuring the camera settings.
Setting Up the DVR/NVR System
Once you have connected all your cameras to the DVR/NVR system, it’s time to set up the system for recording and monitoring. Here are the steps to set up your DVR/NVR system:
- Connect the DVR/NVR system to a power source and turn it on.
- Connect the DVR/NVR system to a monitor or TV using an HDMI or VGA cable.
- Use the included mouse or remote control to navigate the system’s interface.
- Follow the on-screen instructions to set up your system’s date, time, and recording preferences.
- Configure the recording settings such as motion detection, schedule recording, and video quality.
- Create user accounts and set up permissions for accessing the system.
- Connect the DVR/NVR system to your network for remote viewing and monitoring.
- Install the necessary software or app on your mobile device or computer to access the system remotely.
- Test the system to ensure the cameras are recording properly and you can access the live feed remotely.
Once you have completed these steps, your DVR/NVR system should be set up and ready to use for monitoring and recording your security cameras.
Configuring the Camera Settings
Once you have successfully installed your Smonet security camera, it’s important to configure the camera settings to ensure optimal performance and functionality. Follow these steps to configure the camera settings:
1. Access the Camera’s Web Interface
Open a web browser on your computer and enter the camera’s IP address in the address bar. You will be prompted to enter the camera’s username and password.
2. Adjust Camera Settings
Once logged in, you can adjust various settings such as image quality, resolution, motion detection sensitivity, and more. Make sure to customize the settings according to your preferences and security needs.
By configuring the camera settings, you can enhance the overall security of your property and ensure that the camera operates efficiently. Make sure to save any changes you make to the settings before exiting the web interface.
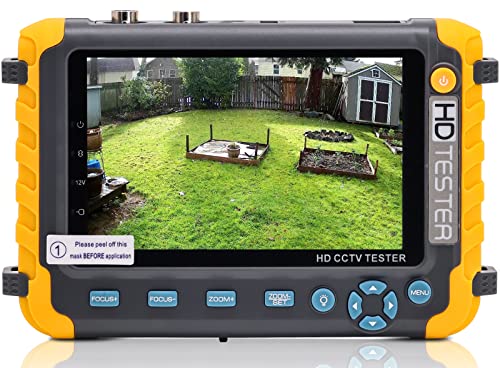
Testing and Troubleshooting Your Smonet Security Cameras
Once you have successfully installed your Smonet security cameras, it is important to test them to ensure they are functioning properly. Here are some steps you can take to test and troubleshoot your cameras:
| Step 1: Check the camera connections |
| Step 2: Verify power supply |
| Step 3: Test the camera feed on your monitor or smartphone |
| Step 4: Adjust camera angles and settings if needed |
| Step 5: Monitor camera performance over time |
| Step 6: If you encounter any issues, refer to the user manual for troubleshooting tips |
By following these steps, you can ensure that your Smonet security cameras are working efficiently and providing the surveillance you need for your home or business.


