


Home security is a top priority for many homeowners, and installing security cameras can provide an added layer of protection for your property. With the advancement of technology, setting up simple home security cameras has become easier and more affordable than ever.
Whether you want to keep an eye on your pets while you’re away, monitor the front door for package deliveries, or simply enhance the security of your home, installing security cameras can give you peace of mind.

From wireless options to DIY installation kits, there are various ways to set up security cameras in and around your home. In this article, we’ll guide you through the steps to install simple home security cameras to help you safeguard your property.
Step-by-Step Guide to Installing Basic Home Security Cameras
Installing basic home security cameras can help enhance the safety of your property and provide peace of mind. Follow these steps to set up your security cameras:
Step 1: Choose the Right Camera Placement
Decide where you want to install the cameras to cover key entry points and vulnerable areas of your home.
Step 2: Mount the Cameras
Use the mounting hardware provided with the cameras to securely attach them to walls, ceilings, or other surfaces.
Tip: Ensure the cameras are positioned at the right angle for optimal coverage.
Step 3: Connect the Cameras
Connect the cameras to a power source and follow the manufacturer’s instructions to link them to your home Wi-Fi network.
Tip: Consider using a Wi-Fi extender if the camera signal is weak in certain areas.
By following these simple steps, you can easily install basic home security cameras to protect your property and loved ones.
Choose the Right Camera System for Your Needs
Before installing home security cameras, it’s essential to choose the right camera system that meets your specific needs. Here are a few factors to consider:
1. Indoor vs. Outdoor Cameras
Decide whether you need indoor cameras to monitor the inside of your home or outdoor cameras to secure the perimeter. Outdoor cameras are weatherproof and built to withstand the elements, while indoor cameras are designed for indoor use.
2. Wired vs. Wireless Cameras
Consider whether you prefer wired cameras that require a physical connection to a power source and recording device or wireless cameras that operate using Wi-Fi. Wireless cameras offer more flexibility in terms of installation but may require periodic battery changes.
Determine the Best Locations for Camera Placement
Before installing your home security cameras, it’s crucial to determine the best locations for optimal coverage. Here are some tips to help you decide where to place your cameras:
1. Identify vulnerable areas: Think about the areas around your home that are most vulnerable to break-ins or suspicious activity, such as entry points like doors and windows.
2. Consider the camera’s field of view: Make sure the camera’s field of view covers the areas you want to monitor. Position cameras at angles that provide the best coverage.
3. Avoid obstacles: Place cameras where they won’t be obstructed by bushes, trees, or other objects. Ensure there are no obstructions that could block the camera’s view.
4. Install cameras at eye level: Mount cameras at eye level to capture clear images of faces for easy identification in case of an incident.
5. Use multiple cameras: For comprehensive coverage, consider installing multiple cameras at different locations around your home to reduce blind spots.
By carefully selecting the best locations for your home security cameras, you can enhance the effectiveness of your surveillance system and better protect your property.
Gather the Necessary Tools and Equipment
Before you begin installing your simple home security cameras, make sure you have all the necessary tools and equipment on hand. Here is a list of items you will need:
- Security cameras
- Mounting brackets
- Screws and anchors
- Power adapter
- Drill and drill bits
- Screwdriver
- Network cable (if applicable)
- Monitor or mobile device for viewing
Having these tools and equipment ready will ensure a smooth installation process and help you set up your home security system efficiently.
Install the Camera Mounts and Brackets
Before mounting your security cameras, you need to install the camera mounts and brackets. Begin by selecting a suitable location for each camera and then attach the mounts securely to the wall or ceiling using the provided screws and anchors. Make sure the mounts are level and stable to ensure proper camera positioning.
Once the mounts are in place, attach the camera brackets to the mounts using the provided hardware. Adjust the brackets to the desired angle for optimal camera coverage. Ensure that the brackets are securely fastened to the mounts to prevent any movement or instability.
After installing the mounts and brackets, you are now ready to attach the security cameras to the brackets. Follow the manufacturer’s instructions to securely attach the cameras to the brackets, making sure they are properly aligned and tightened. Test the camera’s positioning and adjust if necessary before finalizing the installation.
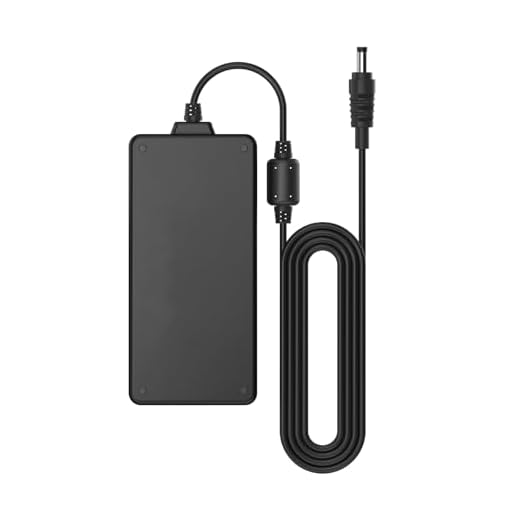
Connect the Cameras to the Power Source
Once you have mounted the cameras in the desired locations, the next step is to connect them to a power source. Most security cameras come with a power adapter that needs to be plugged into a power outlet. Follow these steps to connect the cameras:
- Locate the power adapter that came with each camera.
- Connect the power adapter to the camera’s power input port.
- Plug the power adapter into a nearby power outlet. Make sure the outlet is easily accessible and not blocked by any obstacles.
- Repeat this process for each camera you have installed.
Once the cameras are connected to the power source, they should start powering up and you can proceed with the next steps to set up the monitoring system.
Set Up the Camera System’s Monitoring Software
Once your cameras are installed and connected to the network, you will need to set up the monitoring software provided with the camera system. This software will allow you to view live feeds from your cameras, as well as access recorded footage.
Follow the instructions provided by the camera manufacturer to install the monitoring software on your computer or mobile device. Make sure to set up any necessary user accounts and passwords to access the system securely.
Once the software is installed, you can configure the settings for each camera, such as motion detection sensitivity, recording schedules, and alerts. Take the time to familiarize yourself with the software’s interface and features to get the most out of your home security camera system.
Configure the Camera Settings for Optimal Performance
Once you have installed your home security camera, it is important to configure the settings to ensure optimal performance. Here are some key settings to consider:
| Resolution: | Adjust the resolution of the camera based on your needs. Higher resolution provides clearer images but may require more storage space. |
| Frame Rate: | Set the frame rate to capture smooth footage. A higher frame rate is ideal for capturing fast-moving objects. |
| Field of View: | Position the camera to cover the desired area with the appropriate field of view. Ensure there are no obstructions blocking the view. |
| Recording Schedule: | Create a recording schedule based on your preferences. You can set it to record continuously or only when motion is detected. |
| Alerts: | Configure alerts to receive notifications when motion is detected or any other predefined event occurs. Customize alert settings to suit your needs. |
By adjusting these settings, you can optimize your home security camera for effective monitoring and surveillance.

Test the Cameras and Adjust as Needed
After installing your home security cameras, it is crucial to test them to ensure they are functioning properly. Follow these steps to test your cameras:
- Check the camera angles: Make sure the cameras are positioned correctly to capture the desired areas.
- Test the video feed: Use the camera’s software or app to view the live feed and check for any issues or blind spots.
- Adjust settings: If needed, adjust camera settings such as sensitivity, motion detection, and recording preferences.
Testing your cameras will help you identify any potential problems early on and make necessary adjustments for optimal security coverage.
Enjoy the Peace of Mind Provided by Your New Home Security System
Now that you have installed your simple home security cameras, you can enjoy the peace of mind that comes with knowing your home is protected. Whether you are at work, on vacation, or simply relaxing at home, your security system will help you feel safe and secure.
Monitor Your Home Anytime, Anywhere
With your new security system in place, you can monitor your home from anywhere using your smartphone or computer. Check in on your property, receive alerts for any unusual activity, and rest easy knowing that you are in control of your home’s security.
Protect Your Loved Ones and Possessions
By investing in a home security system, you are taking important steps to protect your loved ones and your valuable possessions. With cameras in place, you can deter potential intruders and quickly alert authorities in case of an emergency.
Take advantage of the peace of mind that comes with a simple home security system. Rest easy knowing that your home is protected and your loved ones are safe.


