Having security cameras around your house can provide you with a sense of safety and peace of mind. Whether you want to monitor your property while you’re away or keep an eye on your surroundings at all times, installing security cameras is a smart investment.
Before you start the installation process, it’s important to plan out where you want to place your cameras. Think about the areas of your property that are most vulnerable to break-ins or other security threats. Common locations include the front door, back door, garage, and any other entry points to your home.

Once you’ve identified the key areas for camera placement, you’ll need to choose the right type of cameras for your needs. There are many options available, from wired to wireless cameras, indoor to outdoor cameras, and even smart cameras that can be accessed remotely through an app.
Step-by-step guide for installing security cameras
Installing security cameras around your house can provide peace of mind and added protection. Follow these steps to ensure a successful installation:
1. Plan your camera placement
Before installing the cameras, carefully plan where you want to place them. Consider areas that need surveillance, such as entry points, windows, and blind spots. Make sure the cameras have a clear line of sight and cover the desired areas.
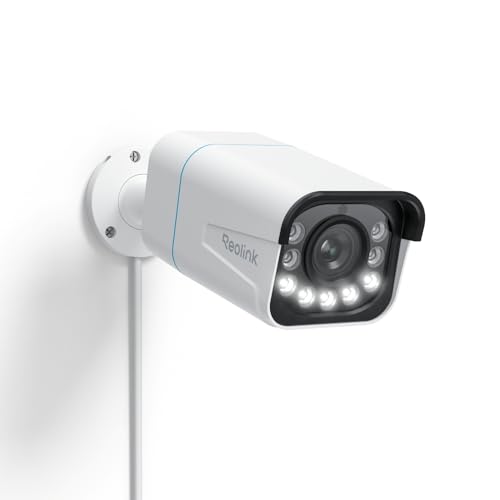
2. Install the cameras
| 1. Choose the right cameras for your needs |
| 2. Mount the cameras securely using appropriate hardware |
| 3. Adjust the camera angles to capture the best view |
| 4. Connect the cameras to a power source and test them |
By following these steps, you can effectively install security cameras around your house to enhance your home security.
Choosing the right location for your security cameras
When installing security cameras around your house, choosing the right location is crucial for maximizing their effectiveness. Here are some key factors to consider:
1. Entry Points
Place cameras near all entry points to your home, including doors, windows, and garage doors. This will help deter potential intruders and capture any suspicious activity.
2. Blind Spots
Avoid placing cameras in areas with obstructions or blind spots, such as trees, bushes, or walls. Make sure the camera has a clear line of sight to the area you want to monitor.
By strategically selecting the locations for your security cameras, you can enhance the security of your home and have better surveillance coverage.
Mounting the cameras securely for optimal coverage
When mounting your security cameras, it’s important to choose strategic locations that provide optimal coverage of your property. Here are some tips to ensure you mount your cameras securely:
1. Choose high vantage points for outdoor cameras to capture a wide field of view.
2. Ensure the cameras are placed out of reach to prevent tampering or vandalism.
3. Use weatherproof mounting brackets to protect the cameras from the elements.
4. Adjust the angle of the cameras to eliminate blind spots and maximize coverage.
5. Securely fasten the cameras to the mounting surface using appropriate screws and anchors.
By following these guidelines, you can ensure that your security cameras are mounted securely and provide optimal coverage of your property.
Connecting the cameras to a monitoring system
Once you have installed the security cameras around your house, the next step is to connect them to a monitoring system for surveillance. Follow these steps to ensure a seamless connection:
- Choose a monitoring system: Select a monitoring system that is compatible with your security cameras. This could be a dedicated DVR (Digital Video Recorder) or a cloud-based system.
- Connect the cameras: Use the provided cables to connect each camera to the monitoring system. Ensure that the cables are securely connected to avoid any signal loss.
- Configure the system: Follow the manufacturer’s instructions to set up the monitoring system. This may involve assigning each camera a specific channel and configuring the recording settings.
- Test the connection: Once everything is set up, test the connection by viewing the camera feed on the monitoring system. Make sure that each camera is capturing the desired area and that the footage is clear.
- Adjust settings: Fine-tune the settings on the monitoring system to meet your surveillance needs. This could include adjusting the recording schedule, motion detection sensitivity, and video quality.
By following these steps, you can effectively connect your security cameras to a monitoring system for enhanced security and peace of mind.
Testing and Adjusting Camera Angles for Best Results
Once you have installed your security cameras around your house, it is important to test and adjust their angles to ensure optimal coverage and effectiveness. Here are some tips for testing and adjusting your camera angles:
1. Test Camera Views
After installing the cameras, check the camera views to make sure they cover the intended areas. Walk around your property and test each camera’s field of view to identify any blind spots or areas that need better coverage.
2. Adjust Camera Angles
Use the camera’s mounting brackets to adjust the angle of the cameras for better coverage. Aim the cameras slightly downward to avoid capturing too much sky or upward to avoid capturing too much ground. Make sure the cameras are positioned at the right height and angle to capture clear images of any potential intruders.
| Camera Location | Adjusted Angle |
|---|---|
| Front Door | Positioned slightly downward to capture faces |
| Backyard | Adjusted to cover the entire backyard area |
| Side Gate | Positioned at an angle to capture anyone entering the gate |
By testing and adjusting your camera angles, you can ensure that your security cameras provide the best coverage and protection for your home.
Maintaining and troubleshooting your security camera system
Proper maintenance of your security camera system is crucial for ensuring its effectiveness in monitoring your property. Here are some tips to help you maintain and troubleshoot your security camera system:
Regular Cleaning
Keep your camera lenses clean by gently wiping them with a soft, dry cloth. Dust and dirt can accumulate on the lenses over time, affecting the quality of the footage. Regular cleaning will ensure clear images and proper functioning of your cameras.
Check Connections
Periodically inspect the connections between your cameras, cables, and recording device. Loose or damaged connections can cause disruptions in the footage or even complete loss of signal. Make sure all connections are secure and in good condition.
| Issue | Solution |
|---|---|
| Blurred Images | Adjust the focus of the camera lens or clean it to remove any obstructions. |
| No Signal | Check the power supply, cables, and connections to ensure everything is properly connected and functioning. |
| Interference | Move any devices emitting electromagnetic interference away from the camera system to improve signal quality. |
By following these maintenance tips and troubleshooting common issues, you can ensure that your security camera system continues to provide reliable surveillance of your property.