


Securing your home with a robust security camera system is essential in today’s world. Whether you want to keep an eye on your property while you’re away or deter potential intruders, installing security cameras is a smart investment. However, installing cameras on a two-story house comes with its own set of challenges.
In this guide, we’ll walk you through the steps to install security cameras on a two-story house effectively and efficiently. From choosing the right camera placement to running cables and setting up the monitoring system, we’ve got you covered. By following these steps, you can enhance the security of your home and gain peace of mind.
Step-by-step guide to installing security camera on a 2 story house
Installing a security camera on a 2 story house can provide added protection and peace of mind. Follow these steps to properly install a security camera:
1. Choose the right location
Decide where you want to place the security camera. Consider areas with high traffic or vulnerable entry points.
2. Mount the camera
- Use a ladder to reach the desired location.
- Securely mount the camera using screws and a mounting bracket.
3. Run the cables
- Connect the camera to a power source.
- Run the cables along the wall or ceiling to conceal them.
4. Set up the camera
- Follow the manufacturer’s instructions to set up the camera.
- Adjust the angle and settings for optimal coverage.
By following these steps, you can successfully install a security camera on a 2 story house to enhance your home security.
Assessing your security needs
Before installing security cameras on your 2-story house, it’s important to assess your security needs. Consider the following factors:
- Areas to cover: Identify the key areas around your house that require surveillance, such as entry points, windows, and blind spots.
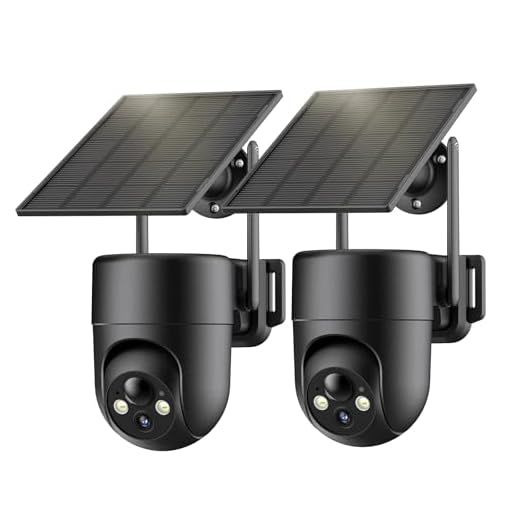
- Camera types: Determine the type of cameras you need based on your requirements, such as indoor, outdoor, wired, or wireless cameras.
- Resolution: Choose cameras with adequate resolution to capture clear images and videos.
- Night vision: If you need surveillance at night, opt for cameras equipped with night vision capabilities.
- Remote access: Decide if you want to access the camera feeds remotely via a smartphone or computer.
Choosing the right security camera
When selecting a security camera for your 2-story house, there are several factors to consider to ensure you get the best coverage and protection. Here are some key points to keep in mind:
1. Camera resolution
Choose a camera with high resolution to capture clear and detailed footage. Look for cameras with at least 1080p resolution for optimal image quality.
2. Camera type
Consider whether you need a wired or wireless camera. Wired cameras are more reliable but may require professional installation, while wireless cameras offer flexibility but depend on a strong Wi-Fi signal.
By carefully considering these factors, you can select the right security camera for your 2-story house that meets your specific needs and provides peace of mind.
Selecting the installation location
When installing security cameras on a 2-story house, it is crucial to carefully select the installation locations to maximize coverage and effectiveness. Here are some key factors to consider:
| 1. Coverage Area | Determine the areas you want to monitor and choose locations that provide optimal coverage of those areas. Consider the field of view of the camera and ensure it covers key entry points and vulnerable areas. |
| 2. Height | Install cameras at a height that provides a clear view without being easily accessible or tampered with. For a 2-story house, consider mounting cameras at the second-floor level to capture a wider view. |
| 3. Wiring | Plan the camera placement based on the availability of power sources and the ease of running wiring. Consider wireless options for easier installation and maintenance. |
| 4. Weather Resistance | Choose weatherproof cameras and make sure the installation locations are shielded from direct sunlight or harsh weather conditions to ensure longevity and clear footage. |
Gathering necessary tools and equipment
Before installing security cameras on a 2-story house, you will need to gather the necessary tools and equipment. Here are some essential items you will need:
- Security cameras: Make sure you have the right number of cameras for your property, as well as any additional features you may need such as night vision or motion detection.
- DVR or NVR: You will need a digital video recorder (DVR) or network video recorder (NVR) to store and manage the footage from your security cameras.
- Cabling: Depending on the type of cameras you have chosen, you will need cables to connect them to the DVR or NVR. Consider whether you need Ethernet cables, coaxial cables, or power cables.
- Power supply: Make sure you have a reliable power source for your cameras. You may need to install power outlets or use power over Ethernet (PoE) for some cameras.
- Tools: Have a set of basic tools on hand, such as a drill, screwdriver, ladder, and cable cutters, to help with the installation process.
- Weatherproofing equipment: If your cameras will be exposed to the elements, make sure you have weatherproofing equipment such as junction boxes, cable connectors, and silicone sealant.
By gathering these tools and equipment before you start the installation process, you can ensure that you have everything you need to set up your security cameras effectively and securely on your 2-story house.
“`html
Mounting the camera on the exterior wall
When mounting a security camera on a 2-story house, it’s important to choose the right location on the exterior wall for optimal coverage. Follow these steps to securely mount your camera:
Tools and materials needed:
| Drill | Screws and anchors |
| Mounting bracket | Power drill |
1. Choose a location on the exterior wall that provides a clear view of the area you want to monitor.
2. Use a power drill to create pilot holes for the screws that will secure the mounting bracket in place.
3. Attach the mounting bracket to the exterior wall using screws and anchors for added stability.
4. Securely attach the security camera to the mounting bracket according to the manufacturer’s instructions.
5. Adjust the camera angle to ensure the desired coverage area is captured.
6. Connect the camera to a power source and test the camera’s functionality before finalizing the installation.
Running cables and connecting to power source
Once you have determined the location for your security camera, you will need to run cables from the camera to your recording device or monitor. For a 2-story house, this may require running cables through walls, ceilings, or even outside the house.
Make sure to use weatherproof cables if you need to run them outside. You may also need to use cable clips or staples to secure the cables along the way.
When connecting your security camera to a power source, you can either use a power outlet or hardwire the camera to your electrical system. Make sure to follow the manufacturer’s instructions for the correct power source and voltage.
It’s important to ensure that the cables are properly connected and secure to prevent any interruptions in the camera’s feed. Test the camera’s connection to the power source before mounting it in its final location.
Setting up the camera system and testing
Once you have positioned the security cameras in the desired locations on your 2-story house, it’s time to set up the camera system and test its functionality. Follow these steps to ensure your security camera system is properly installed:
- Connect the cameras to the DVR or NVR using the provided cables.
- Power on the DVR/NVR and the cameras to ensure they are receiving power.
- Access the camera system’s interface on your computer or mobile device to configure the settings and view the camera feeds.
- Adjust the camera angles and settings to cover the desired areas and ensure clear footage.
Testing the security camera system:
- Walk around the perimeter of your house to test the camera coverage and visibility.
- Check the camera feeds on your computer or mobile device to verify the image quality and motion detection.
- Test the night vision capabilities of the cameras by monitoring the feeds in low-light conditions.
By following these steps and testing your security camera system thoroughly, you can ensure that your 2-story house is effectively protected with a reliable surveillance system.
Adjusting camera angles and securing the installation
Once you have installed your security camera on your 2-story house, it is important to adjust the camera angles to ensure optimal coverage. Make sure the camera is facing the desired area and adjust the angle as needed.
To secure the installation, consider using mounting brackets or screws to firmly attach the camera to the wall. This will help prevent the camera from being easily tampered with or removed. Additionally, make sure all cables are securely fastened and hidden to prevent tampering.
Regularly check the camera to ensure it is still securely mounted and properly angled for maximum security coverage. Adjust the camera as needed to adapt to changing lighting conditions or to capture different areas of interest.


