How to install ring floodlight camera motion-activated hd security cam
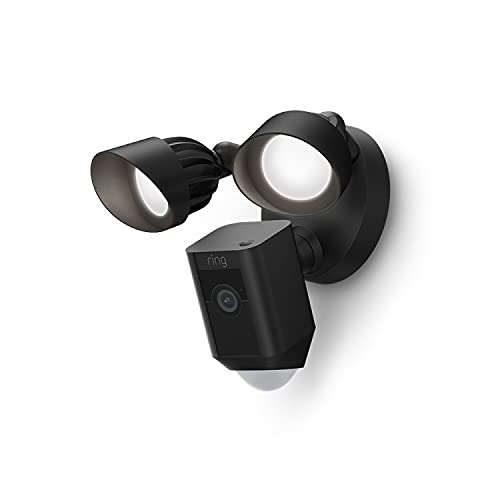


Ring Floodlight Camera is a cutting-edge motion-activated HD security camera that provides top-notch surveillance for your property. Whether you’re looking to enhance your home security or keep an eye on your surroundings, installing this camera is a smart choice. In this guide, we’ll walk you through the step-by-step process of setting up your Ring Floodlight Camera to ensure optimal performance.
Step 1: Planning and Preparation
Prior to installation, it’s essential to plan out the placement of your Ring Floodlight Camera. Choose a location that offers a wide field of view and covers key areas of your property. Ensure that the camera is within range of your Wi-Fi network for seamless connectivity.
Step-by-Step Guide to Installing Ring Floodlight Camera
Installing a Ring Floodlight Camera is a straightforward process that can enhance the security of your home. Follow these steps to set up your motion-activated HD security cam:
Step 1: Gather Your Tools
Before you begin, make sure you have all the necessary tools handy. You will need a ladder, a screwdriver, wire strippers, and a drill.
Step 2: Turn Off Power
Prior to installation, turn off power at the circuit breaker for the area where you will be installing the floodlight camera.
Step 3: Mount the Floodlight Camera
- Choose a suitable location for mounting the camera that provides a clear view of the area you want to monitor.
- Use the provided mounting bracket and screws to attach the camera to the wall or ceiling.
Step 4: Connect Wiring
- Follow the manufacturer’s instructions to connect the wiring for the floodlight camera. Use wire nuts to securely connect the wires.
- If necessary, consult a licensed electrician for assistance with wiring.
Step 5: Adjust Settings
Once the camera is securely mounted and wired, adjust the settings on the Ring app to customize your security preferences.
Following these steps will help you successfully install your Ring Floodlight Camera and enjoy enhanced security for your home.
Unboxing and Checking Components
When you receive your Ring Floodlight Camera Motion-Activated HD Security Cam, the first step is to carefully unbox it and check all the components to ensure everything is included and in good condition. Here is a list of components you should find in the box:
| 1. Ring Floodlight Camera |
| 2. Mounting Bracket |
| 3. Installation Tools (screws, screwdriver, etc.) |
| 4. User Manual and Setup Guide |
| 5. Power Adapter and Cable |
| 6. Security Stickers |
Ensure that all the components are present and undamaged before proceeding with the installation process. If anything is missing or damaged, contact Ring customer support for assistance.
Choosing the Right Location for Installation
Before installing your Ring Floodlight Camera, it is crucial to choose the right location to ensure optimal performance and security coverage.
Consider the Following Factors:
1. Height: Install the camera at a height of 9-10 feet above the ground for the best angle and coverage.
2. Range: Ensure the camera is within the Wi-Fi range to maintain a stable connection.
3. Lighting: Avoid installing the camera in direct sunlight or facing bright lights to prevent glare and interference.
4. Obstructions: Position the camera away from obstructions like trees or bushes that may block the view or trigger false alarms.
Power Source Considerations
Before installing your Ring Floodlight Camera, it’s important to consider the power source for the device. The camera requires a constant source of power to function properly and provide continuous surveillance of your property.
There are two main options for powering your Ring Floodlight Camera: hardwiring it into your existing electrical system or using a plug-in power adapter. Hardwiring the camera requires some electrical knowledge and may involve hiring a professional electrician to ensure proper installation.
If you choose to use a plug-in power adapter, make sure to place the camera within reach of an electrical outlet. Be aware that the camera needs to be connected to a stable Wi-Fi network for optimal performance.
Consider the location of the camera and the availability of power sources when planning your installation. Ensure that the power source you choose is reliable and can support the continuous operation of the camera.
Mounting the Floodlight Camera
Before mounting the floodlight camera, make sure to choose a location that provides a clear view of the area you want to monitor and is within range of your Wi-Fi network.
Steps:
- Attach the mounting bracket to the desired location using the provided screws. Make sure it is securely fixed to the surface.
- Connect the wiring from the floodlight camera to the existing electrical box or follow the instructions for installation if using a new electrical box.
- Secure the floodlight camera to the mounting bracket using the provided screws.
- Adjust the angle and direction of the camera to capture the desired area and tighten the screws to lock it in place.
Connecting to Wi-Fi Network
After installing the Ring Floodlight Camera, the next step is to connect it to your Wi-Fi network. Follow these steps to ensure a successful connection:
- Open the Ring app on your smartphone or tablet.
- Select the Ring Floodlight Camera from the list of devices.
- Tap on the “Setup Device” option.
- Follow the on-screen instructions to connect the camera to your Wi-Fi network.
- Make sure to enter the correct Wi-Fi network name and password.
- Wait for the camera to connect to the network, which may take a few minutes.
- Once connected, you will receive a confirmation message in the app.
After successfully connecting the Ring Floodlight Camera to your Wi-Fi network, you can start using its motion-activated HD security camera features to monitor your home or property.
Adjusting Motion Settings
Once you have installed your Ring Floodlight Camera, you may want to adjust the motion settings to customize the camera’s sensitivity to motion. Here’s how you can do it:
| 1. | Open the Ring app on your smartphone or tablet. |
| 2. | Select your Ring Floodlight Camera from the list of devices. |
| 3. | Go to the settings for your camera. |
| 4. | Find the motion settings option and click on it. |
| 5. | You can adjust the motion sensitivity slider to increase or decrease the camera’s sensitivity to motion. |
| 6. | You can also set up motion zones to specify where you want the camera to detect motion. |
| 7. | Save the changes and your Ring Floodlight Camera will now be customized to your preferences. |
Testing the Camera and Motion Detection
Once you have successfully installed your Ring Floodlight Camera, it’s time to test its functionality. Here’s how you can test the camera and motion detection:
- Open the Ring app on your smartphone or tablet.
- Select the Floodlight Camera from the list of devices.
- Tap on the Live View button to see the camera’s live feed.
- Walk around the area covered by the camera to test the motion detection.
- Observe how the camera reacts to motion events and records footage.
Adjusting Motion Settings
If you find that the camera’s motion detection is too sensitive or not sensitive enough, you can adjust the motion settings in the Ring app. Experiment with the settings until you find the right balance for your needs.
Downloading and Setting Up the Ring App
Before you can start using your Ring Floodlight Camera, you need to download the Ring app on your smartphone or tablet. Follow these steps to get started:
1. Download the App: Visit the App Store or Google Play Store on your device and search for the Ring app. Click on the download button to install the app on your device.
2. Create an Account: Once the app is installed, open it and create a new account. You will need to provide your email address and create a password to set up your account.
3. Add Your Device: Follow the on-screen instructions to add your Ring Floodlight Camera to the app. Make sure to connect your camera to your Wi-Fi network during the setup process.
4. Customize Settings: Once your camera is connected, you can customize the settings in the app. Set up motion detection zones, adjust alerts, and configure other preferences to suit your needs.
5. Access Your Camera: With the Ring app installed and your camera set up, you can now access live video feeds, review recordings, and receive notifications on your device whenever motion is detected.
Customizing Notifications and Alerts
Once you have successfully installed your Ring Floodlight Camera, you can customize the notifications and alerts to suit your preferences.
Step 1: Open the Ring App
Launch the Ring app on your smartphone or tablet and log in to your account.
Step 2: Access Device Settings
Go to the device settings for your Ring Floodlight Camera by selecting the camera from the list of devices.
Step 3: Customize Notifications
Under the device settings, you can adjust the notification settings such as motion alerts, live view notifications, and more. You can choose to receive alerts for specific types of motion or events.
By customizing notifications and alerts, you can ensure that you are informed about important events while minimizing unnecessary notifications.
Enjoying Enhanced Home Security
Installing a Ring Floodlight Camera Motion-Activated HD Security Cam not only enhances the security of your home but also provides you with peace of mind knowing that your property is protected. With its advanced motion detection technology and high-definition video recording capabilities, you can monitor your home from anywhere at any time.
Key Features:
- High-quality video recording with night vision
- Two-way audio communication
- Customizable motion zones
- Instant alerts on your smartphone
By installing a Ring Floodlight Camera, you can deter unwanted intruders, keep an eye on your property, and ensure the safety of your loved ones. Enjoy enhanced home security with this innovative and easy-to-install device.