

Installing a security camera to monitor the outdoors from inside your home can provide an added layer of protection and peace of mind. However, positioning the camera correctly to capture the desired view can be a challenge, especially when placing it behind a window. In this guide, we will walk you through the steps to install an indoor security camera facing outdoors in a window.
Before you begin the installation process, it is important to choose a suitable location for your security camera. Make sure the camera has a clear view of the outdoor area you want to monitor and that it is placed securely on a stable surface near the window. Additionally, consider the angle of the camera to avoid any reflections or glare from the glass.
Once you have selected the ideal location for your camera, you can proceed with the installation process. Start by attaching the camera mount to the chosen surface near the window using the provided screws or adhesive. Ensure that the mount is firmly secured to prevent any movement or vibrations that could affect the camera’s view.
Step-by-Step Guide to Installing Indoor Security Camera Facing Outdoors in Window
Installing an indoor security camera facing outdoors in a window can provide added protection to your home or office. Follow these steps to set up your camera effectively:

Step 1: Choose the Right Location
Identify the window that gives you the best view of the outdoor area you want to monitor. Make sure the camera has a clear line of sight without any obstructions.
Step 2: Mount the Camera
Securely mount the camera on the inside of the window frame using the provided mounting hardware. Position the camera to face the outdoor area you want to monitor.
Tip: Use a mounting bracket to angle the camera for optimal viewing.
Follow the manufacturer’s instructions for setting up the camera and connecting it to your Wi-Fi network. Adjust the camera settings to ensure clear and sharp footage.
Remember to regularly clean the window to prevent any glare or obstruction that may affect the camera’s view.
Choose the Right Location for Your Camera
When installing an indoor security camera to face outdoors through a window, it is crucial to choose the right location. Here are some tips to help you select the optimal spot:
1. Avoid Direct Sunlight: Place the camera in a position where direct sunlight won’t interfere with the image quality. Reflections and glare from the sun can distort the view and make it difficult to see clearly.
2. Angle for Visibility: Position the camera at an angle that provides the best view of the outdoor area you want to monitor. Make sure there are no obstructions that could block the camera’s line of sight.
3. Consider Privacy: Be mindful of your neighbors’ privacy when placing the camera. Avoid pointing it directly at their property or windows to respect their boundaries.
4. Secure Mounting: Ensure the camera is securely mounted to prevent it from falling or being tampered with. A stable mounting position will also help maintain a clear and steady image.
By carefully selecting the location for your indoor security camera facing outdoors, you can enhance its effectiveness and ensure reliable surveillance of your property.
Prepare the Necessary Tools and Equipment
Before you begin the installation process, make sure you have all the tools and equipment you need:
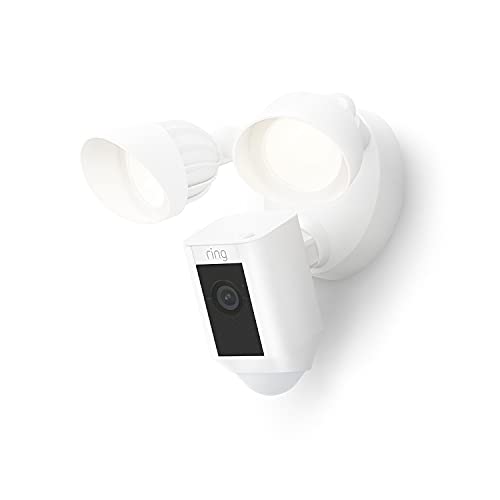
- Indoor security camera: Choose a high-quality camera with features like night vision and motion detection.
- Window mount: Purchase a window mount designed specifically for indoor cameras.
- Drill and screws: You may need to drill holes to secure the mount.
- Power source: Ensure you have access to a power outlet near the window.
- Wi-Fi connection: Make sure your camera can connect to your home’s Wi-Fi network.
Having the right tools and equipment on hand will make the installation process smoother and more efficient.
Install the Mounting Bracket
Before installing your indoor security camera facing outdoors in a window, you’ll need to attach the mounting bracket. Follow these steps:
- Locate a suitable spot near the window where you want to place the camera.
- Hold the mounting bracket against the surface and mark the screw holes with a pencil.
- Drill pilot holes for the screws using an appropriate drill bit.
- Securely attach the mounting bracket to the surface using screws and a screwdriver.
Once the mounting bracket is securely in place, you can proceed with attaching the indoor security camera and adjusting its position to face outdoors through the window.
Position the Camera Correctly
When installing an indoor security camera facing outdoors in a window, it is crucial to position the camera correctly to ensure optimal performance. Here are some tips on how to position the camera:
- Place the camera at an angle that provides a clear view of the outdoor area you want to monitor.
- Avoid placing the camera too close to the window to prevent glare or reflection that may obstruct the view.
- Ensure that the camera is securely mounted to the window or the surrounding area to prevent any movement or vibration.
- Consider the lighting conditions outside the window and adjust the camera settings accordingly to capture clear footage.
- Test the camera’s positioning by checking the live feed to confirm that it captures the desired outdoor area effectively.
Connect the Camera to Power and Wi-Fi
Once you have positioned the indoor security camera facing outdoors in the window, it’s time to connect it to power and Wi-Fi. Follow these steps to ensure a successful setup:
| 1. Power Connection: | Plug the camera’s power adapter into a nearby outlet or power source. Make sure the camera is receiving power before proceeding. |
| 2. Wi-Fi Setup: | Access the camera’s settings or configuration menu using the accompanying app or software. Follow the on-screen instructions to connect the camera to your Wi-Fi network. Ensure that the camera is within range of your Wi-Fi signal for a stable connection. |
| 3. Test the Connection: | Once connected to Wi-Fi, test the camera’s live feed to ensure it is capturing the desired outdoor view through the window. Adjust the camera angle if needed for optimal coverage. |
Test the Camera’s Functionality and Adjust as Needed
Once you have installed the indoor security camera facing outdoors in the window, it’s important to test its functionality to ensure proper placement and clear view of the outside area. Turn on the camera and check the live feed to see if the view is obstructed by any reflections or glare from the window.
If you notice any issues with the camera’s view, you may need to adjust its position or angle slightly to eliminate any reflections or obstructions. You can also try using a window mount or anti-glare film to improve the camera’s visibility.