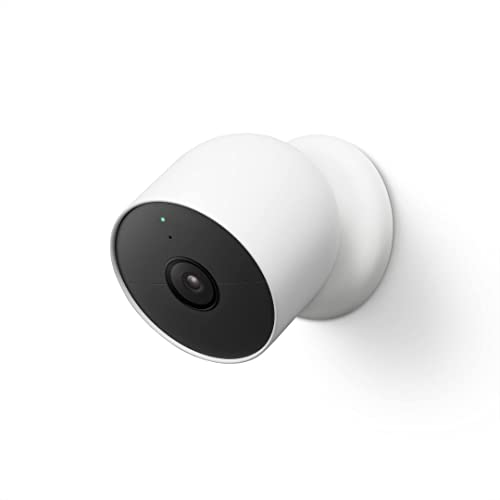


Google Nest Cam Outdoor is a smart security camera designed to help you keep an eye on your home and surroundings. With its weatherproof design and advanced features, it provides constant monitoring and alerts for any activity detected.
Installing the Google Nest Cam Outdoor is a straightforward process that can be done in just a few steps. In this guide, we will walk you through the installation process and help you set up your camera for optimal performance.
Whether you are a tech-savvy individual or a novice, this guide will provide you with all the information you need to install and configure your Google Nest Cam Outdoor security camera effectively.

Step-by-step guide to install Google Nest Cam Outdoor Security Camera
Installing a Google Nest Cam Outdoor Security Camera is a simple process that can help enhance the security of your home. Follow these steps to set up your camera:
- Choose a location for your camera that provides a good view of the area you want to monitor.
- Mount the camera on a wall or other surface using the included mounting hardware.
- Connect the camera to a power source using the provided cable.
- Download the Google Home app on your smartphone or tablet.
- Open the app and follow the on-screen instructions to set up your camera.
- Connect the camera to your Wi-Fi network.
- Customize your camera settings, such as motion detection and alerts.
- Test your camera to ensure it is functioning properly.
- Enjoy the added security and peace of mind that comes with your new Nest Cam Outdoor Security Camera.
Unboxing and checking the contents of the package
Before you start installing your Google Nest Cam Outdoor security camera, it’s important to unbox the package and check that you have all the necessary components. Here’s what you should find inside the box:
| 1. Google Nest Cam Outdoor camera |
| 2. Mounting magnet |
| 3. Wall plate |
| 4. Power cable and adapter |
| 5. Screws and anchors for installation |
| 6. Quick start guide and warranty information |
Make sure all the items are included and in good condition before proceeding with the installation process.
Choosing the right location for your outdoor security camera
When installing your Google Nest Cam Outdoor security camera, selecting the right location is crucial for maximizing its effectiveness. Here are some key considerations to keep in mind:
| 1. Coverage area: | Choose a location that provides a clear view of the area you want to monitor, ensuring that there are no obstructions that could block the camera’s line of sight. |
| 2. Protection from the elements: | Position the camera in a spot where it is shielded from direct sunlight, rain, snow, and other harsh weather conditions to ensure its longevity. |
| 3. Power source: | Ensure that the camera is located close to a power outlet or consider using an outdoor-rated extension cord to provide power without compromising safety. |
| 4. Wi-Fi signal strength: | Test the Wi-Fi signal strength in the chosen location to ensure a stable connection for the camera to transmit footage effectively. |
| 5. Mounting surface: | Select a sturdy surface for mounting the camera, such as a wall or eave, to prevent tampering and ensure a secure installation. |
By carefully selecting the location for your outdoor security camera, you can enhance the overall security of your property and enjoy reliable surveillance footage.
Mounting the camera securely for optimal performance
Properly mounting your Google Nest Cam Outdoor security camera is crucial for ensuring optimal performance and coverage. Follow these steps to securely mount your camera:
- Choose a location that provides a clear view of the area you want to monitor, while also offering protection from the elements.
- Use the provided mounting plate and screws to attach the camera to the wall or ceiling. Make sure the mounting surface is stable and can support the weight of the camera.
- Adjust the angle of the camera to capture the desired field of view. Test the camera’s view before finalizing the installation.
- Ensure all cables are properly connected and secured to prevent any interference with the camera’s operation.
- Regularly check the camera’s mounting to ensure it remains secure and stable over time. Make any necessary adjustments as needed.
By following these steps, you can ensure that your Google Nest Cam Outdoor security camera is securely mounted for optimal performance and peace of mind.
Connecting the camera to a power source
Before installing your Google Nest Cam Outdoor security camera, you need to connect it to a power source. Here’s how:
1. Choose the right power outlet
Find an outdoor power outlet that is within reach of the camera’s power cable. Make sure the outlet is weatherproof and can withstand outdoor conditions.
2. Plug in the power adapter
Connect the power adapter to the camera’s power cable and plug it into the outdoor power outlet. Ensure the connection is secure and the cable is not exposed to any potential hazards.
Once the camera is connected to a power source, you can proceed with the installation process to set up your Google Nest Cam Outdoor security camera.
Setting up the camera on your Google account
Once you have successfully installed your Google Nest Cam Outdoor security camera, the next step is to set it up on your Google account. Follow these steps to complete the setup:
1. Open the Google Home app: Launch the Google Home app on your mobile device.
2. Add a new device: Tap on the “+” symbol to add a new device to your account.
3. Select “Set up device”: Choose the “Set up device” option and then select “Have something already set up?”
4. Scan the QR code: Use your phone to scan the QR code on the back of your Google Nest Cam Outdoor.
5. Connect to Wi-Fi: Follow the on-screen instructions to connect your camera to your Wi-Fi network.
6. Link to your Google account: Sign in to your Google account to link the camera to your account.
7. Customize settings: Customize the settings for your camera, such as naming it and setting up alerts.
8. Complete setup: Once you have configured all the settings, your Google Nest Cam Outdoor security camera is now successfully set up on your Google account.
Configuring the camera settings for maximum security
After installing your Google Nest Cam Outdoor security camera, it is essential to configure the settings properly to ensure maximum security for your property. Here are some key steps to configure the camera settings:
1. Enable Two-Factor Authentication:
Two-factor authentication adds an extra layer of security to your account by requiring a second form of verification in addition to your password. Enable this feature to protect your camera from unauthorized access.
2. Set up Activity Zones:
Activity Zones allow you to define specific areas within the camera’s field of view where you want to receive motion alerts. By setting up these zones, you can reduce false alerts and focus on monitoring critical areas.
By following these steps and exploring other advanced security features offered by your Google Nest Cam Outdoor, you can enhance the security of your property and enjoy peace of mind knowing that your camera is configured for maximum protection.
Testing the camera to ensure proper functionality
Once you have successfully installed your Google Nest Cam Outdoor Security Camera, it is important to test the camera to ensure that it is functioning correctly. Follow these steps to test the camera:
1. Check the camera feed
Access the camera feed on your smartphone or computer to verify that the camera is capturing video and transmitting it properly. Make sure the video quality is clear and that there are no issues with the live feed.
2. Test motion detection
Walk in front of the camera to test the motion detection feature. Ensure that the camera detects motion accurately and sends you notifications as expected. Adjust the sensitivity settings if necessary to avoid false alarms.
By testing the camera after installation, you can identify any potential issues and address them promptly to ensure the security of your property.
Integrating the camera with other smart home devices
Google Nest Cam Outdoor security camera can be seamlessly integrated with various smart home devices to enhance your home security system. Here are some ways to connect and utilize the camera with other smart devices:
1. Google Assistant: You can easily link your Nest Cam Outdoor with Google Assistant for voice control. This allows you to view live feeds, check notifications, and control the camera using simple voice commands.
2. Smart Lights: Integrate the camera with smart lights to create an automated lighting system that turns on when motion is detected by the camera. This can help deter intruders and enhance the overall security of your home.
3. Smart Locks: Connect the camera with smart locks to monitor and control access to your home. You can set up alerts to notify you when someone approaches the door, and even remotely unlock the door for trusted visitors.
4. Smart Thermostats: By integrating the camera with smart thermostats, you can set up rules to adjust the temperature based on the camera’s activity. For example, you can set the thermostat to lower the temperature when the camera detects no motion to save energy.
By integrating your Nest Cam Outdoor with other smart home devices, you can create a comprehensive and efficient home security system that works seamlessly together to keep your home safe and secure.
Troubleshooting common installation issues
If you encounter any issues during the installation of your Google Nest Cam Outdoor security camera, here are some common troubleshooting steps you can take:
1. Check the Wi-Fi signal strength
Make sure that your camera is within range of your Wi-Fi network and that the signal strength is strong enough for a stable connection. You may need to move your router closer to the camera or use a Wi-Fi extender to improve signal strength.
2. Verify power source
Ensure that the camera is properly connected to a power source and that the power supply is working correctly. If the camera is battery-powered, check the battery level and replace or recharge if needed.
By following these troubleshooting steps, you should be able to resolve common installation issues with your Google Nest Cam Outdoor security camera.


