
Installing a CNB security camera to your TV can provide you with a convenient way to monitor your property and keep it safe. Whether you want to keep an eye on your home or business, having a security camera connected to your TV can give you peace of mind.
In this guide, we will walk you through the steps to install a CNB security camera to your TV so you can start monitoring your property in no time. With the right tools and a few simple steps, you can have your security camera up and running quickly and easily.
Step-by-Step Guide for Installing CNB Security Camera to TV
Installing a CNB security camera to your TV is a straightforward process that can enhance your home security system. Follow these steps to connect your CNB security camera to your TV:

- Check the compatibility: Make sure your CNB security camera is compatible with your TV. Most CNB security cameras have HDMI or RCA outputs that can be connected to your TV.
- Locate the camera: Find a suitable location to mount your CNB security camera. Ensure it has a clear view of the area you want to monitor.
- Connect the camera to the TV: Use the provided cables to connect the CNB security camera to your TV. Plug the HDMI or RCA cable into the camera’s output port and the corresponding input port on your TV.
- Power up the camera: Plug in the power adapter for your CNB security camera and turn it on. Make sure the camera is powered on and functioning properly.
- Adjust the settings: Use the remote control for your TV to switch to the correct input source for the CNB security camera. You may need to adjust the camera settings to optimize the video output on your TV.
- Test the camera: Verify that the CNB security camera is displaying the video feed on your TV. Make any necessary adjustments to the camera position or settings to ensure clear video quality.
Once you have successfully connected your CNB security camera to your TV, you can enjoy enhanced security monitoring capabilities in your home or business.
Check Compatibility
Before installing your CNB security camera to your TV, make sure to check the compatibility of the camera with your TV model. Some security cameras may not be compatible with all TVs, so it’s important to verify this before proceeding with the installation.
Check the specifications of both the camera and the TV to ensure that they are compatible in terms of video output, resolution, and connectivity options. If there are any compatibility issues, you may need to use additional adapters or converters to make the connection work.
Gather Necessary Equipment
Before you start installing your CNB security camera to your TV, make sure you have all the necessary equipment at hand. Here is a list of items you will need:
| 1. CNB security camera |
| 2. TV with available RCA or HDMI input |
| 3. Power adapter for the camera |
| 4. Video cable (RCA or HDMI) |
| 5. Mounting hardware (if needed) |
| 6. Screwdriver |
| 7. User manual for the camera |
Connect Camera to Power Source
To install your CNB security camera, you first need to connect it to a power source. Follow these steps:
Step 1: Check the Power Adapter
Make sure you have the correct power adapter for your CNB security camera. The power adapter should match the voltage and current requirements of the camera.
Step 2: Connect the Power Adapter
Plug the power adapter into a power outlet and connect the other end to the power input on the camera. Make sure the connection is secure.
| Power Adapter | Power Input on Camera |
| AC 100-240V | DC 12V |
Connect Camera to TV
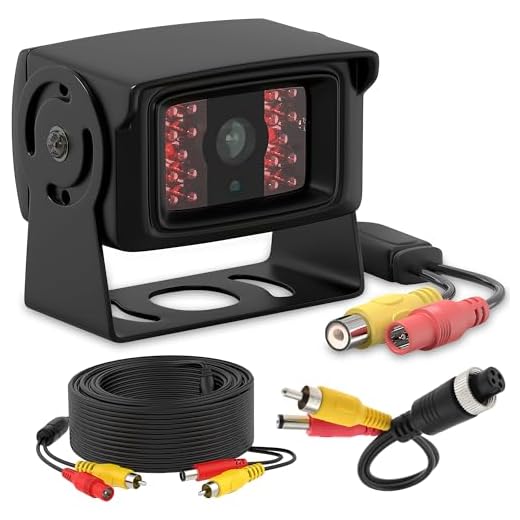
To connect your CNB security camera to your TV, you will need to use the appropriate cables. Make sure to check the ports available on both your camera and TV.
1. Locate the video output port on your CNB security camera. It is usually labeled as “Video Out” or “CVBS Out”.
2. Connect one end of the RCA cable to the video output port on the camera.
3. Locate the video input port on your TV. This port is usually labeled as “Video In” or “AV In”.
4. Connect the other end of the RCA cable to the video input port on your TV.
5. Turn on both the camera and the TV. Select the appropriate input source on your TV to display the camera feed.
6. You should now see the live feed from your CNB security camera on your TV screen. Adjust the camera angle and settings as needed.
Adjust Camera Settings
After successfully installing your CNB security camera to your TV, it is important to adjust the camera settings to ensure optimal performance and functionality. Follow these steps to adjust the camera settings:
1. Access the Camera Menu
Use the remote control that came with your CNB security camera to access the camera menu. Navigate through the menu options to find the settings you want to adjust.
2. Configure Image Quality
Adjust the image quality settings such as brightness, contrast, saturation, and sharpness to achieve the desired picture quality. Make sure to fine-tune the settings based on your specific preferences and lighting conditions.
By adjusting the camera settings, you can customize the viewing experience and enhance the overall security surveillance provided by your CNB security camera.
Test the Connection
Once you have connected your CNB security camera to your TV, it’s important to test the connection to ensure everything is working properly. Here’s how you can do it:
1. Check the Camera Feed
Turn on your TV and switch to the input channel you connected your security camera to. You should see the live feed from your camera on the screen. Make sure the image is clear and that there are no issues with the connection.
2. Test the Camera Controls
Use the remote control or buttons on the camera to test the pan, tilt, and zoom functions. Make sure you can control the camera movements smoothly and that the image adjusts properly. Test any other features of the camera to ensure everything is working as expected.
Mount the Camera
Once you have connected the CNB security camera to your TV, it’s time to mount the camera in the desired location. Follow these steps to securely mount the camera:
| 1. | Choose a suitable location for the camera that provides a clear view of the area you want to monitor. |
| 2. | Use the mounting bracket included with the camera to attach it to the wall or ceiling. |
| 3. | Make sure the camera is securely mounted to prevent it from falling or being tampered with. |
| 4. | Adjust the camera angle to ensure it captures the desired area effectively. |
| 5. | Once the camera is securely mounted, test it to ensure it provides clear images on your TV screen. |
Enjoy Secure Monitoring
Once you have successfully installed your CNB security camera and connected it to your TV, you can now enjoy secure monitoring of your property.
1. Monitor Your Property
With your CNB security camera connected to your TV, you can easily monitor your property in real-time. Keep an eye on your home or business premises from the comfort of your living room.
2. Ensure Safety and Security
By having a CNB security camera system installed and linked to your TV, you can enhance the safety and security of your property. The ability to monitor your surroundings can help deter potential intruders and ensure peace of mind.