Arlo security cameras are a popular choice for home and business surveillance. The VMS3430 model is a reliable and easy-to-use system that provides peace of mind by keeping an eye on your property. In this guide, we will walk you through the steps to install the Arlo Security Camera VMS3430.
Before you begin the installation process, make sure you have all the necessary equipment and tools ready. You will need the Arlo base station, cameras, power adapters, Ethernet cable, and mounting hardware.
Step 1: Start by connecting the Arlo base station to your router using the Ethernet cable. Plug in the power adapter and wait for the base station to boot up. Once the LED lights on the base station turn solid green, it is ready to be configured.
Step-by-Step Guide to Installing Arlo Security Camera VMS3430
Installing your Arlo Security Camera VMS3430 system is a straightforward process that can be completed in just a few simple steps. Follow this guide to set up your Arlo cameras and start monitoring your property.
- Unbox your Arlo Security Camera VMS3430 system and make sure you have all the components: cameras, base station, power adapters, Ethernet cable, and mounting hardware.
- Connect the base station to your router using the Ethernet cable and plug in the power adapter to turn it on.
- Download the Arlo app on your smartphone or tablet and create an account. Follow the on-screen instructions to add your base station to the app.
- Sync your cameras with the base station by pressing the sync button on the base station and then on each camera. Wait for the LED lights on the cameras to blink blue, indicating successful sync.
- Choose the optimal locations to mount your cameras, making sure they have a clear view of the areas you want to monitor.
- Use the mounting hardware to secure the cameras in place and adjust the angles as needed.
- Open the Arlo app on your device and follow the prompts to customize your camera settings, such as motion detection sensitivity and recording preferences.
- Your Arlo Security Camera VMS3430 system is now installed and ready to use. Monitor your cameras through the app and enjoy peace of mind knowing your property is protected.
Unboxing the Arlo Security Camera Kit
When you receive your Arlo VMS3430 security camera kit, you’ll find a carefully packaged box containing all the components you need to set up your home security system.
What’s in the Box:
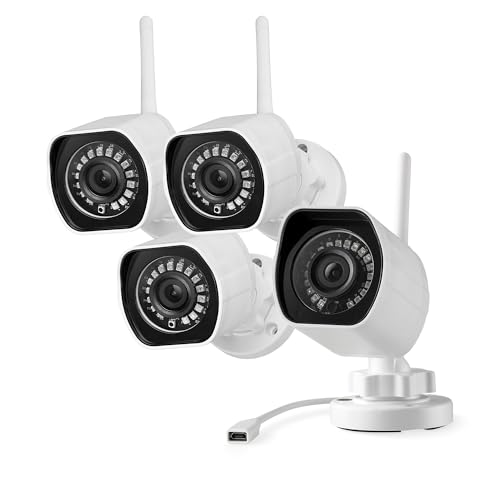
The box includes four Arlo wire-free cameras, a base station, an Ethernet cable, four magnetic camera mounts, a power adapter, and batteries for each camera.
Tip: Make sure to check that all the components are included before starting the installation process.
Setting Up the Base Station
Before you can start using your Arlo security camera system, you need to set up the base station. Follow these steps to get your base station up and running:
| 1. | Connect the base station to your router using the Ethernet cable provided. |
| 2. | Plug in the power adapter to the base station and connect it to a power source. |
| 3. | Wait for the base station to power up and for the LED lights to turn solid green. |
| 4. | Download the Arlo app on your smartphone and follow the on-screen instructions to set up the base station. |
| 5. | Once the base station is set up, you can start adding your Arlo cameras to the system and customize your security settings. |
Connecting the Cameras to the Base Station
To set up your Arlo security camera system, you need to connect the cameras to the base station. Follow these steps to ensure a successful installation:
- Place the cameras: Position your cameras in the desired locations around your property, ensuring they have a clear view of the area you want to monitor.
- Power on the base station: Plug in the base station and wait for it to power on. Once the LED lights on the base station turn solid green, it is ready for setup.
- Sync the cameras: Press the Sync button on the base station and then press the Sync button on each camera within 20 seconds to pair them. The LED light on the camera will blink blue to indicate a successful connection.
- Check the camera status: Once all cameras are successfully synced, check the Arlo app to ensure they are all recognized by the base station and functioning properly.
By following these steps, you can easily connect your Arlo security cameras to the base station and start monitoring your property with peace of mind.
Installing the Arlo App on Your Smartphone
To access your Arlo security camera system, you will need to install the Arlo app on your smartphone. Follow these simple steps to get started:
- Download the App: Go to the App Store or Google Play Store on your smartphone and search for “Arlo”. Download and install the Arlo app on your device.
- Create an Account: Open the Arlo app and create a new account. You will need to provide your email address and create a password to set up your account.
- Add Your Arlo System: Once you have created an account, follow the on-screen instructions to add your Arlo security camera system to the app. Make sure your cameras are powered on and connected to the internet.
- Access Your Cameras: After adding your Arlo system, you can now access live video feeds, customize settings, and receive alerts on your smartphone through the Arlo app.
With the Arlo app installed on your smartphone, you can easily monitor your home or business security cameras from anywhere in the world.
Syncing the Cameras with the Arlo App
After setting up your Arlo base station, the next step is to sync your cameras with the Arlo app for monitoring and control. Here’s how you can easily sync your Arlo cameras:
Step 1: Launch the Arlo App
Start by launching the Arlo app on your smartphone or tablet. Make sure you are connected to the same Wi-Fi network as your Arlo base station.
Step 2: Add a New Device
In the app, navigate to the settings and select the option to add a new device. Follow the on-screen instructions to sync your cameras with the base station. You may need to press the sync button on the camera to complete the process.
Mounting the Cameras in Desired Locations
Once you have decided on the locations for your Arlo security cameras, it’s time to mount them securely. Follow these steps to properly mount your cameras:
- Choose the Right Mounting Location: Select a location that provides a clear view of the area you want to monitor, away from obstructions and direct sunlight.
- Attach the Mounting Bracket: Use the provided screws to attach the mounting bracket to the desired location, such as a wall or ceiling.
- Secure the Camera: Slide the camera onto the mounting bracket and tighten the screw to secure it in place.
- Adjust the Camera Angle: Adjust the camera angle to ensure it covers the desired area effectively. Use the included tools to tighten the camera in place.
- Repeat for Each Camera: Repeat the above steps for each Arlo camera you want to install, ensuring they are all securely mounted in their desired locations.
By following these steps, you can successfully mount your Arlo security cameras in the desired locations to maximize their effectiveness in monitoring your home or property.
Adjusting Camera Settings for Maximum Security
After successfully installing your Arlo security camera VMS3430, it is essential to adjust the camera settings to ensure maximum security for your property. Follow these steps to customize your camera settings:
1. Motion Detection Sensitivity
Adjust the motion detection sensitivity level to your preference. Higher sensitivity settings will trigger the camera to record more frequently, while lower settings may miss some movements. Find the right balance to capture important events without overwhelming your storage.
2. Activity Zones
Create activity zones to focus the camera’s attention on specific areas. By defining areas where you want the camera to monitor movement, you can reduce false alarms and ensure that the camera captures relevant events effectively.
Testing the Camera System for Proper Functionality
After successfully installing your Arlo security camera system VMS3430, it is crucial to test the system to ensure it functions properly. Follow these steps to test the camera system:
1. Check Camera Connections
Verify that all cameras are securely connected to the base station and power source. Make sure the LEDs on the cameras are lit up, indicating they are receiving power.
2. Test Camera Views
Access the Arlo app on your smartphone or computer and check the live feed from each camera. Pan, tilt, and zoom to ensure the camera captures the desired area and has a clear view. Test the night vision mode if applicable.
By following these steps, you can verify that your Arlo security camera system VMS3430 is installed correctly and functioning as intended.
Setting Up Motion Detection and Alerts
One of the key features of Arlo security cameras is their motion detection capability, which allows you to receive alerts when motion is detected in the camera’s field of view. Follow these steps to set up motion detection and alerts for your Arlo VMS3430 system:
| Step 1: | Open the Arlo app on your mobile device and log in to your Arlo account. |
| Step 2: | Select the camera you want to configure for motion detection from the list of devices. |
| Step 3: | Go to the camera settings and find the motion detection options. |
| Step 4: | Adjust the sensitivity and detection zones to customize the motion detection settings according to your preferences. |
| Step 5: | Enable notifications for motion events to receive alerts on your mobile device whenever motion is detected. |
| Step 6: | Save the settings and test the motion detection by walking in front of the camera to ensure that alerts are triggered properly. |
Enjoying Peace of Mind with Arlo Security Camera VMS3430
Installing the Arlo Security Camera VMS3430 system in your home can provide you with the peace of mind knowing that your property is secure. With its advanced features and easy installation process, you can rest assured that you are protected at all times.
Step-by-Step Installation Guide
Follow these simple steps to install your Arlo Security Camera VMS3430:
| 1. | Choose the optimal location for your cameras to ensure maximum coverage. |
| 2. | Mount the cameras securely using the provided mounting hardware. |
| 3. | Connect the base station to your Wi-Fi network for remote access. |
| 4. | Download the Arlo app on your smartphone to monitor your cameras from anywhere. |
| 5. | Customize your camera settings and alerts to suit your preferences. |
Benefits of Arlo Security Camera VMS3430
Investing in the Arlo Security Camera VMS3430 system offers numerous benefits, including:
- 24/7 monitoring of your property
- High-definition video quality
- Wire-free design for easy installation
- Customizable motion detection alerts
- Weather-resistant cameras for outdoor use
With the Arlo Security Camera VMS3430, you can enjoy peace of mind knowing that your home is protected around the clock.