

Securing your home and protecting your loved ones is a top priority for any homeowner. One of the most effective ways to enhance the security of your property is by installing a wired outdoor home security camera system. These systems provide continuous monitoring and recording of your outdoor spaces, giving you peace of mind and a sense of security.
However, the installation process can seem daunting for those who are not familiar with the technical aspects of setting up a security camera system. In this article, we will guide you through the step-by-step process of installing a wired outdoor home security camera system, from choosing the right equipment to mounting and setting up your cameras.

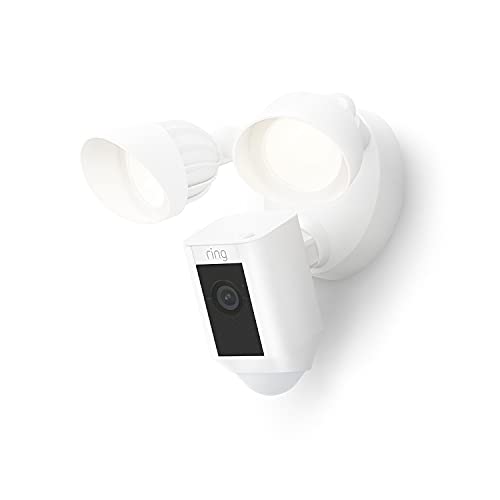
Choose the Right Camera
When selecting a wired outdoor home security camera system, it’s crucial to choose the right camera for your specific needs. Consider the following factors:
| Resolution: | Opt for cameras with high resolution (1080p or higher) for clear and detailed images. |
| Field of View: | Choose cameras with a wide field of view to cover more area and reduce blind spots. |
| Night Vision: | Look for cameras with infrared night vision capabilities for clear footage in low-light conditions. |
| Weather Resistance: | Ensure that the cameras are weatherproof and designed to withstand outdoor elements. |
| Power Source: | Determine if the cameras require a power outlet nearby or if they can be powered by batteries or solar panels. |
Consider Your Needs
Before installing a wired outdoor home security camera system, it’s important to consider your specific needs and requirements. Think about the areas you want to monitor, the level of security you need, and the features you prioritize.
Some factors to consider include:
- Camera Resolution: Determine the image quality you desire, whether you need high-definition footage or standard resolution.
- Field of View: Consider the angle of coverage needed to monitor your outdoor space effectively.
- Night Vision: Evaluate whether night vision capabilities are essential for around-the-clock surveillance.
- Weatherproofing: Ensure the cameras are designed to withstand outdoor elements such as rain, snow, and extreme temperatures.
- Remote Viewing: Decide if you want to access live footage remotely via a mobile app or web browser.
By carefully assessing your needs, you can choose a wired outdoor home security camera system that best suits your requirements and provides the level of protection you seek.
Research Different Options
Before purchasing a wired outdoor home security camera system, it’s essential to research different options available in the market. Take your time to compare features, prices, and reviews of various brands and models. Look for systems that offer high-resolution video quality, night vision capabilities, motion detection, and mobile app integration for remote monitoring.
Consider factors like the number of cameras needed, the range of coverage, and whether you prefer a DIY installation or professional setup. Reading user feedback and expert reviews can help you make an informed decision on the best security camera system for your home.
Plan Your Installation
Before you start installing your wired outdoor home security camera system, it is essential to plan out the placement of your cameras and the routing of the cables. Here are some steps to help you plan your installation:
- Determine the areas you want to monitor: Identify the key areas around your home that you want to keep an eye on, such as the front door, back yard, garage, or driveway.
- Consider the camera angles: Think about the best angles to capture the most relevant footage. Ensure that the cameras have a clear view of the target areas without any obstructions.
- Decide on the number of cameras: Based on the areas you want to monitor, decide how many cameras you will need to cover all the necessary angles.
- Plan the cable routes: Determine the best routes for running the cables from the cameras to the recording device or monitor. Consider hiding the cables along walls or under eaves to prevent them from being tampered with.
- Choose the right placement: Install the cameras at a height that provides a good view of the area while also making them less accessible to intruders.
By carefully planning your installation, you can ensure that your wired outdoor home security camera system will provide optimal coverage and protection for your home.
Survey Your Property
Before installing your outdoor home security camera system, it’s important to survey your property to determine the best locations for your cameras. Walk around the perimeter of your home and identify areas that are vulnerable to break-ins or other security threats. Look for blind spots, entry points, and areas with valuable items that need extra protection.
Consider the optimal angles and viewpoints for your cameras to ensure maximum coverage. You may want to place cameras near doors, windows, garages, and other entry points. Additionally, think about the lighting conditions in each area to ensure clear footage day and night.
Mapping out the placement of your cameras before installing them will help you create a comprehensive security system that meets your specific needs and provides peace of mind.
Select Installation Locations
Choosing the right locations for installing your wired outdoor home security camera system is crucial for maximizing security coverage. Here are some tips to help you select the best installation locations:
1. Entry Points
Place cameras near all entry points to your home, such as doors, windows, and garage doors. This will help capture any suspicious activity as people enter or exit your property.
2. Perimeter Coverage
Install cameras along the perimeter of your property to monitor any movement around the outside of your home. This will provide comprehensive coverage and help deter potential intruders.
Gather Necessary Tools
Before you start installing your outdoor home security camera system, make sure you have all the necessary tools and equipment on hand. Here is a list of essential tools you will need:
1. Power Drill
A power drill will be essential for drilling holes for mounting the cameras and running wires through walls or other surfaces.
2. Screwdriver Set
You will need a screwdriver set to secure the mounting brackets for the cameras and make any necessary adjustments during installation.
Other tools you may need include a ladder, wire cutters, a stud finder, a level, a pencil for marking, and a tape measure. Having all the tools ready will ensure a smooth and efficient installation process.
List of Required Equipment
Before installing a wired outdoor home security camera system, you will need to gather the following equipment:
1. Outdoor Security Cameras: Choose high-quality cameras with weatherproof housing for outdoor use.
2. DVR/NVR System: A Digital Video Recorder (DVR) or Network Video Recorder (NVR) to store and manage video footage.
3. Power Supply and Cables: Make sure you have the necessary power adapters and cables to connect the cameras to the DVR/NVR.
4. Monitor or Display: A monitor or display screen to view live footage and recordings from the security cameras.
5. Mounting Hardware: Hardware such as screws, anchors, and brackets to securely mount the cameras in your desired locations.
6. Tools: Basic tools like a drill, screwdriver, and ladder for installation and mounting.
7. Internet Connection: An internet connection for remote viewing and accessing the security system online.
Prepare Installation Area
Before installing your wired outdoor home security camera system, it is important to prepare the installation area to ensure a smooth and successful setup. Here are some steps to follow:
- Choose the location: Select the best spots for your cameras, keeping in mind the areas you want to monitor and the range of the camera’s view.
- Check the power source: Make sure there is a nearby power outlet for each camera or plan to run wires to a central power source.
- Clear the area: Remove any obstacles or debris that may obstruct the camera’s view or interfere with the installation process.
- Gather tools: Have all the necessary tools and equipment ready, such as a drill, screws, screwdriver, and cable management tools.
- Plan the cable route: Decide on the best route for running the camera cables to ensure a neat and secure installation.
Install the Cameras
Once you have determined the best locations for your outdoor security cameras, follow these steps to install them:
- Start by mounting the camera bracket using the provided screws and anchors. Ensure that the bracket is securely attached to the wall or ceiling.
- Attach the camera to the bracket, making sure it is facing the desired direction for optimal coverage.
- Connect the camera to the power source and any necessary cables for data transmission.
- Adjust the camera angle and settings as needed to achieve the best view of the area you want to monitor.
- Test the camera to ensure it is functioning properly and capturing clear footage.
Repeat these steps for each camera in your outdoor security camera system to complete the installation process.
Mounting the Cameras
Once you have determined the optimal locations for your outdoor security cameras, it’s time to mount them. Follow these steps:
- Use a drill to create holes for the camera mounts on the exterior walls or soffits of your home.
- Attach the mounting brackets securely using screws and anchors, if needed.
- Mount the camera onto the bracket and adjust the angle for the best view of the area you want to monitor.
- Make sure the camera is level and tighten all screws to prevent it from moving.
- Run the camera cables through the mounting bracket and into your home through a drilled hole or existing opening.
Repeat this process for each camera in your outdoor security camera system, ensuring they are all securely mounted and positioned to capture the desired areas.


