
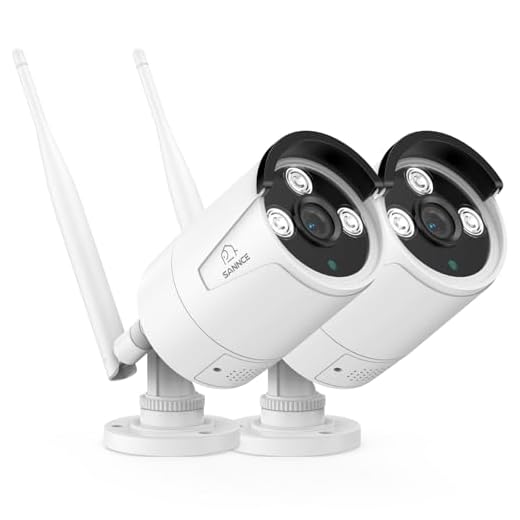


Are you looking to enhance the security of your home or office with wireless security cameras? Sannce offers a range of high-quality wireless security camera systems that are easy to install and provide reliable surveillance. In this guide, we will walk you through the step-by-step process of installing Sannce wireless security cameras to help you protect your property and loved ones.
Before you begin the installation process, it is important to familiarize yourself with the components of the Sannce wireless security camera system. Make sure you have all the necessary equipment, such as the cameras, power adapters, mounting brackets, and cables, ready to go. Once you have everything you need, you can follow these simple steps to set up your Sannce wireless security cameras.

Step-by-Step Guide to Installing Sannce Wireless Security Cameras
Installing Sannce wireless security cameras can help you protect your home or office effectively. Follow these steps to set up your Sannce cameras:
- Choose the Ideal Location: Select a strategic location for your camera that offers a good view of the area you want to monitor.
- Mount the Camera: Use the mounting kit provided with the camera to securely install it on a wall or ceiling.
- Connect the Power Supply: Plug in the power adapter to provide the camera with power.
- Connect to Wi-Fi: Follow the manufacturer’s instructions to connect the camera to your Wi-Fi network.
- Install the App: Download and install the Sannce app on your smartphone or tablet.
- Add the Camera to the App: Use the app to add your camera by scanning the QR code on the camera or entering the device ID.
- Configure Settings: Set up motion detection, alerts, and other settings through the app to customize your camera’s functionality.
- Test the Camera: Check the camera’s live feed to ensure it is working properly and adjust the position if needed.
- Secure Your System: Change the default password and ensure your Wi-Fi network is secure to prevent unauthorized access.
Preparation and Planning
Before installing your Sannce wireless security cameras, it’s important to carefully plan and prepare. Start by determining the best locations for your cameras to maximize coverage of your property. Consider areas where potential intruders may try to enter or hide. Make sure the cameras have a clear line of sight and are positioned to capture important details.
Next, ensure that you have all the necessary tools and equipment for the installation, including a power drill, screws, a screwdriver, and a ladder if needed. Familiarize yourself with the camera’s instruction manual and make sure you have a stable internet connection for setting up the cameras.
It’s also a good idea to test the cameras in the locations you’ve chosen before permanently installing them. This will help you identify any potential issues with connectivity or coverage and make adjustments as needed. By taking the time to prepare and plan ahead, you can ensure a smooth and successful installation process for your Sannce wireless security cameras.
Choosing the Right Location
When installing your Sannce wireless security cameras, it is crucial to choose the right location for optimal coverage and security. Here are some tips to help you select the ideal spot:
- Look for areas with a clear line of sight, free from obstructions such as trees or buildings, to ensure the camera has a clear view of the area.
- Place the camera at a height that provides a wide-angle view of the space you want to monitor, while also keeping it out of reach from potential tampering.
- Consider the lighting conditions in the area and choose a location that will not be affected by glare or shadows, as this can impact the camera’s ability to capture clear footage.
- Ensure that the camera is within range of your Wi-Fi signal to maintain a stable connection and reliable performance.
- If you are installing outdoor cameras, make sure they are weatherproof and positioned to withstand the elements for long-term durability.
Mounting the Camera
Before mounting the Sannce wireless security camera, ensure you have a clear view of the area you want to monitor. Choose a location that provides the best angle and coverage for surveillance.
Use the mounting template provided in the camera package to mark the drilling holes on the wall or ceiling. Make sure the surface is flat and stable before proceeding.
Securely attach the camera mount to the surface using the appropriate screws and anchors. Double-check the stability of the mount to prevent any accidents or damage.
Gently place the camera on the mount and adjust its angle to capture the desired view. Make sure the camera is securely attached and facing the right direction for optimal surveillance.
Once the camera is mounted and positioned correctly, connect it to the power source and configure it according to the manufacturer’s instructions to start monitoring your property.
Powering the Camera
Before installing your Sannce wireless security camera, you need to ensure that it is properly powered. The camera typically comes with a power adapter that you can use to connect it to a power source. Make sure to place the camera near a power outlet for easy access.
Once you have connected the camera to the power source, you can proceed with the installation process. It is important to follow the manufacturer’s instructions carefully to ensure that the camera is powered correctly and functions properly.
Connecting to Wi-Fi
Once the Sannce wireless security camera is powered on and ready to go, you will need to connect it to your Wi-Fi network. Follow these steps to ensure a successful connection:
Step 1: Access Camera Settings
Open the Sannce camera app on your smartphone or computer and access the camera settings. Look for the Wi-Fi connection option.
Step 2: Select Wi-Fi Network
Choose your Wi-Fi network from the list of available networks and enter the password when prompted. Make sure the camera is within range of your Wi-Fi signal.
Once the camera is successfully connected to your Wi-Fi network, you can start monitoring your property remotely.
Installing the Mobile App
To access and control your Sannce wireless security cameras remotely, you will need to install the mobile app provided by Sannce. Follow these steps to install the app on your smartphone or tablet:
- Open the App Store (for iOS devices) or Google Play Store (for Android devices) on your mobile device.
- Search for “Sannce” in the search bar of the app store.
- Locate the official Sannce app and click on the “Install” or “Download” button.
- Wait for the app to download and install on your device.
- Once the installation is complete, open the Sannce app on your device.
- Follow the on-screen instructions to set up and configure the app to connect to your Sannce wireless security cameras.
Now you can easily monitor and manage your security cameras from anywhere using the Sannce mobile app.
Setting Up the Camera System
Once you have unpacked your Sannce wireless security cameras, it’s time to set up the camera system. Follow these steps:
| 1. | Choose the optimal locations for your cameras to ensure maximum coverage of the area you want to monitor. |
| 2. | Mount the cameras securely using the included mounting hardware and adjust the angle as needed. |
| 3. | Connect the cameras to the power source and make sure they are receiving power. |
| 4. | Connect the cameras to the NVR (Network Video Recorder) using the provided cables. |
| 5. | Power on the NVR and follow the on-screen instructions to set up the system, including connecting to your Wi-Fi network. |
| 6. | Once the system is set up, you can access the camera feeds remotely using the Sannce app on your smartphone or tablet. |
Testing and Adjusting Settings
Once you have successfully installed your Sannce wireless security cameras, it’s essential to test and adjust the settings to ensure optimal performance. Here are some steps to follow:
1. Test Camera Placement
After mounting the cameras, test each camera’s view to make sure it covers the desired area effectively. Adjust the angle and position if necessary to eliminate blind spots.
2. Configure Motion Detection
Access the camera’s settings through the Sannce app or web interface to configure motion detection sensitivity and areas of interest. Test the motion detection by walking in front of the camera to ensure it triggers recording or alerts as expected.
| Test | Action | Outcome |
|---|---|---|
| Motion Detection | Walk in front of the camera | Camera should trigger recording or alert |
| Image Quality | View recorded footage | Ensure clear and crisp images |
| Night Vision | Test in low-light conditions | Ensure clear visibility |
Maintenance and Troubleshooting
Proper maintenance is essential to keep your Sannce wireless security cameras functioning optimally. Regularly clean the camera lenses and housing to ensure clear video quality. Check the power source and connections periodically to prevent power issues.
Common Troubleshooting Tips:
If you encounter connectivity issues, try resetting the camera or the Wi-Fi router. Ensure that the camera firmware is up to date and that the Wi-Fi signal is strong enough for a stable connection.
If the camera stops working: Check the power supply, restart the camera, and verify the network settings. If problems persist, contact Sannce customer support for further assistance.


