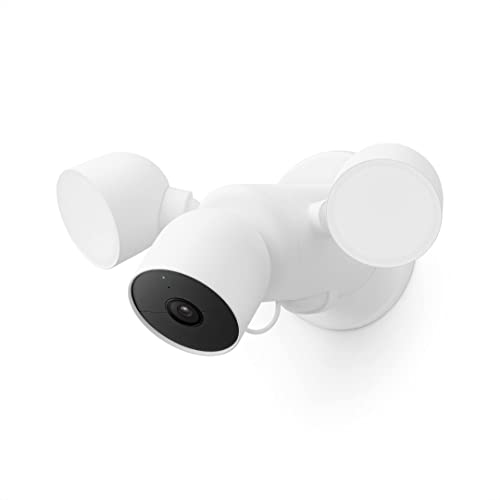


Google security cameras offer a convenient and reliable way to monitor your home or business. With advanced features like motion detection, night vision, and cloud storage, these cameras provide peace of mind and security.
Installing Google security cameras may seem daunting at first, but with the right tools and guidance, you can easily set up your system. In this guide, we will walk you through the step-by-step process of installing and configuring your Google security cameras for optimal performance.
Whether you’re looking to enhance your home security or keep an eye on your business premises, installing Google security cameras is a smart investment in protecting what matters most to you.

Step-by-step guide to installing Google security cameras
Installing Google security cameras is a great way to enhance the security of your home or office. Follow these steps to set up your cameras:
- Choose the location: Decide where you want to install the cameras, ensuring they cover key areas.
- Mount the cameras: Use the mounting hardware provided to secure the cameras in place.
- Connect to power: Plug the cameras into a power source using the included power adapter.
- Connect to Wi-Fi: Follow the instructions to connect the cameras to your Wi-Fi network.
- Set up the app: Download the Google security camera app and follow the on-screen instructions to set up the cameras.
- Adjust settings: Customize the camera settings, such as motion detection sensitivity and recording options.
- Test the cameras: Ensure the cameras are working properly by testing the live feed and recording capabilities.
By following these steps, you can easily install Google security cameras and enjoy added peace of mind knowing your property is protected.
Choosing the right location for your cameras
When installing Google security cameras, it is crucial to choose the right locations to ensure optimal coverage and effectiveness. Here are some tips for selecting the best spots:
- Identify high-risk areas: Start by identifying the areas around your property that are most vulnerable to break-ins or security threats. These are the areas where you will want to place your cameras for maximum protection.
- Consider camera range: Make sure to place your cameras within range of the areas you want to monitor. Check the camera’s specifications to determine the optimal distance for capturing clear footage.
- Avoid obstacles: Avoid placing cameras where they can be easily obstructed by trees, bushes, or other objects. Clear lines of sight are essential for capturing clear and unobstructed footage.
- Protect cameras from the elements: Ensure that your cameras are installed in locations where they are protected from extreme weather conditions, such as rain, snow, or direct sunlight. This will help prolong the life of your cameras.
- Consider privacy concerns: Be mindful of your neighbors’ privacy when positioning your cameras. Avoid pointing them directly into neighboring properties or areas where individuals have a reasonable expectation of privacy.
Setting up your Google security camera system
Installing a Google security camera system is a great way to enhance the security of your home or office. Follow these steps to set up your Google security cameras:
1. Choose the right location
Place your cameras in strategic locations around your property to maximize coverage. Make sure they are within reach of a power source and have a clear view of the area you want to monitor.
2. Connect the cameras to your network
Follow the manufacturer’s instructions to connect your cameras to your Wi-Fi network. This usually involves using a mobile app to scan a QR code on the camera and entering your network credentials.
| Camera Model | Installation Steps |
|---|---|
| Google Nest Cam | Download the Nest app, scan the QR code, and follow the on-screen instructions to set up your camera. |
| Google Nest Cam Outdoor | Mount the camera outdoors, connect it to a power source, and use the Nest app to complete the setup process. |
Connecting the cameras to your Wi-Fi network
Once you have installed your Google security cameras in the desired locations, it’s time to connect them to your Wi-Fi network for remote monitoring and access. Follow these simple steps to ensure a successful connection:
Step 1: Access camera settings
Open the Google security camera app on your smartphone or computer and navigate to the camera settings menu. Look for the option to connect the camera to a Wi-Fi network.
Step 2: Choose your Wi-Fi network
Select your home Wi-Fi network from the list of available networks. Enter the password for your Wi-Fi network when prompted. Ensure that the camera is within range of your Wi-Fi signal for a stable connection.
| SSID: | Your Wi-Fi network name |
| Password: | Your Wi-Fi network password |
Once you have entered the correct information, the camera will attempt to connect to your Wi-Fi network. Wait for the connection to be established, and you’re all set to start monitoring your property remotely using your Google security cameras.
Installing the Google Home app on your smartphone
To set up and manage your Google security cameras, you will need to install the Google Home app on your smartphone. Follow these steps to complete the installation:
- Open the App Store (for iOS devices) or Google Play Store (for Android devices) on your smartphone.
- Search for “Google Home” in the search bar.
- Select the Google Home app from the search results.
- Tap on the “Install” button to download and install the app on your smartphone.
- Once the installation is complete, open the Google Home app.
- Follow the on-screen instructions to sign in with your Google account or create a new one if you don’t have an account yet.
- After signing in, you can start adding and setting up your Google security cameras within the Google Home app.
By installing the Google Home app on your smartphone, you will have access to a user-friendly interface to manage and monitor your security cameras easily.
Adding your cameras to the Google Home app
To add your Google security cameras to the Google Home app, follow these steps:
- Open the Google Home app on your mobile device.
- Tap on the “+” icon to add a new device.
- Select “Set up device” and then “Have something already set up?”
- Search for and select the brand of your security cameras.
- Follow the on-screen instructions to connect your cameras to the Google Home app.
- You may need to log in to your camera account to authorize the connection.
- Once connected, you can view and manage your cameras through the Google Home app.
By adding your cameras to the Google Home app, you can easily monitor and control them from one central location, making it convenient to keep an eye on your home’s security.
Setting up motion detection and alerts
One of the key features of Google security cameras is the ability to set up motion detection and receive alerts when activity is detected. Follow these steps to configure motion detection and alerts:
Step 1: Access camera settings
Open the Google Home app on your mobile device and navigate to the camera you want to configure. Tap on the camera to access its settings.
Step 2: Enable motion detection
In the camera settings, look for the motion detection option and enable it. You may be prompted to set the sensitivity level and activity zones for the camera.
| Sensitivity level | Adjust the sensitivity level to determine how much movement triggers the camera’s motion detection. |
| Activity zones | Define specific areas in the camera’s field of view where you want motion detection to be active. |
Once you have configured the motion detection settings, save your changes.
Step 3: Set up alerts
In the camera settings, locate the alerts option and enable it. You can choose to receive alerts via notifications on your mobile device or email, depending on your preference.
Make sure to test the motion detection and alerts to ensure they are working properly. You can adjust the settings as needed to optimize the camera’s performance.
Testing and Adjusting Your Camera Settings
After installing your Google security camera, it’s crucial to test and adjust the camera settings to ensure optimal performance. Here are some steps to help you with this process:
1. Test the Camera Placement
Check the camera’s field of view by walking around your property and ensuring there are no blind spots. Adjust the camera angle if necessary to capture all crucial areas.
2. Check the Video Quality
View the live feed from the camera on your smartphone or computer to check the video quality. Adjust the resolution settings to achieve the desired image clarity.
Make sure the camera’s night vision feature is working correctly by testing it in low-light conditions.
Adjust the motion detection sensitivity to reduce false alerts and ensure you are only notified when necessary.
By testing and adjusting your camera settings, you can maximize the effectiveness of your Google security camera and enhance your home security system.


