


Setting up a security camera system is an essential step in ensuring the safety and security of your property. One of the key components of a security camera setup is providing power to the cameras. Properly hooking up power to your security cameras is crucial to ensure they function correctly and effectively.
In this guide, we will walk you through the steps to properly hook up power to a security camera system. Whether you are installing a new system or upgrading an existing one, understanding how to connect power to your cameras is vital for optimal performance.
From choosing the right power source to connecting the cables correctly, we will cover everything you need to know to power up your security cameras efficiently. By following these steps, you can ensure that your security system is up and running to protect your property and loved ones.
Step-by-step guide for connecting power to your security camera
Installing a security camera requires proper power connections to ensure it functions correctly. Follow these steps to connect power to your security camera:
1. Determine the power source
Identify the power source for your security camera, whether it’s a power outlet, a power adapter, or a PoE (Power over Ethernet) connection.
2. Connect the power cable
Plug the power cable into the power source and the power input port on the security camera. Make sure the connection is secure to avoid any disruptions in power supply.
By following these steps, you can easily hook up power to your security camera and ensure it operates smoothly.
Locate the power source near your security camera
Before connecting power to your security camera, you need to find a suitable power source nearby. This could be an electrical outlet or a power source specifically designed for security cameras. Make sure the power source is within reach of the camera’s power cable to avoid any unnecessary extensions.
Check the voltage requirements of your security camera
Before connecting power to your security camera, it is crucial to check the voltage requirements of the camera. Most security cameras operate on either 12V or 24V DC power. Make sure to read the user manual or check the specifications of the camera to determine the correct voltage input.
Using the wrong voltage can damage the camera and void any warranties. If you are unsure about the voltage requirements, consult with the manufacturer or a professional installer to ensure the proper power supply is used.
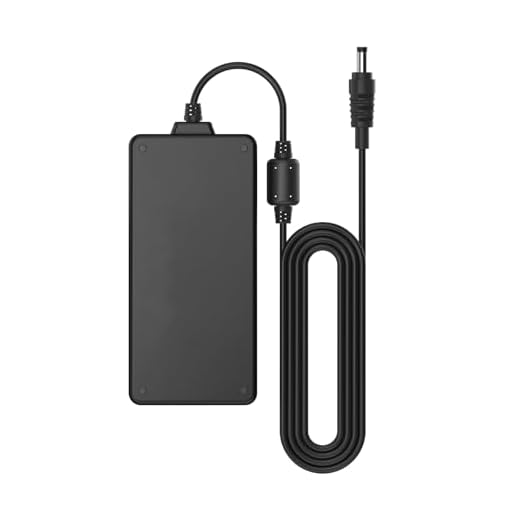
Choose the appropriate power supply for your camera
When hooking up power to your security camera, it is crucial to choose the right power supply to ensure proper functionality and longevity of your camera. Most security cameras operate on either 12V DC or 24V AC power supplies. Make sure to check the specifications of your camera to determine the correct voltage requirement.
If your camera operates on 12V DC, you can use a plug-in power adapter or a centralized power supply box with multiple outputs. For cameras that require 24V AC, you may need a dedicated transformer or power supply unit. It is important to match the voltage and current requirements of your camera to the power supply to avoid damaging your equipment.
Connect the power supply to the camera’s power input
Once you have identified the power input on your security camera, take the power supply that came with the camera. Make sure the voltage and current ratings match the requirements of the camera to avoid any damage.
Step 1: Plug one end of the power supply into a power outlet or surge protector.
Step 2: Connect the other end of the power supply to the power input on the camera. Ensure that the connection is secure to prevent any power disruptions.
Step 3: Turn on the power supply and check if the camera receives power. You may see a light indicator on the camera confirming the power connection.
Once you have successfully connected the power supply to the camera, you can proceed with setting up the camera according to the manufacturer’s instructions.
Use weatherproof connectors for outdoor installations
When installing a security camera outdoors, it is crucial to use weatherproof connectors to ensure the safety and durability of the power connection. Weatherproof connectors are designed to withstand various weather conditions, such as rain, snow, and extreme temperatures, to prevent any damage to the power supply.
Benefits of weatherproof connectors:
1. Protection against water infiltration: Weatherproof connectors have seals and gaskets that prevent water from entering the connection, reducing the risk of short circuits and electrical damage.
2. Long-lasting performance: By using weatherproof connectors, you can extend the lifespan of your security camera system and avoid frequent maintenance or replacements due to weather-related issues.
Ensure a secure connection between the power supply and camera
When connecting the power supply to the security camera, it is crucial to ensure a secure and reliable connection to prevent any power issues or camera malfunctions. Follow these steps to ensure a safe and stable power connection:
1. Use the correct power adapter:
Make sure to use the power adapter provided by the camera manufacturer or a compatible one with the correct voltage and current rating. Using an incorrect power adapter can damage the camera.
2. Connect the power cable securely:
Ensure that the power cable is securely connected to both the camera and the power supply. Check for any loose connections or exposed wires that could cause a short circuit.
Test the power connection to verify functionality
Once you have connected the power supply to your security camera, it is important to test the connection to ensure that everything is working properly.
Steps to test the power connection:
- Check the power source: Make sure that the power source is providing the correct voltage and current required by the security camera.
- Power on the camera: Turn on the power supply and check if the camera lights up or displays any indicators that it is receiving power.
- Monitor the camera feed: Connect the camera to a monitor or a recording device to verify that the camera is capturing video footage.
- Check for any issues: If the camera is not functioning properly, double-check the power connection and troubleshoot any potential issues.
Consider using a UPS for backup power in case of outages
When setting up power for your security camera system, it’s important to consider the possibility of power outages. One way to ensure uninterrupted power supply is to use a UPS (Uninterruptible Power Supply). A UPS acts as a battery backup that kicks in automatically in case of a power outage, keeping your security camera system running smoothly.
When choosing a UPS for your security camera system, make sure to select one that can support the power requirements of all your cameras and other equipment. It’s also important to regularly test the UPS and replace the batteries as needed to ensure reliable backup power.
Follow manufacturer’s instructions for power connection to avoid damage
When hooking up power to a security camera, it is crucial to follow the manufacturer’s instructions carefully to avoid damaging the camera or voiding the warranty. Here are some general guidelines to keep in mind:
- Check the voltage requirements: Make sure the power source you are connecting to meets the voltage requirements specified by the manufacturer.
- Use the correct power adapter: Ensure you are using the correct power adapter that came with the camera or a compatible one recommended by the manufacturer.
- Avoid overloading the power supply: Do not connect multiple cameras to a single power supply if it exceeds the recommended capacity.
- Secure power connections: Make sure all power connections are securely tightened to prevent loose connections or power interruptions.
- Consider using a surge protector: To protect your camera from power surges or fluctuations, consider using a surge protector in your setup.
By following these guidelines and the manufacturer’s specific instructions, you can ensure a safe and proper power connection for your security camera.
Monitor the power status of your security camera regularly
One crucial aspect of maintaining your security camera system is to regularly monitor the power status of your cameras. This ensures that your cameras are receiving power and functioning properly at all times. Here are some tips to help you monitor the power status effectively:
- Check the power source: Ensure that the power source connected to your security camera is stable and reliable. Any fluctuations or interruptions in power supply can affect the performance of your camera.
- Use a power monitoring tool: Consider using a power monitoring tool or device to track the power consumption of your security camera. This can help you identify any issues with power supply and take necessary actions.
- Regular inspections: Make it a habit to visually inspect the power cables and connections of your security camera system regularly. Look out for any signs of damage or wear and tear that may impact the power supply.
- Set up alerts: Some security camera systems come with alert features that notify you in case of power failure or low battery. Make sure to set up these alerts to stay informed about the power status of your cameras.


