

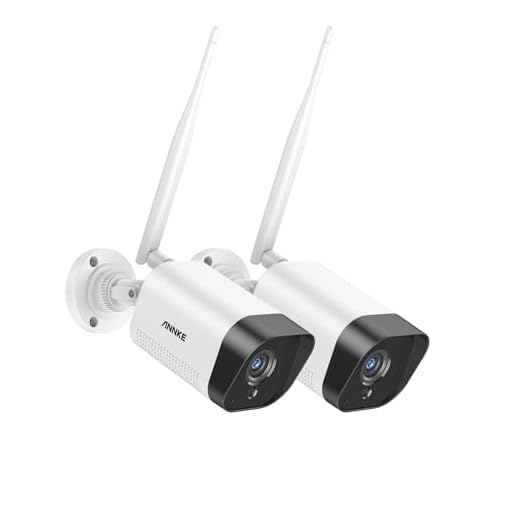
If you’re looking to enhance the security of your home or office, the Annke 1080p wireless security camera is a reliable and convenient option. With its easy setup and high-definition video quality, this camera offers peace of mind and surveillance capabilities. In this guide, we’ll walk you through the process of setting up your Annke camera, so you can start monitoring your property in no time.
Before you begin, make sure you have all the necessary components for installation: the Annke 1080p wireless security camera, a power adapter, a network cable, and a smartphone or computer with the Annke Vision app installed. Once you have everything ready, follow the step-by-step instructions below to set up your camera and connect it to your Wi-Fi network.
How to Set Up Annke 1080p Wireless Security Camera
Setting up your Annke 1080p wireless security camera is a straightforward process that can help you keep your home or business secure. Follow these steps to get started:
Step 1: Unboxing
Begin by unboxing your Annke 1080p wireless security camera and checking that all the components are present. You should have the camera, power adapter, mounting screws, and any other accessories included in the package.
Step 2: Powering On
Connect the power adapter to the camera and plug it into a power outlet. Wait for the camera to power on and initialize.
| LED Indicator | The camera’s LED indicator should start blinking, indicating that it is ready to be set up. |
| Annke Vision App | Download and install the Annke Vision app on your smartphone or tablet. |
Follow the in-app instructions to connect your camera to your Wi-Fi network. Make sure to select the 2.4GHz network as the camera does not support 5GHz Wi-Fi.
Once the camera is successfully connected, you can mount it in the desired location and adjust the angle for optimal coverage. You can then use the Annke Vision app to view the camera feed, customize settings, and receive alerts when motion is detected.
By following these steps, you can easily set up your Annke 1080p wireless security camera and enhance the security of your property.
Unboxing Your Annke Camera
When you receive your Annke 1080p wireless security camera, the first step is to unbox it carefully to ensure all the components are intact. Here’s a step-by-step guide to unboxing your camera:
- Remove the camera from the packaging box.
- Check for all the accessories included such as the power adapter, mounting screws, user manual, and any other items.
- Inspect the camera for any physical damage or defects.
- Ensure that all the components are in good condition before proceeding with the installation.
By unboxing your Annke camera properly, you can ensure a smooth setup process and optimal performance.
Connecting the Power Adapter
To power your Annke 1080p wireless security camera, you will need to connect the power adapter that comes with the camera. Follow these steps to properly connect the power adapter:
1. Locate the power input port on the back of the camera. It is usually labeled “Power” or has a symbol indicating power.
2. Take the power adapter and plug the connector into the power input port on the camera. Make sure it is securely connected.
3. Plug the other end of the power adapter into a power outlet. Ensure that the outlet is working and providing power.
4. Once the power adapter is connected, you should see a light indicator on the camera indicating that it is receiving power.
5. Your Annke 1080p wireless security camera is now powered and ready to use for monitoring your property.
Downloading the Annke App
To set up and manage your Annke 1080p wireless security camera, you will need to download the Annke Vision app on your mobile device. Follow these steps to download the app:
For iOS Users:
1. Open the App Store on your iPhone or iPad.
2. Search for “Annke Vision” in the search bar.
3. Locate the app in the search results and tap on “Get” to download and install the app on your device.
For Android Users:
1. Open the Google Play Store on your Android device.
2. Search for “Annke Vision” in the search bar.
3. Select the app from the search results and tap on “Install” to download and install the app on your device.
Once the app is successfully downloaded and installed, you can proceed to set up your Annke 1080p wireless security camera using the app.
Creating an Annke Account
Before you can set up your Annke 1080p wireless security camera, you need to create an Annke account. Follow these simple steps to create your account:
- Visit the Annke website and click on the “Sign Up” or “Create Account” button.
- Enter your email address and create a strong password for your account.
- Verify your email address by clicking on the link sent to your inbox.
- Once your email is verified, you can log in to your Annke account with your credentials.
- Now you are ready to set up and configure your Annke 1080p wireless security camera.
By creating an Annke account, you can access your camera remotely, receive alerts, and manage your camera settings with ease.
Adding Your Camera to the App
Once you have set up your Annke 1080p wireless security camera physically, the next step is to add it to the app for remote monitoring. Follow these steps to connect your camera:
Step 1: Download the App
Download the Annke Vision app from the App Store (iOS) or Google Play Store (Android) on your smartphone or tablet.
Step 2: Add Camera
Open the app and tap on the “Add Device” button. Follow the on-screen instructions to scan the QR code on the camera or manually input the camera’s serial number.
Connecting to Wi-Fi Network
To connect your Annke 1080p wireless security camera to your Wi-Fi network, follow these steps:
- Power on the camera and wait for the indicator light to start flashing.
- Download the Annke Vision app on your smartphone and create an account.
- Open the app and tap on the camera icon to add a new device.
- Scan the QR code on the camera or manually enter the camera’s serial number.
- Follow the on-screen instructions to connect the camera to your Wi-Fi network.
- Enter your Wi-Fi network’s password when prompted.
- Wait for the camera to connect to the Wi-Fi network, and you’re all set!
Once connected, you can access the camera remotely through the app to view live footage and adjust settings as needed.
Adjusting Camera Settings
Once your Annke 1080p wireless security camera is set up and connected to your network, you may want to adjust its settings for optimal performance. Here’s how you can do it:
1. Accessing the Camera Settings
To access the camera settings, open the Annke Vision app on your mobile device or log in to the camera’s web interface using a web browser on your computer. Once you’re logged in, you’ll be able to access and adjust various settings.
2. Adjusting Camera Parameters
Within the camera settings, you can adjust parameters such as video resolution, frame rate, motion detection sensitivity, night vision settings, and more. Make sure to customize these settings according to your specific needs and preferences.
| Parameter | Adjustment |
| Video Resolution | Choose between different resolution options for your video feed. |
| Frame Rate | Adjust the frame rate to control the smoothness of the video playback. |
| Motion Detection Sensitivity | Set the sensitivity level for motion detection alerts. |
| Night Vision Settings | Customize the night vision mode for optimal performance in low-light conditions. |
Mounting the Camera
Before mounting your Annke 1080p wireless security camera, make sure to choose a suitable location that provides a clear view of the area you want to monitor.
Here is a step-by-step guide on how to mount your camera:
- Use the mounting template provided with the camera to mark the screw holes on the wall or ceiling.
- Drill holes at the marked positions and insert the wall plugs.
- Secure the mounting bracket to the wall or ceiling using screws.
- Attach the camera to the mounting bracket by aligning the slots on the camera with the bracket and sliding it into place.
- Tighten the screws on the camera to secure it in position.
- Adjust the camera angle to achieve the desired view and tighten the screws to lock it in place.
Final Steps
Once the camera is securely mounted, connect it to a power source and configure it according to the manufacturer’s instructions. You can now enjoy the peace of mind that comes with having a reliable security camera system in place.
Testing the Camera’s Functionality
Once you have successfully set up your Annke 1080p wireless security camera, it’s essential to test its functionality to ensure everything is working correctly.
Step 1: Check the Live Feed
Access the camera’s live feed on your smartphone or computer to see if the camera is capturing images and videos properly. Make sure the video quality is clear and the camera is positioned correctly to cover the desired area.
Step 2: Test Motion Detection
Move in front of the camera to trigger the motion detection feature. Check if you receive notifications on your device when motion is detected. Adjust the sensitivity settings if needed to avoid false alarms.
Troubleshooting Common Issues
If you encounter any issues while setting up your Annke 1080p wireless security camera, here are some common troubleshooting steps you can follow:
1. Check the Power Source
Make sure the camera is properly connected to a power source and that the power adapter is working correctly. If the camera is not receiving power, it will not function properly.
2. Verify the Network Connection
Ensure that your camera is connected to a stable Wi-Fi network with a strong signal. If the connection is weak or unstable, it may cause issues with the camera’s performance.
Note: If you continue to experience problems, consult the user manual or contact Annke customer support for further assistance.


