Setting up multiple security cameras in your home or business can provide you with valuable peace of mind and added security. However, connecting multiple cameras can be a daunting task if you’re not familiar with the process. Thankfully, with the right knowledge and tools, you can easily hook up multiple security cameras to ensure comprehensive coverage of your property.
Before you begin the installation process, it’s essential to plan out the placement of your cameras to ensure optimal coverage. Consider the areas you want to monitor and the angles at which the cameras should be placed to capture the best footage. Once you have a plan in place, you can start connecting your cameras.

When connecting multiple security cameras, you’ll need to ensure that you have the necessary cables and power supply for each camera. You’ll also need a central hub or recording device to connect all the cameras to for monitoring and recording purposes. Following the manufacturer’s instructions, you can easily connect each camera to the hub and configure them for optimal performance.
Step-by-Step Guide to Connecting Multiple Security Cameras
Step 1: Choose a central location for your security camera system where all cameras can be easily connected to a power source and the network.
Step 2: Install the necessary software on your computer or mobile device to access and manage the security cameras.
Step 3: Connect each security camera to a power source using the provided power adapters.
Step 4: Connect each camera to the network using Ethernet cables or Wi-Fi connections, depending on the camera model.
Step 5: Configure the settings for each camera using the software to ensure proper functionality and recording options.
Step 6: Test each camera to verify that they are all properly connected and recording footage.
Step 7: Mount the cameras in their desired locations and adjust the angles for optimal coverage.
Step 8: Monitor the camera feeds regularly to ensure the security of your property.
Choose the Right Camera System
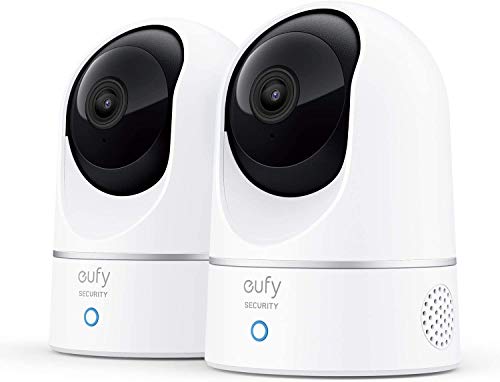
When hooking up multiple security cameras, it’s crucial to choose the right camera system that fits your needs. Consider factors such as the number of cameras you need, the resolution required, whether you want wired or wireless cameras, and if you need features like night vision or motion detection.
Some popular options include CCTV systems, IP cameras, and wireless camera systems. CCTV systems are great for larger properties and offer high-resolution footage, while IP cameras provide remote access and advanced features. Wireless camera systems are easy to install and offer flexibility in camera placement.
Plan Camera Placement Carefully
Before installing multiple security cameras, it is crucial to plan their placement carefully to ensure maximum coverage and effectiveness. Consider the following factors when determining where to place your cameras:
1. Strategic Locations
Identify strategic locations around your property where cameras can capture important areas such as entry points, driveways, and backyards. Make sure to cover vulnerable areas that are often targeted by intruders.
2. Line of Sight
Ensure that each camera has a clear line of sight to its designated area of coverage. Avoid obstructions such as trees, bushes, or walls that could block the camera’s view and compromise its effectiveness.
| Camera Placement Tips | Considerations |
|---|---|
| Height | Mount cameras at a height that provides a wide-angle view without being easily tampered with. |
| Weatherproofing | Choose cameras that are weatherproof to withstand outdoor elements and ensure durability. |
| Lighting | Position cameras to avoid glare from direct sunlight or artificial lighting that may affect image quality. |
By carefully planning the placement of your security cameras, you can enhance the overall security of your property and effectively monitor key areas for potential threats.
Install Cameras Properly
Proper installation of security cameras is crucial for optimal performance. Follow these steps to ensure your cameras are installed correctly:
1. Choose the Right Location
Place your cameras in strategic locations to cover the most vulnerable areas of your property. Make sure they are mounted securely and have a clear view of the area you want to monitor.
2. Check the Camera Placement
Before finalizing the installation, test the camera angles and ensure they provide the desired coverage. Adjust the placement if needed to eliminate blind spots and maximize visibility.
Tip: Consider the lighting conditions in the area and adjust the camera settings accordingly for optimal image quality.
Connect Cameras to a Central Hub
Once you have all your security cameras set up in their desired locations, the next step is to connect them to a central hub for monitoring and recording. Follow these steps to properly connect your cameras to a central hub:
Step 1: Determine the Type of Central Hub
Before connecting your cameras, you need to determine the type of central hub you will be using. This could be a digital video recorder (DVR), a network video recorder (NVR), or a computer with surveillance software installed. Make sure your central hub has enough ports to accommodate all your cameras.
Step 2: Connect Cameras to the Central Hub
Using the appropriate cables, connect each camera to the central hub. Depending on the type of cameras you have, you may need to use coaxial cables, Ethernet cables, or wireless connections. Make sure to follow the manufacturer’s instructions for each camera model.

| Camera | Cable Type |
|---|---|
| Analog Camera | Coaxial Cable |
| IP Camera | Ethernet Cable |
| Wireless Camera | Wireless Connection |
Set Up Remote Viewing Access
Once you have connected all your security cameras to the DVR or NVR system, you can set up remote viewing access to monitor your cameras from anywhere.
1. Ensure that your DVR or NVR system is connected to the internet.
2. Install the remote viewing software on your smartphone, tablet, or computer.
3. Open the software and enter the unique device ID or scan the QR code provided by the system.
4. Create a username and password for remote access.
5. Log in with your credentials to view live footage and recordings from your security cameras remotely.
With remote viewing access, you can keep an eye on your property and loved ones even when you are away from home.
Configure Motion Detection Settings
Setting up motion detection on your security cameras is essential to ensure that you are alerted to any suspicious activity. Follow these steps to configure motion detection settings:
1. Access Camera Settings
Log in to the camera’s web interface or mobile app to access the settings menu. Navigate to the motion detection section.
2. Adjust Sensitivity and Detection Zones
Adjust the sensitivity level of the motion detection to suit your needs. You can also define specific detection zones where you want the camera to monitor for motion.
Pro tip: Fine-tune the settings to avoid false alarms caused by pets or moving trees.
By configuring the motion detection settings on your security cameras, you can ensure that you receive timely notifications of any suspicious activity in the monitored area.
Test the Camera System
After you have successfully connected all your security cameras to the DVR or NVR, it is crucial to test the camera system to ensure everything is working correctly. Follow these steps to test your camera system:
1. Check Camera Feeds
Access the live feed of each camera on your monitor or smartphone to ensure that each camera is capturing the intended area and producing clear images. Make sure all cameras have a stable connection and are transmitting video properly.
2. Test Motion Detection
Walk in front of each camera to test the motion detection feature. Verify that the cameras can detect motion and trigger alerts or recordings as programmed. Adjust the sensitivity settings if necessary to avoid false alarms.
| Camera Number | Motion Detection Test Result |
| Camera 1 | Pass |
| Camera 2 | Pass |
| Camera 3 | Pass |
Maintain and Monitor Your Security Cameras
Once you have set up multiple security cameras, it is important to regularly maintain and monitor them to ensure they are functioning properly. Here are some tips to help you keep your security cameras in top condition:
| Regular Cleaning: | Keep the lenses of your cameras clean by gently wiping them with a microfiber cloth. Dust and dirt can affect the clarity of the footage. |
| Check Connections: | Regularly inspect the cables and connections of your cameras to make sure everything is securely in place. Loose connections can lead to camera malfunctions. |
| Monitor Footage: | Check the footage from your security cameras regularly to ensure they are capturing the intended areas and that the quality of the video is clear. |
| Update Software: | Make sure to keep your camera’s software up to date to ensure you have the latest features and security patches installed. |
| Backup Footage: | Regularly back up the footage from your security cameras to an external storage device or cloud storage to prevent data loss in case of a camera failure. |