


Security camera systems are essential for protecting your store and ensuring the safety of your employees and customers. However, connecting to and managing these systems can sometimes be a daunting task. In this guide, we will walk you through the steps to successfully connect to your store’s security camera system.
Before you begin, make sure you have the necessary access credentials and permissions to connect to the security camera system. This may involve contacting your IT department or security provider to obtain the required information. Once you have the necessary details, you can proceed with the following steps.

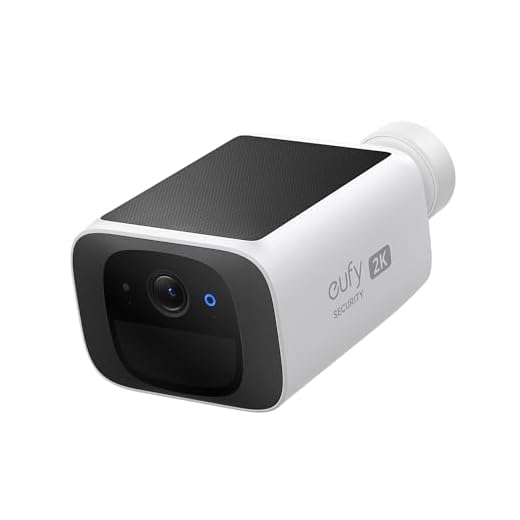
First, determine the type of security camera system your store uses. This could be a traditional closed-circuit television (CCTV) system, an IP-based system, or a cloud-based system. Each type may require a different method of connection, so it’s important to identify the specific system in place.
Step-by-Step Guide to Connect to Store Security Camera System
In order to connect to your store’s security camera system, follow these simple steps:
- Check the Connection: Make sure the security camera system is properly set up and connected to the network.
- Access the System: Use the provided login credentials to access the security camera system through a web browser or dedicated software.
- View Live Feeds: Once logged in, you should be able to view live feeds from the cameras installed in your store.
- Adjust Settings: Explore the settings menu to customize camera views, recording schedules, and other preferences.
- Playback Recordings: Review past recordings by accessing the playback feature and selecting the date and time of the footage you want to view.
- Remote Access: For remote monitoring, set up mobile or desktop apps to access the security camera system from anywhere.
By following these steps, you can easily connect to your store’s security camera system and monitor your premises effectively.
Check Camera Compatibility with System
Before connecting your camera to a store security system, ensure that the camera is compatible with the system. Check the specifications of both the camera and the security system to verify compatibility. Look for information such as video resolution, frame rate, compression format, and connectivity options.
If the camera uses a different protocol or encoding method than the security system, you may need an additional converter or adapter to make them work together. Make sure to consult the user manuals of both the camera and the security system for detailed information on compatibility requirements.
Testing the camera with the security system before installation can help you identify any compatibility issues early on and avoid any potential problems once the system is in place. It is important to ensure that the camera can communicate effectively with the security system to provide reliable surveillance footage.
Install Necessary Software for Connection
Before you can connect to a store security camera system, you will need to install the necessary software on your device. This software is typically provided by the manufacturer of the security cameras and is essential for accessing the live feed and recordings.
Step 1: Download the Software
Visit the manufacturer’s website or contact their customer support to obtain the software needed to connect to the security camera system. Make sure to download the correct version for your operating system.
Step 2: Install the Software
Once the software has been downloaded, follow the installation instructions provided by the manufacturer. This may involve running an installer program and configuring the software settings to connect to the store security camera system.
Connect Camera to Power Source
Once you have identified the power cable that came with your security camera, you can proceed to connect it to a power source. Follow these steps:
| 1. | Locate a nearby power outlet or use a power extension cord to reach the desired location for your camera. |
| 2. | Insert the power cable into the power input port on the camera. Make sure it is securely connected. |
| 3. | Plug the other end of the power cable into the power outlet. Ensure that the outlet is providing a stable power supply. |
| 4. | Turn on the power source and verify that the camera lights up, indicating that it is receiving power. |
Configure Camera Settings on System
Once you have successfully connected to the store security camera system, you may need to configure the camera settings to ensure optimal performance. Here are the steps to configure the camera settings:
- Access the camera settings menu on the system interface.
- Adjust the camera resolution to the desired level for clear images.
- Set the frame rate for smooth video playback.
- Configure the motion detection sensitivity to trigger alerts when motion is detected.
Make sure to save your changes after configuring the camera settings to apply them effectively. You can also consult the user manual for specific instructions on adjusting the settings based on your requirements.
Establish Network Connection for Remote Access
Connecting to a store security camera system remotely requires establishing a network connection. Follow these steps to ensure a secure and stable connection:
1. Ensure that the store security camera system is connected to a stable and reliable network with internet access.

2. Obtain the IP address and port number of the security camera system from the system administrator or documentation.
3. Configure port forwarding on the store’s router to allow remote access to the security camera system.
4. Install and configure remote viewing software or app on your computer or mobile device to access the security camera system remotely.
5. Use the provided IP address, port number, and login credentials to connect to the store security camera system from any location with an internet connection.
Set Up User Accounts and Permissions
Once the store security camera system is installed, it is important to set up user accounts and permissions to control access to the system. Follow these steps to create user accounts and assign permissions:
-
Create User Accounts
Create individual user accounts for each person who will be accessing the security camera system. This will help track who has access to the system and ensure accountability.
-
Assign Permissions
Assign specific permissions to each user account based on their role and responsibilities. For example, you may want to restrict certain users from accessing certain cameras or settings to maintain security and privacy.
By setting up user accounts and permissions, you can ensure that only authorized individuals have access to the store security camera system and maintain control over who can view and manage the cameras.
Test Camera Feed and Functionality
Once you have successfully connected to the store security camera system, it is crucial to test the camera feed and ensure that the system is functioning properly.
Step 1: Access the camera feed through the designated software or application on your device.
Step 2: Check the quality of the video feed to ensure that the images are clear and not blurry.
Step 3: Verify that the camera angles are set up correctly to cover the desired areas within the store.
Step 4: Test the camera’s pan, tilt, and zoom functionality to ensure that you can adjust the camera as needed.
Step 5: Check for any delays or lags in the video feed, as this could indicate connectivity issues.
Step 6: If you encounter any issues during the testing process, troubleshoot the connection and camera settings to resolve them.
Ensure Security Protocols for Data Protection
When connecting to a store security camera system, it is crucial to ensure robust security protocols to protect the data being transmitted and stored. Here are some key steps to enhance data protection:
1. Use Encryption: Encrypting the data transmitted between the security camera system and your device can prevent unauthorized access and ensure that sensitive information remains secure.
2. Implement Access Control: Restrict access to the security camera system to authorized personnel only. This helps prevent unauthorized users from tampering with the system or viewing sensitive footage.
3. Regularly Update Software: Keep the security camera system software up-to-date to patch any vulnerabilities that could be exploited by hackers. Regular updates can help strengthen the system’s security.
4. Enable Two-Factor Authentication: Adding an extra layer of security with two-factor authentication can help prevent unauthorized access even if login credentials are compromised.
5. Monitor System Activity: Regularly monitor the activity on the security camera system to detect any unusual behavior that may indicate a security breach. Prompt action can help mitigate potential risks.


