

Security cameras are an essential part of any surveillance system, providing peace of mind and protection for your property. However, in order for security cameras to function properly, they need to be connected to a power source. Connecting power to security cameras may seem like a daunting task, but with the right knowledge and tools, it can be a straightforward process.
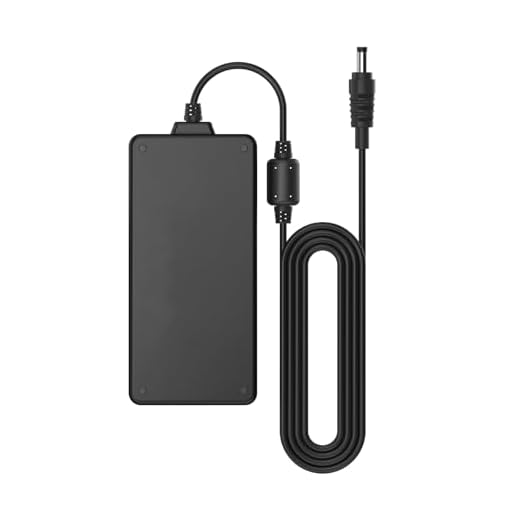
Before you begin, it’s important to determine the power requirements of your security cameras. Most security cameras operate on low voltage DC power, typically 12V or 24V. Make sure you have the correct power supply that matches the voltage requirements of your cameras.
Once you have the appropriate power supply, you can connect power to your security cameras by running a power cable from the power source to each camera. Depending on the setup, you may need to use a power splitter or power distribution box to connect multiple cameras to a single power source.
Step-by-step guide to connecting power to security cameras
Step 1: Identify the power source for your security cameras. This could be a power outlet, a PoE (Power over Ethernet) switch, or a dedicated power supply.
Step 2: Make sure the power source is compatible with your security cameras. Check the voltage and current requirements of your cameras and compare them to the output of the power source.
Step 3: Connect the power cable from the power source to the power input on the security camera. Make sure the connection is secure to avoid any power loss or damage.
Step 4: Turn on the power source and check that the security camera is receiving power. You may see an indicator light or hear a beep to confirm the connection.
Step 5: Test the camera to ensure it is functioning properly. Check the video feed and adjust the angle if needed.
Step 6: Secure any loose cables and tidy up the installation to prevent any accidents or tampering.
Step 7: Monitor the security camera regularly to ensure it continues to receive power and function effectively.
Locate power source
Before connecting power to your security cameras, you need to locate a suitable power source. This can be an electrical outlet, a power supply box, or a PoE (Power over Ethernet) switch, depending on the type of cameras you have.
If you are using wired cameras, make sure the power source is located within reach of the cameras’ power cables. If you are using wireless cameras, ensure the power source is easily accessible for maintenance and battery replacement.
It is important to choose a power source that is stable and reliable to ensure uninterrupted power supply to your security cameras. Avoid using extension cords or power strips that may cause voltage fluctuations or power surges.
Choose appropriate power supply
When connecting power to security cameras, it is crucial to choose the appropriate power supply to ensure the cameras function properly. Make sure to check the power requirements of your specific cameras to select the right power source.
Some security cameras may require a direct power source, while others can be powered through Ethernet cables (Power over Ethernet, PoE). If you are using PoE cameras, you will need a PoE injector or switch to provide power and data transmission.
Prepare necessary tools
Before connecting power to your security cameras, make sure you have the following tools ready:
- Power adapter
- Power cables
- Power supply unit
- Screwdriver
- Drill (if needed for installation)
Having these tools on hand will help you complete the power connection process smoothly and efficiently.
Connect power cable to camera
Once you have determined the appropriate power source for your security camera, it’s time to connect the power cable to the camera. Follow these steps to ensure a proper connection:
- Locate the power input port on the camera. This is usually located on the back or bottom of the camera.
- Take the power cable and plug one end into the power input port on the camera.
- Make sure the connection is secure and the cable is inserted fully into the port.
- Connect the other end of the power cable to the power source you have chosen, such as a power outlet or a power adapter.
- Ensure that the power source is turned on and providing power to the camera.
- Once the power cable is connected and the camera is receiving power, you should see the camera’s LEDs light up or hear a sound indicating that the camera is powered on.
Secure Connection with Waterproof Seal
When connecting power to security cameras, it is crucial to ensure a secure and waterproof seal to protect the electrical connections from moisture and other environmental factors. Follow these steps to create a secure connection with a waterproof seal:
Step 1: Use Waterproof Connectors
Choose waterproof connectors that are specifically designed for outdoor use and provide a tight seal to prevent water from entering the connection.
Step 2: Seal the Connection
After connecting the power cables, use waterproof sealant or silicone to seal the connection and ensure a watertight seal. This will help prevent moisture from causing damage to the electrical components.
By following these steps, you can ensure a secure connection with a waterproof seal for your security cameras, protecting them from the elements and ensuring reliable performance.
Test power supply with multimeter
Before connecting the power supply to your security cameras, it’s crucial to test the voltage output to ensure it meets the requirements of your cameras. A multimeter is a handy tool for this task.
Here’s how you can test the power supply with a multimeter:
- Set the multimeter: Turn on your multimeter and set it to the DC voltage range that matches the output of your power supply.
- Connect the probes: Connect the black probe to the negative terminal and the red probe to the positive terminal of the power supply.
- Read the voltage: The multimeter will display the voltage output of the power supply. Ensure it matches the required voltage for your security cameras.
Important tips:
- Check the polarity: Make sure the probes are connected correctly to avoid damaging your equipment.
- Double-check the voltage: Confirm the voltage reading multiple times to ensure accuracy.
Mount camera in desired location
Before connecting power to your security camera, make sure to mount it in the desired location. Choose a spot that provides a clear view of the area you want to monitor and ensures the camera is securely fixed in place.
Use the appropriate mounting hardware to attach the camera to a wall, ceiling, or other suitable surface. Make sure the camera is positioned at the correct angle for optimal coverage.
Check camera feed for power connection
Before connecting power to your security camera, it’s important to check the camera feed to ensure that the power connection is working properly. This will help prevent any issues with power supply and ensure that your camera is functioning correctly.
Steps to check camera feed for power connection:
- Access the camera feed through your monitoring system or app.
- Look for any alerts or notifications indicating power issues.
- Check the camera’s status to see if it is receiving power.
- If the camera feed is not displaying or there are power issues, troubleshoot the power connection.
By checking the camera feed for power connection, you can ensure that your security camera system is working effectively and providing the necessary surveillance for your property.
Monitor Camera Performance Regularly
Regular monitoring of your security cameras is essential to ensure that they are functioning properly and capturing high-quality footage. Set aside time to check the camera feeds regularly to identify any issues or malfunctions. Look for signs of image distortion, pixelation, or any other abnormalities that may indicate a problem with the camera or its power supply.
Tip: Create a schedule for checking the camera performance, such as daily or weekly inspections, to stay on top of any issues that may arise.
By monitoring your security cameras regularly, you can proactively address any technical issues and ensure that your surveillance system is operating effectively.


