Wifi cameras and security lights are essential components of a smart home security system. By integrating these devices, you can enhance your home’s safety and monitor your property remotely. However, setting up a wifi camera to work with a security light may seem complicated at first. In this guide, we will walk you through the steps to connect your wifi camera to a security light seamlessly.
Before you begin the setup process, make sure you have a stable internet connection and access to your home’s wifi network. Additionally, ensure that your wifi camera and security light are compatible with each other and that you have the necessary tools for installation.

Follow the instructions provided by the manufacturer of your wifi camera and security light to connect the two devices. Typically, this involves configuring the settings on both devices to establish a secure connection. Once connected, you can customize the settings to meet your specific security needs, such as motion detection, alerts, and recording options.
Step-by-step guide to connect your wifi camera to a security light
Connecting your wifi camera to a security light can provide enhanced surveillance and security for your property. Follow these steps to easily set up the connection:
- Choose a compatible wifi camera: Ensure that your wifi camera is compatible with the security light and supports the necessary protocols for connectivity.
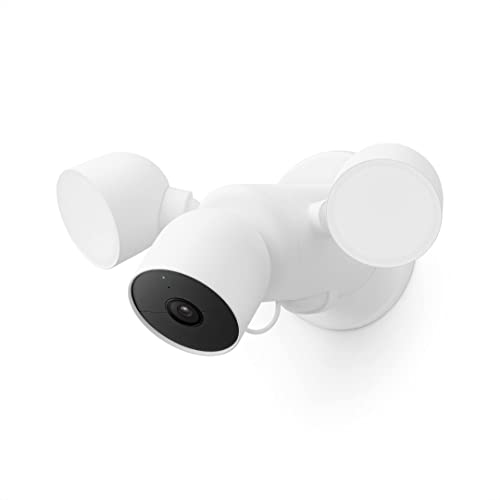
- Install the security light: Mount and install the security light in a strategic location where it can cover the desired area for surveillance.
- Set up the wifi camera: Follow the manufacturer’s instructions to set up and configure your wifi camera on your network.
- Connect the camera to the security light: Locate the connection point on both devices and establish a secure connection between the wifi camera and the security light.
- Configure settings: Adjust the settings on both the camera and the security light to ensure seamless integration and optimal performance.
- Test the connection: Verify that the wifi camera is successfully connected to the security light by testing the surveillance capabilities and monitoring the footage.
Check compatibility of devices
Before attempting to connect your wifi camera to a security light, it is important to check the compatibility of the devices. Make sure that both the camera and the security light are compatible with each other in terms of wireless protocols and communication standards.
Some wifi cameras and security lights may require specific apps or software to work together seamlessly. Check the manufacturer’s specifications and documentation to ensure that the devices are compatible and can communicate effectively.
Install the security light
Step 1: Choose a suitable location for the security light that provides optimal coverage of the area you want to monitor.
Step 2: Ensure the light is installed at a height that allows the camera to capture clear images and videos.
Step 3: Follow the manufacturer’s instructions to securely mount the security light to the desired surface.
Step 4: Connect the power source to the security light according to the provided guidelines.
Step 5: Test the security light to ensure it is functioning properly before proceeding to connect the wifi camera.
Download the camera app
Before connecting your wifi camera to a security light, you need to download the camera app on your smartphone or tablet. The camera app is essential for configuring the camera settings, viewing the live feed, and accessing the recorded footage.
Make sure to download the official app provided by the camera manufacturer to ensure compatibility and access to all the features. You can find the camera app on the App Store for iOS devices or Google Play Store for Android devices.
Once you have downloaded the camera app, follow the on-screen instructions to create an account and set up the camera. Make sure to enable all necessary permissions, such as access to the camera, microphone, and location, to ensure the app functions properly.
Power on the camera
Before connecting your WiFi camera to a security light, you need to ensure that the camera is powered on and ready for setup. Follow these steps to power on your camera:
- Locate the power button on the camera.
- Press and hold the power button until you see the camera’s indicator lights turn on.
- Wait for the camera to boot up and initialize. This may take a few moments.
- Once the camera is powered on, you are ready to proceed with connecting it to your security light.
Connect camera to wifi
Connecting your camera to your wifi network is a simple process that can be done in a few easy steps. Follow the instructions below to get your camera up and running:
| Step 1: | Make sure your camera is powered on and within range of your wifi network. |
| Step 2: | Access the camera’s settings menu and look for the wifi connection option. |
| Step 3: | Select your wifi network from the list of available networks and enter the wifi password when prompted. |
| Step 4: | Wait for the camera to connect to the wifi network. Once connected, you should see a confirmation message on the camera’s display. |
| Step 5: | You can now access your camera remotely using the wifi connection. Make sure to test the connection by viewing the camera feed on your smartphone or computer. |
Sync camera with app
To connect your wifi camera to a security light, you will need to sync the camera with the corresponding app on your smartphone or tablet. Follow these steps to sync your camera with the app:
- Download and install the app on your device from the App Store or Google Play Store.
- Open the app and create an account or log in if you already have one.
- Follow the on-screen instructions to add a new device to the app.
- Put your camera in pairing mode by following the manufacturer’s instructions.
- Once the camera is in pairing mode, the app should detect it and prompt you to connect.
- Follow the on-screen prompts to complete the pairing process.
Once the camera is successfully synced with the app, you can now access and control it remotely through the app on your mobile device.
Adjust camera settings
Before connecting your wifi camera to a security light, it is important to adjust the camera settings to ensure optimal performance. Follow these steps to adjust the settings:
1. Positioning: Make sure the camera is positioned correctly to capture the desired area. Adjust the angle and height of the camera as needed.
2. Resolution: Check the resolution settings of the camera and adjust them to suit your needs. Higher resolution provides clearer images but may require more bandwidth.
3. Motion detection: Enable motion detection on the camera to alert you of any movement in the area. Adjust the sensitivity of the motion detection to reduce false alarms.
4. Night vision: If your camera has night vision capabilities, adjust the settings to ensure clear footage in low-light conditions. Test the night vision to verify its effectiveness.
5. Network settings: Ensure that the camera is connected to the correct wifi network and adjust any network settings as needed. Make sure the camera has a stable connection for optimal performance.
Test camera and security light
Once you have successfully connected your wifi camera to your security light, it’s important to test the setup to ensure everything is working correctly. Here are some steps to test the camera and security light:
1. Check the camera feed
Access the camera feed on your smartphone or computer to see if the camera is capturing and transmitting video footage correctly. Make sure the camera is positioned correctly and has a clear view of the area you want to monitor.
2. Test the motion detection
Walk in front of the camera to trigger the motion detection feature. Check if the security light turns on automatically when motion is detected. You can adjust the sensitivity of the motion detection settings if needed.
Troubleshooting tips
If you are having trouble connecting your wifi camera to a security light, here are some troubleshooting tips to help you:
- Check the power source: Ensure that both the wifi camera and the security light are properly powered on and receiving electricity.
- Verify the wifi connection: Make sure that the wifi camera is connected to a stable wifi network with a strong signal.
- Reset the devices: Try resetting both the wifi camera and the security light to their factory settings and then attempt to reconnect them.
- Update firmware: Check if there are any firmware updates available for your wifi camera or security light and install them if needed.
- Check compatibility: Ensure that the wifi camera is compatible with the security light and that they can communicate with each other.
- Distance matters: Keep the wifi camera within the recommended distance from the security light to ensure a stable connection.
- Seek professional help: If all else fails, consider consulting a professional technician or the manufacturer for further assistance.