Security cameras are an essential part of modern home security systems, providing you with peace of mind and a sense of security. However, setting up and connecting security cameras can sometimes be a daunting task. In this guide, we will walk you through the process of connecting your security cameras to ensure that your home is well-protected.
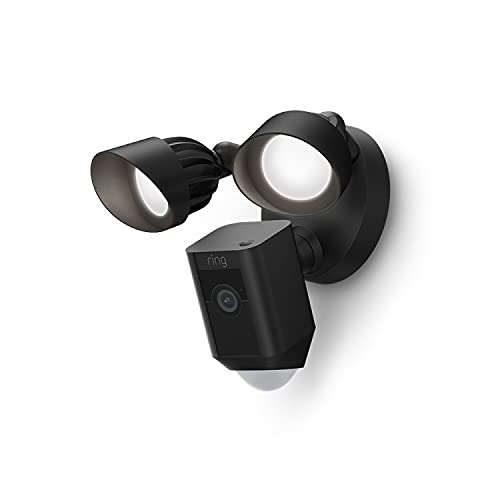
Before you begin the installation process, it is important to choose the right type of security cameras for your needs. Whether you opt for wired or wireless cameras, make sure they are compatible with your home security system. Once you have selected the right cameras, it’s time to start the installation process.
Connecting your security cameras involves several steps, including mounting the cameras in strategic locations, running cables if necessary, and configuring the cameras to work with your network. By following the manufacturer’s instructions and taking the time to properly set up your cameras, you can ensure that your home is secure and protected.
How to Connect My Security Cameras That
Connecting your security cameras is an important step in setting up your home or business surveillance system. Follow these simple steps to ensure your cameras are properly connected and functioning:
1. Power on your cameras: Make sure your security cameras are properly plugged in and receiving power. Without power, your cameras will not function.
2. Connect to a network: Most modern security cameras are Wi-Fi enabled, so you’ll need to connect them to your home or business network. Follow the instructions provided with your cameras to connect them to your Wi-Fi network.
3. Install the camera software: Once your cameras are connected to your network, you’ll need to install the camera software on your computer or mobile device. This software will allow you to access and control your cameras remotely.
4. Set up remote access: To view your camera feeds remotely, you’ll need to set up remote access. This typically involves creating an account with the camera manufacturer and configuring your cameras for remote viewing.
5. Test your cameras: Once everything is set up, test your cameras to ensure they are functioning properly. Check the video feeds and make sure you can access them remotely.
By following these steps, you can easily connect your security cameras and ensure your home or business is properly protected.
Choose the Right Camera
When selecting security cameras for your home or business, it’s essential to consider your specific needs and requirements. Here are some key factors to keep in mind:
Resolution
Higher resolution cameras provide clearer images, making it easier to identify details such as faces or license plates. Consider cameras with at least 1080p resolution for optimal clarity.
Outdoor vs. Indoor
Ensure that your cameras are suitable for the environment where they will be installed. Outdoor cameras should be weatherproof and able to withstand harsh conditions, while indoor cameras may focus more on aesthetics and discreet placement.
Pro tip: Look for cameras with infrared night vision capabilities for clear footage even in low-light conditions.
By taking these factors into account, you can choose the right security cameras to meet your specific needs and ensure optimal performance.
Determine the Placement
Before connecting your security cameras, it’s crucial to determine the best placement for each camera. Consider areas that need monitoring, such as entry points, windows, and high-traffic areas. Make sure the cameras have a clear line of sight and are positioned to capture important details. Avoid placing cameras in areas with excessive glare or direct sunlight, as this can affect the image quality. Additionally, ensure the cameras are out of reach to prevent tampering or vandalism.
Check Compatibility
Before connecting your security cameras, it’s important to ensure that they are compatible with the system or network you plan to use. Here are a few key factors to consider:
Camera Type
Make sure that the security cameras you have are compatible with the type of system or network you are using. For example, if you have IP cameras, they will need to be connected to an IP-based network.
System Requirements
Check the technical specifications and system requirements of your security cameras to ensure they are compatible with your existing setup. This includes checking for compatibility with the operating system, software, and hardware components.
| Camera Model | System Compatibility |
| Model A | Compatible with Windows and Mac OS |
| Model B | Requires specific software for optimal performance |
Set Up the Network
Before connecting your security cameras, you need to set up your network properly. Make sure you have a stable internet connection and a router that supports Ethernet connections. Follow these steps to set up the network:
1. Connect the Router
Connect your router to the modem using an Ethernet cable. Make sure both devices are powered on and working correctly.
2. Configure the Router
Access your router’s settings by typing its IP address into a web browser. Set up the network name (SSID) and password to secure your connection.
Once your network is set up, you can proceed to connect your security cameras to the network following the manufacturer’s instructions.
Install the Camera
Before you begin the installation process, make sure you have all the necessary tools and equipment handy. This may include a power drill, screws, a screwdriver, and a ladder.
Step 1: Choose the Location
Determine the best location to install your security camera. Make sure it is positioned to cover the desired area and is within range of a power source.
Step 2: Mount the Camera
| 1. Use the power drill to create holes for mounting the camera. |
| 2. Secure the camera in place using screws and a screwdriver. |
| 3. Adjust the angle of the camera to ensure optimal coverage. |
Configure the Settings
Once you have connected your security cameras to your network, you will need to configure the settings to ensure they are working properly. Here are some steps to help you set up your security cameras:
- Access the camera settings through the camera’s web interface by entering its IP address in a web browser.
- Log in using the default username and password provided by the manufacturer.
- Change the default username and password to ensure security.
- Set up the date and time settings to ensure accurate timestamps on your footage.
- Configure motion detection settings to receive alerts when motion is detected.
- Set up recording settings to specify when and how footage should be recorded.
- Adjust image quality and resolution settings for optimal video quality.
- Enable remote access to view your camera feeds from anywhere.
- Regularly update the firmware to ensure your cameras have the latest security patches.
Test the Connection
Once you have connected your security cameras to the network, it is important to test the connection to ensure everything is working properly.
1. Check the Video Feed
Access the video feed from each camera on your computer or mobile device to make sure you can see live footage. Check the quality of the video and ensure there are no glitches or delays.
2. Test Remote Access
Try accessing the camera feeds remotely from a different location or using a different network. This will help you verify that you can monitor your cameras even when you are not at home.