

If you have a security camera system with a DVR (Digital Video Recorder) and want to view the footage on your Mac, you’re in the right place. Connecting your security camera DVR to your Mac can provide you with peace of mind and the ability to monitor your property remotely.
There are a few different methods you can use to connect your security camera DVR to your Mac. One common way is to use software provided by the manufacturer of your DVR system. This software allows you to access the DVR remotely and view live footage or playback recordings on your Mac.
Another option is to connect your security camera DVR to your Mac using a network connection. By setting up your DVR on your local network and configuring your Mac to access it, you can view the camera feeds directly on your computer. This method may require some technical know-how, but it can be a convenient way to monitor your cameras.
Step-by-Step Guide to Connect Security Camera DVR to Mac
If you want to connect your security camera DVR to your Mac, follow these steps:
- Check if your security camera DVR has a network port or supports network connection.
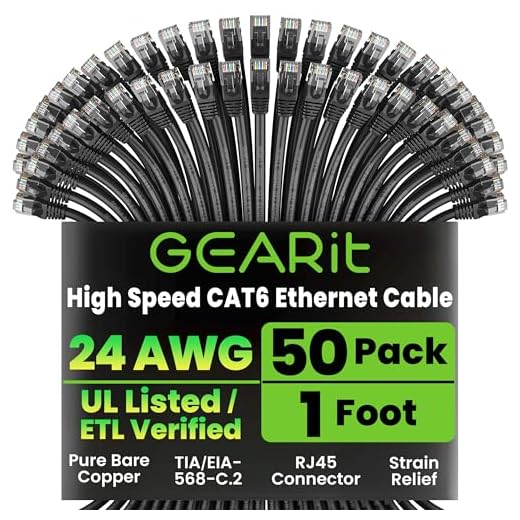
- Connect the DVR to your home network using an Ethernet cable.
- On your Mac, open the Safari web browser and enter the IP address of your DVR in the address bar.
- You may need to log in to your DVR using the default username and password provided by the manufacturer.
- Once logged in, you can view live video feeds, playback recorded footage, and configure settings from your Mac.
- Make sure your Mac meets the minimum system requirements for viewing and recording video from your security camera DVR.
- Consider installing dedicated software or apps provided by the DVR manufacturer for easy access and control.
Check Compatibility of Security Camera DVR and Mac System
Before attempting to connect your security camera DVR to your Mac, it is important to ensure that the two devices are compatible with each other. Here are some key points to consider:
1. DVR System Compatibility:
Check the specifications of your security camera DVR to see if it is compatible with Mac systems. Some DVRs may only be designed to work with Windows-based computers, so it is crucial to confirm compatibility before proceeding.
2. Software Compatibility:
Make sure that the software required to access and control your security camera DVR is available for Mac OS. Some DVR systems come with proprietary software that may not be supported on Mac systems, so check for Mac-compatible alternatives or updates.
| Compatibility Checklist | |
| DVR System Compatibility | Check for Mac compatibility in DVR specifications |
| Software Compatibility | Ensure software for DVR is Mac-compatible |
Obtain Necessary Cables and Adapters for Connection
Before you can connect your security camera DVR to your Mac, you will need to ensure you have the necessary cables and adapters on hand. Depending on the type of DVR you have and the connections available, you may need different cables and adapters.
Common cables and adapters that you may need include HDMI cables, VGA cables, USB cables, and video capture devices. Make sure to check the ports on your DVR and your Mac to determine the type of cables and adapters you will need for the connection.
Install Security Camera DVR Software on Mac
To connect your security camera DVR to your Mac, you will need to install the appropriate software. Here are the steps to install the DVR software on your Mac:
Step 1: Check Compatibility
Before installing the software, make sure that it is compatible with your Mac operating system. Check the system requirements of the software to ensure smooth installation.
Step 2: Download and Install Software
Go to the manufacturer’s website or the software provider’s website to download the DVR software for Mac. Follow the instructions provided to install the software on your Mac.
Connect Security Camera DVR to Mac via USB or Ethernet
Connecting your security camera DVR to your Mac can be done using either a USB or Ethernet connection. Here’s how:
Using USB Connection:
- Locate the USB port on your security camera DVR.
- Connect one end of the USB cable to the USB port on the DVR.
- Connect the other end of the USB cable to an available USB port on your Mac.
- Wait for your Mac to recognize the DVR as a connected device.
- You may need to install any necessary drivers or software provided by the DVR manufacturer.
- Once connected, you can access the DVR’s files and settings on your Mac.
Using Ethernet Connection:
- Locate the Ethernet port on your security camera DVR.
- Connect one end of an Ethernet cable to the Ethernet port on the DVR.
- Connect the other end of the Ethernet cable to an available Ethernet port on your Mac or to a router connected to your Mac.
- Ensure that both your DVR and Mac are on the same network.
- Open a web browser on your Mac and enter the DVR’s IP address to access its interface.
- You may need to enter a username and password to log in to the DVR’s interface.
By following these steps, you can easily connect your security camera DVR to your Mac using either a USB or Ethernet connection.
Configure Network Settings on Security Camera DVR
Configuring network settings on your security camera DVR is essential for connecting it to your Mac. Follow these steps to set up the network settings:
- Access the DVR’s settings menu by logging in with the admin credentials.
- Navigate to the network settings section in the menu.
- Choose the network connection type (wired or wireless) based on your setup.
- Enter the IP address, subnet mask, gateway, and DNS server information provided by your network administrator.
- Save the settings and restart the DVR to apply the changes.
Once you have configured the network settings on your security camera DVR, you can proceed to connect it to your Mac for monitoring and recording purposes.
Set Up Remote Viewing Access on Mac for Security Camera DVR
If you want to access your security camera DVR remotely on your Mac, you’ll need to set up remote viewing access. Follow these steps to get started:
Step 1: Obtain Your DVR’s IP Address
First, you’ll need to find the IP address of your security camera DVR. You can usually find this information in the DVR’s settings or manual.
Step 2: Set Up Port Forwarding
Next, you’ll need to set up port forwarding on your router to allow remote access to your DVR. Log in to your router’s settings and configure port forwarding for the DVR’s IP address and the appropriate ports (usually 80 or 8080).
| Protocol | Port Range | Local IP Address |
|---|---|---|
| TCP | 80 | Your DVR’s IP Address |
Make sure to save the settings and restart your router for the changes to take effect.
Test Connection and Ensure Live Feed Display on Mac
Once the DVR is connected to your Mac, it’s important to test the connection and ensure that the live feed from your security camera is displaying correctly. Follow these steps to verify the connection:
Step 1: Launch the DVR Viewing Software
Open the DVR viewing software on your Mac. This software is usually provided by the manufacturer of the security camera system. If you don’t have the software installed, you may need to download and install it from the manufacturer’s website.
Step 2: Connect to the DVR
Once the software is open, locate the option to connect to the DVR. Enter the IP address, username, and password for the DVR to establish the connection. If the connection is successful, you should see the live feed from your security camera displayed on your Mac.
Enable Motion Detection and Recording Features on Security Camera DVR
To enhance the security surveillance capabilities of your security camera DVR, you can enable motion detection and recording features. Follow these steps to activate these functionalities:
1. Access DVR Settings
Log in to your security camera DVR software and navigate to the settings menu. Look for the motion detection and recording options in the settings panel.
2. Configure Motion Detection
Adjust the sensitivity and detection zones for motion detection to suit your security needs. You can customize the areas of the camera’s view that will trigger motion alerts.
Important: Make sure to save your settings after configuring motion detection to apply the changes.
By enabling motion detection and recording features on your security camera DVR, you can monitor specific areas for any suspicious activity and ensure that your property is secure at all times.
Secure Connection with Password and Encryption Settings
When connecting your security camera DVR to your Mac, it is essential to ensure a secure connection by setting up strong password and encryption settings.
1. Set a Strong Password:
Make sure to set a strong password for your security camera DVR to prevent unauthorized access. Use a combination of letters, numbers, and special characters to create a secure password.
2. Enable Encryption:
Enable encryption settings on your security camera DVR to secure the data transmission between the camera and your Mac. This will help protect your footage from being intercepted by unauthorized users.
Troubleshoot Common Connectivity Issues Between Security Camera DVR and Mac
When connecting your security camera DVR to your Mac, you may encounter some common connectivity issues that can be frustrating to troubleshoot. Here are some troubleshooting tips to help you resolve these issues:
1. Check the Physical Connections:
Make sure that all cables are securely connected between the security camera DVR and your Mac. Check the power supply and Ethernet cables to ensure they are properly plugged in and not damaged.
2. Verify Network Settings:
Ensure that your Mac and the security camera DVR are on the same network. Check the IP addresses and subnet masks to confirm they are configured correctly for communication.
- Check the network settings on your Mac by going to System Preferences > Network.
- Access the network settings on the security camera DVR interface to verify the configuration.
If necessary, consult the user manuals for both devices for guidance on network settings and configuration.
By following these troubleshooting steps, you can resolve common connectivity issues between your security camera DVR and Mac, allowing you to view and manage your surveillance footage seamlessly.


