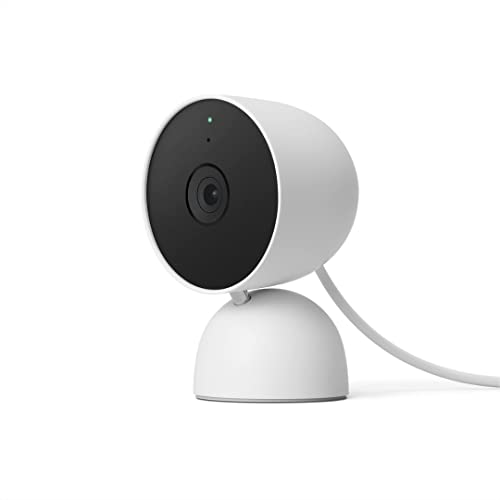
If you’re looking to enhance the security of your home or workplace, installing a Bunker Hill security camera can be a great solution. These cameras offer high-quality video surveillance and peace of mind. However, once you have set up your Bunker Hill security camera system, you may want to connect it to your computer for easier access and monitoring.
Connecting your Bunker Hill security camera to your computer is a straightforward process that can be done with just a few simple steps. By connecting your camera to your computer, you can easily view live footage, access video recordings, and manage your security settings from one centralized location.
In this guide, we will walk you through the process of connecting your Bunker Hill security camera to your computer, providing you with step-by-step instructions and tips to ensure a smooth setup. By following these instructions, you’ll be able to take full advantage of your security camera system and keep your property safe and secure.
How to Connect Bunker Hill Security Camera to Computer
If you want to connect your Bunker Hill security camera to your computer for monitoring and recording purposes, follow these steps:
Step 1: Install the Software
Start by installing the necessary software provided with your Bunker Hill security camera system on your computer. This software will allow you to access and control the camera’s feed.
Step 2: Connect the Camera
Connect the Bunker Hill security camera to your computer using the appropriate cables. Make sure to follow the manufacturer’s instructions for proper connection.
Once the camera is connected, launch the software on your computer and configure the camera settings to your preferences.
Now you should be able to view the camera feed on your computer and start monitoring your surroundings.
Check Camera Compatibility
Before attempting to connect your Bunker Hill security camera to your computer, it is essential to ensure that the camera is compatible with your computer system. Check the specifications of the security camera to see if it is compatible with your operating system (Windows, Mac, etc.) and if it requires any specific software or drivers to function properly.
Make sure that your computer meets the minimum system requirements for connecting the security camera. This may include having a certain amount of RAM, available storage space, and specific ports (such as USB or HDMI) to connect the camera.
Additionally, check if the Bunker Hill security camera supports the connection method you intend to use, such as Wi-Fi, Ethernet, or USB. Some cameras may require a network connection or a specific type of cable to connect to a computer.
Install Camera Software
To connect your bunker hill security camera to your computer, you will need to install the necessary camera software. Follow these steps to complete the installation:
- Insert the installation CD that came with your bunker hill security camera into your computer’s CD drive.
- Run the setup program and follow the on-screen instructions to install the camera software on your computer.
- Once the installation is complete, launch the camera software.
- Follow the software’s prompts to set up your security camera and connect it to your computer.
After completing these steps, your bunker hill security camera should be successfully connected to your computer, and you can start monitoring your property with ease.
Connect Camera to Computer via USB
To connect your Bunker Hill security camera to your computer via USB, follow these steps:
1. Locate the USB port on your camera
Find the USB port on your Bunker Hill security camera. It is usually located on the side or the back of the camera.
2. Connect the USB cable
Take the USB cable that came with your camera and plug one end into the USB port on the camera. Plug the other end into a USB port on your computer.
Set Up Camera Network Connection
Before connecting your Bunker Hill security camera to your computer, you need to set up the network connection. Follow these steps:
- Connect Camera to Router: Use an Ethernet cable to connect the camera to your router. Make sure the connection is secure.
- Power On Camera: Plug in the camera and power it on. Wait for the camera to boot up and initialize.
- Access Router Settings: Log in to your router’s settings using a web browser. Find the camera’s IP address in the connected devices list.
- Assign Static IP: Assign a static IP address to the camera to ensure a stable connection. Note down the IP address for future reference.
- Configure Port Forwarding: Set up port forwarding on your router to allow remote access to the camera. Forward the camera’s port to its static IP address.
- Test Connection: Verify the network connection by accessing the camera’s IP address in a web browser. You should see the camera’s live feed if the connection is successful.
Once the network connection is set up, you can proceed to connect the Bunker Hill security camera to your computer for monitoring and recording.
Configure Camera Settings
Once you have successfully connected your Bunker Hill security camera to your computer, it’s important to configure the camera settings to ensure optimal performance and security. Follow these steps to configure the camera settings:
- Access the Camera Interface: Open the camera software on your computer and log in to the camera interface using the default username and password.
- Adjust Camera Resolution: Set the camera resolution to your desired quality level. Higher resolutions provide clearer images but may require more storage space.
- Enable Motion Detection: Activate the motion detection feature to receive alerts when motion is detected in the camera’s field of view.
- Set Recording Schedule: Create a recording schedule based on your preferences. You can choose to record continuously or only when motion is detected.
- Configure Network Settings: Ensure the camera is connected to your network and adjust network settings as needed to enable remote access and monitoring.
- Update Firmware: Check for firmware updates regularly and install them to ensure your camera is running the latest software version with bug fixes and security enhancements.
Access Camera Feed on Computer
To access the live feed from your Bunker Hill security camera on your computer, you will need to follow these steps:
Step 1: Install Software
First, you will need to install the necessary software on your computer to connect to the camera. Check the instruction manual that came with your camera for the specific software you need to download and install.
Step 2: Connect Camera to Computer
Once the software is installed, connect your Bunker Hill security camera to your computer using the provided USB cable or through a network connection. Follow the on-screen instructions to establish the connection between the camera and your computer.
After completing these steps, you should be able to access the camera feed on your computer and monitor your security footage in real-time.
Enable Remote Viewing
If you want to view your Bunker Hill security camera remotely on your computer, you will need to set up remote viewing capabilities. Follow these steps to enable remote viewing:
- First, make sure your security camera is connected to your network and accessible via the internet.
- Access the settings of your security camera through the web interface or software provided by the manufacturer.
- Look for the remote viewing or network settings in the camera settings.
- Enable remote viewing and set up a username and password for remote access.
- Make sure to configure port forwarding on your router to allow remote access to the camera.
- Once everything is set up, you should be able to access your Bunker Hill security camera remotely on your computer using the designated IP address and login credentials.
Troubleshoot Connection Issues
If you are experiencing connection issues when trying to connect your Bunker Hill security camera to your computer, here are some troubleshooting steps you can try:
- Check the power source: Make sure the camera is properly connected to a power source and turned on.
- Verify the network connection: Ensure that your computer and the camera are connected to the same network.
- Restart the camera: Try restarting the camera by unplugging it and plugging it back in after a few seconds.
- Update software and drivers: Make sure that your camera’s software and drivers are up to date.
- Check firewall settings: Adjust your firewall settings to allow the camera to communicate with your computer.
- Reset the camera: If all else fails, you may need to reset the camera to its factory settings and go through the setup process again.
Update Camera Firmware
Updating the firmware of your Bunker Hill security camera can improve its performance and fix any bugs or security vulnerabilities. Here’s how you can update the camera firmware:
Step 1: Download Firmware
Visit the official Bunker Hill Security website and navigate to the support section. Look for the latest firmware update for your specific camera model and download it to your computer.
Step 2: Transfer Firmware to Camera
Connect your camera to your computer using a USB cable. Copy the downloaded firmware file to the root directory of the camera’s memory card.
| Step 3: | Update Camera Firmware |
| 1. | Insert the memory card back into the camera and power it on. |
| 2. | Navigate to the camera settings menu and look for the firmware update option. |
| 3. | Select the firmware file you copied to the memory card and follow the on-screen instructions to update the camera firmware. |
| 4. | Wait for the update process to complete and restart the camera. |
Secure Your Camera Network
Securing your camera network is crucial to protect your privacy and ensure the safety of your footage. Here are some essential steps to secure your camera network:
- Change default passwords: Always change the default passwords on your cameras and any associated software to a strong, unique password.
- Update firmware: Regularly update the firmware of your cameras to patch any security vulnerabilities.
- Enable encryption: Enable encryption on your camera network to protect your data from unauthorized access.
- Use a firewall: Install a firewall to monitor and control incoming and outgoing traffic on your camera network.
- Limit access: Restrict access to your camera network to authorized users only and consider setting up two-factor authentication.