

Altec Lansing security cameras are a popular choice for those looking to enhance their home or office security. These cameras offer high-quality video recording and advanced features to help you monitor your property effectively. However, setting up and connecting an Altec Lansing security camera can be a daunting task for some users.
In this guide, we will walk you through the steps to connect your Altec Lansing security camera seamlessly. Whether you are a beginner or an experienced user, our easy-to-follow instructions will help you get your camera up and running in no time.

From unpacking the camera to setting up the app and configuring the settings, we will cover everything you need to know to ensure a smooth installation process. By the end of this guide, you will be able to enjoy the benefits of your Altec Lansing security camera and have peace of mind knowing that your property is well-protected.
Step-by-Step Guide to Connect Altec Lansing Security Camera
Connecting your Altec Lansing security camera is a straightforward process that ensures your home or business is protected. Follow these steps to set up your camera:
- Choose a suitable location for your camera that provides a clear view of the area you want to monitor.
- Ensure the camera is within range of your Wi-Fi network.
- Power on the camera and wait for the indicator lights to start blinking.
- Download the Altec Lansing Smart Security System app on your smartphone or tablet.
- Open the app and follow the on-screen instructions to create an account and add your camera.
- Select the “Add Device” option in the app and choose the Altec Lansing security camera from the list of available devices.
- Follow the app’s prompts to connect the camera to your Wi-Fi network by entering your network credentials.
- Once the camera is connected, you can customize settings, view live footage, and receive alerts on your mobile device.
By following these steps, you can easily connect your Altec Lansing security camera and enjoy peace of mind knowing that your property is secure.
Unboxing and Setup
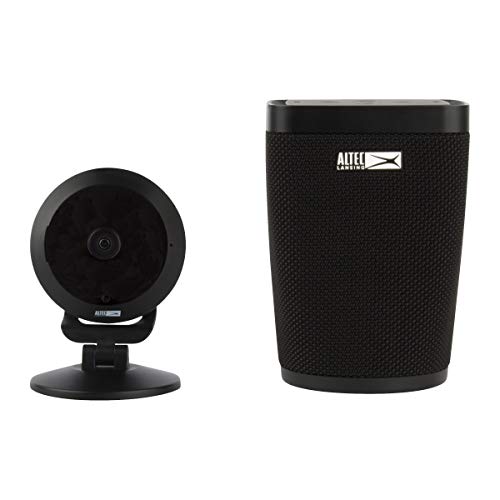
When you receive your Altec Lansing security camera, the first step is to unbox it carefully. Make sure you have all the components, including the camera, power adapter, mounting brackets, and user manual.
Next, find a suitable location to install the camera. It should have a clear view of the area you want to monitor and access to a power outlet. Use the mounting brackets to securely attach the camera to the desired surface.
Step 1: Power On
Plug the power adapter into the camera and then into a power outlet. The camera should power on automatically, and you may see a blinking LED light indicating that it’s ready to connect.
Step 2: Connect to Wi-Fi
Download the Altec Smart Security app on your smartphone and follow the on-screen instructions to connect the camera to your Wi-Fi network. Make sure to enter the correct Wi-Fi password to establish a secure connection.
Once the camera is successfully connected, you can start monitoring your property remotely through the app.
Connecting Power Source
To connect your Altec Lansing security camera to a power source, follow these steps:
Step 1: Locate the power adapter
Find the power adapter that came with your security camera. It should have a plug on one end and a connector on the other end.
Step 2: Plug in the power adapter
Insert the plug of the power adapter into a power outlet or surge protector. Make sure the outlet is working and providing power.
Connect the other end of the power adapter to the power input port on your Altec Lansing security camera. Make sure it is securely plugged in.
Installing the Altec Lansing App
Step 1: Go to the App Store or Google Play Store on your smartphone or tablet.
Step 2: Search for “Altec Lansing Smart Security System” and download the app.
Step 3: Open the app and create an account or sign in if you already have one.
Step 4: Follow the on-screen instructions to add your Altec Lansing security camera to the app.
Step 5: Once the camera is successfully connected, you can access live video feeds and manage settings through the app.
Connecting the Camera to Wi-Fi
Before you can start using your Altec Lansing security camera, you need to connect it to your Wi-Fi network. Follow these steps to ensure a successful connection:
- Plug in your camera and wait for the LED indicator to start flashing.
- Download the Altec Smart Security System app on your smartphone or tablet.
- Open the app and follow the on-screen instructions to create an account and log in.
- Select “Add Device” in the app and choose your camera model.
- Enter your Wi-Fi network name and password when prompted.
- Follow the app’s instructions to complete the setup process and connect your camera to Wi-Fi.
- Once connected, you can access your camera’s live feed and settings remotely through the app.
By following these steps, you can easily connect your Altec Lansing security camera to your Wi-Fi network and start monitoring your home or office with ease.
Configuring Camera Settings
After successfully connecting your Altec Lansing security camera to your network, it is important to configure the camera settings to ensure optimal performance and security. To access the camera settings, you will need to log in to the camera’s web interface using a web browser on a computer or mobile device connected to the same network.
Once logged in, you can adjust various settings such as image quality, resolution, motion detection sensitivity, recording schedules, and more. It is recommended to set up motion detection alerts and schedule regular recordings to keep your property secure.
Make sure to create a strong password for the camera to prevent unauthorized access. Additionally, you may want to explore advanced settings such as night vision mode, audio settings, and cloud storage options to enhance the camera’s functionality.
Remember to save your settings after making any changes to ensure they are applied correctly. Regularly check and update the camera settings to adapt to changing security needs and improve overall surveillance efficiency.
Testing the Camera’s Functionality
Once you have successfully connected your Altec Lansing security camera to your network, it’s important to test its functionality to ensure it’s working properly. Here are some steps you can take to test the camera:
1. Check the Live Feed: Use the camera’s app or web interface to access the live feed from the camera. Make sure the video quality is clear, and there are no glitches or delays.
2. Test Motion Detection: Move in front of the camera to trigger the motion detection feature. Ensure that the camera captures the movement and sends you a notification or recording as expected.
3. Check Night Vision: Test the camera’s night vision by turning off the lights in the room and checking if the camera can still capture clear images in low light conditions.
4. Adjust Camera Settings: Experiment with different camera settings such as resolution, sensitivity, and recording options to optimize the camera’s performance based on your needs.
5. Review Playback: If your camera has recording capabilities, review the playback to ensure that the camera is saving footage correctly and that you can easily access and manage recorded videos.
By following these steps and thoroughly testing your Altec Lansing security camera, you can ensure that it’s set up correctly and functioning as intended to enhance the security of your property.
Mounting the Camera
Before connecting your Altec Lansing security camera, it is important to properly mount it in the desired location. Follow these steps to ensure a secure installation:
1. Choose a Secure Location
Select a location that provides a clear view of the area you want to monitor and where the camera will be protected from the elements. Make sure the mounting surface is sturdy and can support the weight of the camera.
2. Install the Mounting Bracket
Use the provided mounting bracket to attach the camera to the chosen surface. Make sure the bracket is securely fastened and adjust the angle of the camera as needed to achieve the desired view.
Troubleshooting Tips
If you are experiencing difficulties connecting your Altec Lansing security camera, try the following troubleshooting tips:
1. Check the Power Source
Ensure that the camera is properly plugged into a power source and that the power outlet is working. Sometimes, a simple power issue can cause connectivity problems.
2. Reset the Camera
If the camera is still not connecting, try resetting it. Locate the reset button on the camera and hold it down for a few seconds until you see the lights blink. This will reset the camera to its default settings.
Note: Make sure to reconfigure the camera settings after resetting it.
By following these troubleshooting tips, you should be able to resolve any connectivity issues with your Altec Lansing security camera.