
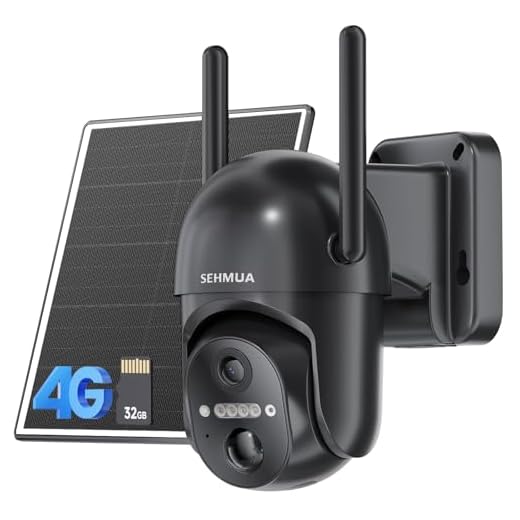

If you’re looking to enhance the security of your home or business with a security camera, activating a SIM card can provide you with the flexibility and reliability you need. With a SIM card, your camera can connect to the cellular network, ensuring that you stay connected even if your Wi-Fi goes down or if there’s a power outage.
Activating a SIM card for your security camera is a straightforward process that requires a few simple steps. In this guide, we’ll walk you through the process of activating a SIM card for your security camera, so you can enjoy peace of mind knowing that your property is protected.

By following the steps outlined in this article, you’ll be able to activate your SIM card and set up your security camera with ease. With a reliable cellular connection, you can monitor your property from anywhere, ensuring that you always have an eye on what matters most to you.
Step-by-Step Guide to Activating SIM Card for Security Camera
Activating a SIM card for your security camera is a crucial step to ensure seamless connectivity and monitoring. Follow these steps to activate your SIM card:
- Insert the SIM card into the designated slot on your security camera.
- Power on the security camera and wait for it to boot up.
- Check the camera settings to locate the SIM card activation option.
- Enter the necessary information, such as the SIM card number and activation code.
- Follow the on-screen instructions to complete the activation process.
- Once activated, test the connectivity by accessing the camera remotely.
- Ensure that the SIM card has sufficient data and credit to support the camera’s operations.
- Monitor the camera regularly to ensure continuous connectivity and functionality.
By following these steps, you can successfully activate the SIM card for your security camera and enhance your surveillance capabilities.
Choose a Suitable SIM Card
When activating a SIM card for your security camera, it is crucial to choose a suitable SIM card that meets your needs. Here are some key factors to consider:
| Network Compatibility: | Ensure that the SIM card is compatible with the network frequencies supported by your security camera. Check with your camera’s manufacturer for specific requirements. |
| Data Plan: | Choose a SIM card with a data plan that suits the data consumption of your security camera. Consider factors such as video quality, recording duration, and frequency of uploads. |
| Network Coverage: | Check the network coverage of the SIM card provider in the location where your security camera is installed. Ensure there is strong signal strength for reliable connectivity. |
| Roaming Charges: | If you plan to use the security camera in different locations, consider the roaming charges associated with the SIM card. Opt for a plan that offers affordable roaming rates. |
“`html
Insert the SIM Card into the Camera
Once you have obtained a compatible SIM card, it’s time to insert it into your security camera. Follow these steps:
Step 1: Power Off the Camera
Before inserting the SIM card, make sure to power off the security camera to avoid any damage.
Step 2: Locate the SIM Card Slot
Locate the SIM card slot on your security camera. It is usually located on the side or back of the camera.
Power On the Security Camera
Once you have inserted the activated SIM card into the security camera, it’s time to power on the device. Follow these steps to power on the security camera:
Step 1: Connect the Power Adapter
Locate the power adapter that came with the security camera. Connect one end of the power adapter to the camera’s power input port and the other end to a power outlet.
Step 2: Turn On the Camera
Press the power button on the security camera to turn it on. You may need to hold the button for a few seconds until the camera’s LED indicators light up, indicating that the camera is powering on.
| Tip: Make sure the power source is stable and reliable to avoid any interruptions in the camera’s operation. |
Configure Network Settings
After activating your SIM card, the next step is to configure the network settings for your security camera. Here are the steps to follow:
- Insert the activated SIM card into the security camera’s SIM card slot.
- Access the camera’s settings menu through the device’s interface or mobile app.
- Locate the network settings section and select the option to set up a new network connection.
- Choose the SIM card as the preferred network connection method.
- Enter the APN (Access Point Name) provided by your mobile network provider.
- Input any additional network settings required by your provider, such as username and password.
- Save the network settings and restart the security camera to apply the changes.
Once the network settings are configured correctly, your security camera should be able to connect to the internet using the activated SIM card.
Test the Connection
Once you have activated your SIM card for your security camera, it is important to test the connection to ensure everything is working properly. Here are the steps to test the connection:
| 1. Insert the activated SIM card into the security camera. |
| 2. Power on the security camera and wait for it to initialize. |
| 3. Check the camera’s network settings to ensure the SIM card is recognized and connected to the network. |
| 4. Test the camera’s live feed by accessing it remotely through the camera’s app or web interface. |
| 5. Verify that you are able to receive alerts and notifications from the camera. |
| 6. If everything is working properly, your SIM card activation for the security camera is successful. |
Ensure Remote Access and Monitoring
Once your SIM card is activated for your security camera, it’s important to ensure that you have remote access and monitoring capabilities. This will allow you to view live footage, receive alerts, and manage your camera from anywhere.
Make sure that your security camera system is compatible with remote access features and that you have set up the necessary apps or software on your smartphone or computer. This will enable you to check in on your property at any time and ensure that everything is secure.


