


Security cameras are an essential tool for monitoring and protecting your home or business. They provide a sense of security and peace of mind, allowing you to keep an eye on your property even when you’re not there. But how exactly do security cameras plug in?
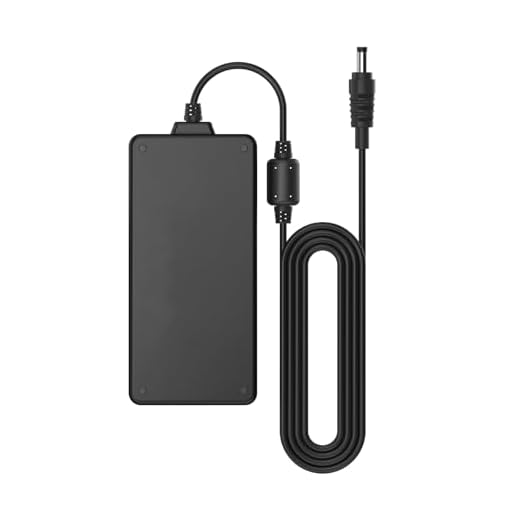
Most security cameras require a power source to function. This can be achieved by plugging the camera into a power outlet using a power adapter. The power adapter converts the electrical current from the outlet into the appropriate voltage needed to power the camera.
Some security cameras are also equipped with PoE (Power over Ethernet) technology, which allows them to receive power and data through a single Ethernet cable. This can simplify the installation process and reduce the need for additional power outlets near the camera location.
How to Plug in a Security Camera
Plugging in a security camera is a simple process that typically involves connecting the camera to a power source and a recording device. Here are the basic steps to plug in a security camera:
| Step 1: | Locate a power outlet near the area where you want to install the security camera. |
| Step 2: | Connect the power adapter to the camera’s power input port. |
| Step 3: | Plug the power adapter into the power outlet. |
| Step 4: | Connect the camera to a recording device such as a DVR or NVR using the appropriate cables. |
| Step 5: | Follow the camera’s setup instructions to configure it for recording and monitoring. |
By following these steps, you can easily plug in a security camera and start monitoring your property for added security.
Locate the Power Source
Before installing a security camera, you need to find a suitable power source to plug it in. Most security cameras come with a power adapter that needs to be connected to an electrical outlet. Make sure the power source is within reach of the camera’s cable to avoid any tugging or stretching that could damage the wires.
If you are installing a wireless security camera, you may need to charge or replace the camera’s batteries instead of plugging it into a power source. Check the manufacturer’s instructions for specific details on how to power your wireless camera.
Connect the Power Adapter
Before connecting the power adapter to your security camera, make sure the camera is turned off to avoid any electrical mishaps.
Locate the power input port on your camera. It is usually located on the back or bottom of the camera.
Steps to connect the power adapter:
- Step 1: Take the power adapter and plug the connector into the power input port of the camera.
- Step 2: Plug the power adapter into a power outlet using the provided power cord.
Once the power adapter is connected, you can turn on the camera and set it up according to the manufacturer’s instructions.
Check the Voltage Requirements
Before plugging in your security camera, it is crucial to check the voltage requirements of the device. Most security cameras operate on either 12V or 24V DC power supply. You can find this information on the camera’s specifications or user manual. Make sure the power source you are using matches the voltage requirements of your camera to avoid damaging the device.
Use a Surge Protector
One important step in setting up your security camera system is to use a surge protector. A surge protector helps protect your cameras from power surges and voltage spikes that can damage them. Simply plug the surge protector into a power outlet and then plug your security camera power adapter into the surge protector. This extra layer of protection can help ensure that your cameras stay safe and functional, even in the event of a power surge.
Position the Camera
Before plugging in the security camera, it’s important to choose the best location for optimal coverage. Consider factors such as the camera’s field of view, potential obstructions, and power source accessibility.
Place the camera in a high position to capture a wider area or at eye level for a more detailed view. Ensure that the camera is facing the desired area and adjust its angle if necessary.
Once you’ve chosen the right spot, locate the nearest power outlet to plug in the camera. Use a suitable extension cord if needed to reach the power source without compromising the camera’s position or functionality.
Secure the Camera Mount
Once the security camera is plugged in and positioned correctly, it’s important to secure the camera mount to prevent tampering or theft. Use screws or bolts to attach the mount to a solid surface such as a wall or ceiling. Make sure the mount is stable and can support the weight of the camera. Consider using security anchors or brackets for added stability.
Adjust the Camera Angle
Once you have plugged in your security camera, it’s important to adjust the camera angle for optimal coverage. Here are some steps to help you adjust the camera angle:
| 1. | Position the camera: Place the camera in the desired location where you want to monitor. |
| 2. | Mount the camera: Securely mount the camera on a stable surface to ensure it stays in place. |
| 3. | Adjust the angle: Use the camera’s adjustable mount to tilt and pan the camera to the desired angle. |
| 4. | Test the view: Check the camera’s view on your monitoring device to ensure it covers the intended area. |
| 5. | Fine-tune if needed: Make any necessary adjustments to the camera angle to optimize the monitoring coverage. |
Test the Camera Feed
Once you have plugged in your security camera and set it up, it is important to test the camera feed to ensure that it is functioning correctly. Follow these steps to test the camera feed:
1. Check the Connection
Make sure that the security camera is properly connected to the power source and the monitoring system. Check the cables and connections to ensure that there are no loose or damaged parts.
2. Access the Camera Feed
Access the camera feed on your monitoring system or through the camera’s app on your smartphone or computer. Check the live feed to see if the camera is capturing and displaying images correctly.
| Action | Result |
| Move the camera | Verify that the camera is able to pan, tilt, and zoom properly. |
| Test night vision | Check if the camera has clear night vision capabilities in low-light conditions. |
| Trigger motion detection | Walk in front of the camera to test if motion detection alerts are working as expected. |
Monitor the Camera System
Once you have set up your security camera system and plugged it in, it is important to monitor the system regularly to ensure it is functioning properly. Here are some tips on how to monitor your security camera system:
- Check the live feed: Regularly check the live feed from your security cameras to ensure they are capturing clear images and video.
- Review recordings: Review recordings from your security cameras to check for any suspicious activity or incidents that may have occurred.
Additional Tips:
- Set up alerts: Configure alerts on your security camera system to notify you of any motion detection or other events.
- Regular maintenance: Perform regular maintenance on your security cameras, such as cleaning the lenses and checking the connections, to ensure they are in good working condition.


