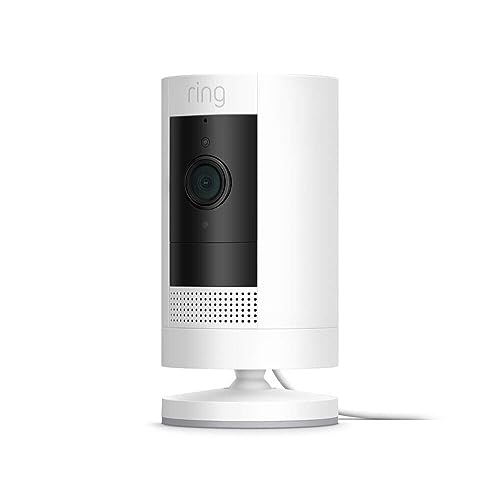


If you’re looking to enhance the security of your home or business, plug-in security cameras are a convenient and effective option. However, relying solely on Wi-Fi for connectivity can sometimes be unreliable, leading to video lag or dropped connections. In such cases, hardwiring your plug-in security cameras can provide a more stable and secure connection, ensuring that you have constant access to live feeds and recordings.
Hardwiring your plug-in security cameras involves connecting them directly to your home’s electrical system or a dedicated power source. This eliminates the need for Wi-Fi and can also prevent potential signal interference from other devices. By following a few simple steps, you can easily hardwire your plug-in security cameras and enjoy a more reliable surveillance system.

In this guide, we will walk you through the process of hardwiring your plug-in security cameras, discussing the benefits of this method and providing step-by-step instructions to help you set up a stable and secure surveillance system for your property. Whether you’re a DIY enthusiast or a security professional, this guide will equip you with the knowledge and skills needed to hardwire your plug-in security cameras with confidence.
Step-by-step guide to hardwire your plug-in security cameras
Hardwiring your plug-in security cameras can provide a more reliable and secure connection compared to using Wi-Fi. Follow these steps to hardwire your cameras:
Step 1: Gather the necessary materials
Make sure you have all the required materials, including a power adapter, a power cable, a PoE (Power over Ethernet) injector or switch, and Ethernet cables.
Step 2: Connect the PoE injector or switch
Connect the PoE injector or switch to your router using an Ethernet cable. Then, connect your camera to the PoE injector or switch using another Ethernet cable.
Note: PoE injectors or switches provide both power and data over Ethernet cables, eliminating the need for a separate power source.
By following these steps, you can successfully hardwire your plug-in security cameras for a more stable and reliable connection.
Preparing the necessary tools and materials
Before you can hardwire your plug-in security cameras, you’ll need to gather a few tools and materials to ensure a smooth installation process. Here’s a list of items you’ll need:
Tools |
Materials |
|
|
Choosing the right location for your security camera
When hardwiring your plug-in security cameras, it is crucial to select the optimal location for installation. Here are some tips to help you choose the right spot:
1. Consider the area you want to monitor: Identify the key areas you want to keep an eye on and choose locations that provide the best vantage points.
2. Check for power sources: Ensure that there is a nearby power outlet or electrical connection for your camera to be hardwired.
3. Avoid obstructions: Place the camera in a position that is free from obstructions like trees, bushes, or walls that could obstruct the view.
4. Weatherproofing: If installing the camera outdoors, make sure it is weatherproof and can withstand various weather conditions.
5. Height and angle: Mount the camera at an appropriate height and angle to capture the desired view without any blind spots.
By carefully selecting the location for your security camera, you can maximize its effectiveness and ensure optimal surveillance coverage.
Turning off the power supply
Before you begin hardwiring your plug-in security cameras, it’s crucial to turn off the power supply to avoid any electrical hazards. Follow these steps to safely switch off the power:
| 1. | Locate the circuit breaker box in your home or office. |
| 2. | Identify the circuit breaker that controls the power supply to the area where you’ll be working. |
| 3. | Switch off the circuit breaker by flipping it to the “off” position. |
| 4. | Use a voltage tester to ensure that the power is completely off before proceeding with the hardwiring process. |
Removing the plug from the camera
To hardwire your plug-in security camera, you will first need to remove the plug from the camera. Follow these steps:
- Unplug the camera from the power source.
- Locate the plug where it connects to the camera.
- Depending on the camera model, you may need to unscrew or unclip the plug from the camera.
- Gently wiggle the plug to disconnect it from the camera.
- Ensure that the wires are not damaged during this process.
Wiring the camera directly to the power source
If you want to hardwire your plug-in security camera to the power source, you will need to follow these steps:
- Turn off the power: Before starting any electrical work, make sure to turn off the power to the outlet you will be working on.
- Prepare the wires: Cut the plug off the camera’s power cord, exposing the wires inside.
- Strip the wires: Strip the insulation off the ends of the wires to expose the copper conductors.
- Connect the wires: Connect the positive (usually red) wire to the positive terminal and the negative (usually black) wire to the negative terminal of the power source.
- Secure the connections: Use wire nuts or electrical tape to secure the connections and insulate them properly.
- Test the camera: Once the connections are secure, turn on the power and test the camera to ensure it is receiving power and functioning correctly.
By following these steps, you can safely and effectively hardwire your plug-in security camera to a power source.
Testing the hardwired security camera
Once you have successfully hardwired your plug-in security camera, it’s important to test it to ensure it’s functioning properly. Here are the steps to test your hardwired security camera:
1. Power on the camera
Make sure the power source is connected and the camera is receiving power. Check for any indicator lights that show the camera is powered on.
2. Check the video feed
Connect the camera to a monitor or viewing device to see if the video feed is working correctly. Ensure the image is clear and there are no distortions.


