


Protecting your home and loved ones is a top priority for any homeowner. One of the most effective ways to enhance the security of your property is by installing an exterior camera system. While professional security systems can be expensive, you can create your own DIY solution that is both affordable and effective.
With a DIY home exterior camera system, you can monitor your property 24/7, deter potential intruders, and have peace of mind knowing that your home is well-protected. In this article, we will guide you through the process of setting up your own security camera system, from choosing the right cameras to installing them in strategic locations around your home.
By following our step-by-step instructions and investing a little time and effort, you can create a custom security solution that meets your specific needs and budget. Don’t wait until it’s too late – take control of your home security today with a DIY exterior camera system!
DIY Home Exterior Security Camera System
Securing your home with an exterior security camera system is a smart way to protect your property and loved ones. With the advancement of technology, setting up a DIY system has become easier and more affordable than ever. Here are some steps to help you create your own home security camera system:
1. Choose the Right Cameras
Start by selecting the right cameras for your needs. Consider factors such as resolution, night vision capabilities, weather resistance, and connectivity options. Look for cameras that are easy to install and offer remote viewing on your smartphone or computer.
2. Plan Your Camera Placement
Strategically place your cameras in key areas around your home, such as entry points, driveways, and backyards. Make sure to cover all angles and possible blind spots. Consider the range of the cameras and ensure they have a clear line of sight.
By following these steps, you can create a reliable DIY home exterior security camera system to enhance the safety of your property.
Choose the Right Camera
When selecting cameras for your DIY home exterior security system, there are several factors to consider to ensure you choose the right one for your needs:
Resolution
Opt for cameras with high resolution (1080p or higher) to capture clear and detailed footage of any potential intruders or incidents.

Outdoor Use
Make sure the cameras are weatherproof and designed for outdoor use to withstand various weather conditions and ensure durability.
- Look for cameras with an IP rating of at least IP65 to ensure they are protected from dust and water.
Consider the camera’s field of view and night vision capabilities to ensure comprehensive coverage of your property, even in low-light conditions.
Ensure the cameras are compatible with your chosen monitoring system and have the necessary features, such as motion detection and remote viewing, to meet your security needs.
Plan Your Camera Placement
Before installing your home exterior security camera system, it’s crucial to carefully plan the placement of each camera to ensure optimal coverage and security. Here are some key points to consider:
1. Identify Vulnerable Areas
Survey your property and identify the most vulnerable areas where potential intruders may attempt to gain access. These could include entry points like doors and windows, as well as blind spots where someone could easily hide from view.
2. Consider Camera Angles
When determining the placement of your cameras, think about the best angles to capture the most important areas of your property. Position cameras high enough to avoid tampering but low enough to provide clear views of faces and other identifying features.
By carefully planning your camera placement, you can create a comprehensive security system that effectively monitors your home’s exterior and deters intruders.
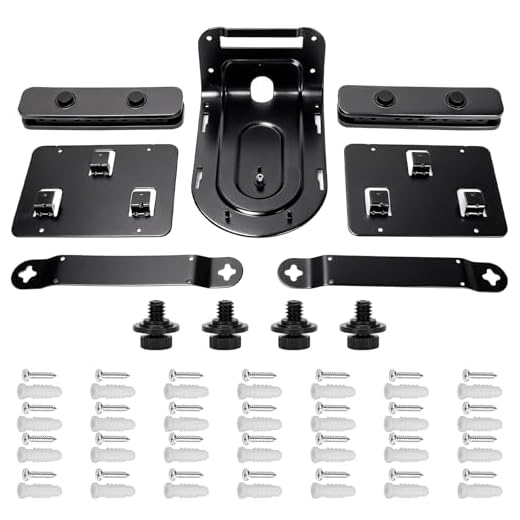
Install the Cameras Securely
Once you have chosen the ideal locations for your security cameras, it is crucial to install them securely to ensure they work effectively. Follow these steps to install your cameras:
- Mounting: Use the appropriate mounting hardware to securely attach the cameras to the exterior of your home. Make sure the cameras are positioned at the correct angle for optimal coverage.
- Weatherproofing: Ensure that your cameras are weatherproofed to withstand outdoor elements such as rain, wind, and snow. This will prolong the life of your cameras and ensure they continue to function properly.
- Hide Wires: Conceal any visible wires to prevent tampering and to maintain a clean and tidy appearance. You can use cable clips or run the wires through walls or conduits.
- Secure Connection: Connect your cameras to your monitoring system using secure and reliable wiring or wireless connections. Make sure the connection is encrypted to prevent unauthorized access.
- Test System: After installing the cameras, test the system to ensure each camera is functioning correctly and capturing clear footage. Adjust the settings as needed for better performance.
Connect Cameras to Monitoring System
Once you have installed your exterior security cameras, the next step is to connect them to a monitoring system for remote access and surveillance. Follow these steps to ensure a seamless connection:
1. Network Configuration
First, ensure that your cameras are connected to your home Wi-Fi network. Check the camera settings to input the correct Wi-Fi credentials and establish a stable connection.
2. Monitoring Software
Download and install the monitoring software provided by the camera manufacturer on your smartphone, tablet, or computer. Follow the setup instructions to link your cameras to the monitoring system.
| Camera | Monitoring System |
|---|---|
| Camera 1 | Mobile App |
| Camera 2 | Desktop Software |
Once the cameras are connected to the monitoring system, you can access live footage, receive alerts, and manage settings remotely for enhanced home security.
Set Up Remote Access
Once you have installed your exterior security camera system, the next step is to set up remote access. This will allow you to view the live feed from your cameras and receive alerts on your smartphone or computer from anywhere in the world.
Step 1: Configure Your Router
First, you need to configure your router to allow remote access to your security cameras. This usually involves setting up port forwarding or enabling UPnP on your router. Refer to your router’s manual for specific instructions on how to do this.
Step 2: Set Up a Dynamic DNS Service
To access your cameras remotely, you will need a dynamic DNS service. This service will provide you with a domain name that will always point to your home IP address, even if it changes. There are many free dynamic DNS services available, such as No-IP or DynDNS.
| Step 3: Install Mobile App | Download and install the mobile app provided by your security camera system manufacturer on your smartphone or tablet. Follow the app’s instructions to connect to your cameras remotely. |
| Step 4: Test Remote Access | Once everything is set up, test remote access by accessing the live feed from your cameras on your mobile device while connected to a different network. If everything works correctly, you are all set to monitor your home from anywhere! |
Adjust Camera Settings
Once you have installed your home exterior security camera system, it is important to adjust the camera settings to ensure optimal performance and coverage. Follow these steps to customize your camera settings:
1. Positioning
Make sure your cameras are positioned correctly to capture the desired areas. Adjust the angle and height to maximize coverage and minimize blind spots.
2. Motion Detection
Configure the motion detection settings to suit your needs. Adjust the sensitivity level to avoid false alarms while ensuring all relevant motion is detected.
By fine-tuning these settings, you can enhance the effectiveness of your home security system and enjoy peace of mind knowing your property is well-protected.
Test the System
Once you have installed your DIY home exterior security camera system, it is crucial to test the system to ensure it is working correctly. Here are some steps to follow:
1. Check the Camera Feeds
Access the camera feeds on your monitoring device to ensure that each camera is capturing the intended area and that the video quality is clear. Make sure there are no blind spots or obstructions blocking the view.
2. Test Motion Detection
Walk around the perimeter of your property to test the motion detection capabilities of your cameras. Make sure the cameras are triggering alerts and recording footage when motion is detected. Adjust the sensitivity settings if necessary to avoid false alarms.
Maintain and Update Regularly
Once you have installed your DIY home exterior security camera system, it is crucial to maintain and update it regularly to ensure its proper functioning. Regular maintenance includes checking the camera lenses for dirt or debris, cleaning the lenses if necessary, and ensuring that the cameras are securely mounted.
It is also important to regularly check the camera feeds to make sure they are clear and free of any obstructions. Additionally, updating the software and firmware of your security cameras is essential to keep them up-to-date with the latest security patches and features.
By maintaining and updating your DIY home exterior security camera system regularly, you can ensure that it continues to provide you with reliable security monitoring and peace of mind.


