

Have you ever noticed a glare in your iPhone camera photos? This frustrating phenomenon can occur for a variety of reasons, and understanding the causes can help you prevent it in the future.
One common reason for glare in iPhone photos is the presence of reflective surfaces. When light bounces off shiny objects such as glass, metal, or water, it can create unwanted reflections in your photos. Additionally, if the camera lens itself is dirty or smudged, it can cause light to scatter and result in glare.
Another factor that can contribute to glare is the angle of the light source relative to the camera lens. Direct sunlight or artificial light sources positioned directly in front of or behind the camera can create glare or lens flares in your photos. Understanding how to position yourself and your subject in relation to the light source can help you minimize glare and improve the quality of your iPhone photos.
Why Glare Appears on iPhone Camera: Common Causes and Solutions
Glare on your iPhone camera can be frustrating and affect the quality of your photos. Understanding the common causes of glare and knowing how to address them can help you capture better images with your device.
Common Causes of Glare on iPhone Camera
Glare on your iPhone camera can be caused by various factors, including:
| 1. Direct sunlight or bright light sources |
| 2. Reflections from shiny surfaces |
| 3. Fingerprints or smudges on the camera lens |
Solutions to Reduce Glare on iPhone Camera
To reduce glare on your iPhone camera, you can try the following solutions:
| 1. Adjust the camera angle to avoid direct light sources |
| 2. Use a lens hood or shade to block out excess light |
| 3. Clean the camera lens regularly to remove fingerprints and smudges |
Understanding Glare: What Causes It and How It Affects Your Photos
Glare is a common issue that can affect the quality of your photos taken with an iPhone camera. It occurs when light reflects off surfaces and enters the camera lens, causing unwanted bright spots or streaks in your images.
Causes of Glare
There are several reasons why glare may appear in your photos:
| 1. | Direct sunlight: Sunlight hitting the camera lens can create glare and wash out your photos. |
| 2. | Reflections: Light reflecting off shiny surfaces like water, glass, or metal can cause glare. |
| 3. | Unwanted light sources: Artificial lights or bright sources in the background can also lead to glare. |
Effects of Glare on Photos
Glare can significantly impact the quality of your photos by reducing contrast, washing out colors, and obscuring details. It can also create distracting elements that take away from the overall composition of the image.
Overcoming Natural Light Glare: Tips for Better Outdoor Photography
When shooting outdoors, dealing with natural light glare can be a challenge. Here are some tips to help you capture better outdoor photos:
1. Use a Lens Hood
A lens hood can help reduce lens flare and glare caused by stray light entering the lens from the sides. It can improve the contrast and color saturation of your photos.
2. Adjust Your Shooting Angle
Changing your shooting angle can help you avoid direct sunlight hitting your lens, which often causes glare. Try moving slightly to the side or adjusting your position to find the best angle that minimizes glare.
- Experiment with different angles to see which one works best for your shot.
- Consider shooting earlier or later in the day when the sunlight is less harsh.
By following these tips, you can minimize natural light glare and take stunning outdoor photos with your iPhone camera.
Dealing with Artificial Light Glare: How to Avoid Glare in Indoor Settings
Indoor settings can often pose challenges when it comes to capturing photos without glare from artificial light sources. Here are some tips to help you avoid glare and take better photos indoors:
1. Position yourself and your subject strategically
Try to position yourself and your subject in a way that minimizes the direct impact of artificial light sources. Experiment with different angles and positions to find the best lighting conditions.
2. Use a polarizing filter
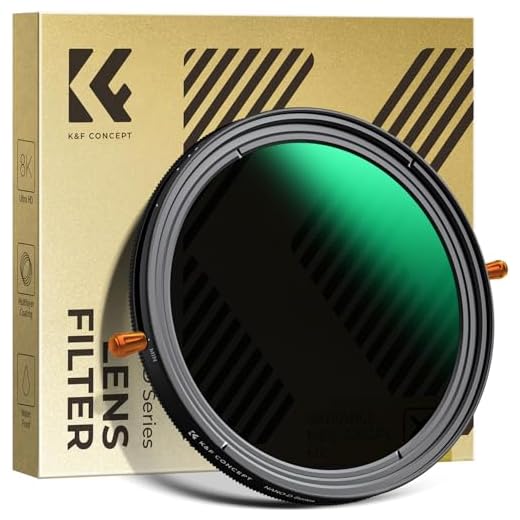
A polarizing filter can help reduce glare by filtering out unwanted reflections. Consider investing in a quality polarizing filter for your camera lens to improve the overall quality of your indoor photos.
- Adjust your camera settings
- Experiment with different exposure settings and white balance to reduce glare and improve the overall quality of your indoor photos.
By following these tips, you can minimize glare from artificial light sources and capture stunning photos in indoor settings.
Reflections and Glare: How to Minimize Glare from Shiny Surfaces
Glare on your iPhone camera can often be caused by reflections from shiny surfaces, such as mirrors, glass, or metallic objects. These reflections can create unwanted bright spots or streaks in your photos, affecting the overall image quality. To minimize glare and reflections in your photos, consider the following tips:
Avoid Direct Light Sources
Position yourself and your subject in such a way that direct light sources, such as lamps or the sun, are not shining directly into the camera lens. This will help reduce the amount of glare and reflections in your photos.
Change Angles and Positions
Experiment with different angles and positions to find the best way to shoot without capturing glare from shiny surfaces. Sometimes, a slight adjustment in your position can make a big difference in reducing unwanted reflections in your photos.
Glare from Screen Protectors: Choosing the Right Protector for Clear Photos
Screen protectors can sometimes cause glare on your iPhone camera, leading to less-than-perfect photos. When selecting a screen protector for your device, it’s important to choose one that is designed to minimize glare and maintain the clarity of your photos.
Matte vs. Glossy Protectors
Matte screen protectors have a textured finish that reduces glare and reflections, making them a good choice for photography. On the other hand, glossy protectors may cause more glare and reflection, impacting the quality of your photos.
Consider opting for a matte screen protector to minimize glare and ensure clear, high-quality photos with your iPhone camera.
Lens Flare vs. Glare: Recognizing the Difference and How to Address Each
Understanding the distinction between lens flare and glare can help you better identify the issue you are experiencing with your iPhone camera. Lens flare is a visual effect caused by light hitting the lens and bouncing around inside, creating artifacts like circles or streaks. Glare, on the other hand, is a reflection of light directly hitting the camera lens, resulting in a washed-out or hazy appearance in the image.
Recognizing Lens Flare:
- Lens flare typically appears as bright circles or streaks on the image.
- It is more prominent when shooting towards a direct light source, such as the sun or a bright artificial light.
- Changing the angle of the camera or using a lens hood can help reduce lens flare.
Addressing Glare:
- Glare appears as a washed-out or hazy area in the image, often caused by light directly hitting the lens.
- To reduce glare, try adjusting the position of the camera or using a polarizing filter to minimize reflections.
- Cleaning the camera lens and avoiding shooting directly into bright light sources can also help minimize glare.
Glare in Video Calls: Tips for Improving Video Quality on iPhone
Glare can be a common issue when using the iPhone camera for video calls. Here are some tips to help improve the video quality and reduce glare:
| 1. | Adjust the lighting: Position yourself in a well-lit area with soft, diffused lighting to reduce glare and shadows on your face. |
| 2. | Use a matte screen protector: Applying a matte screen protector on your iPhone can help reduce reflections and glare on the screen during video calls. |
| 3. | Change the angle: Experiment with different camera angles to find the best position that minimizes glare and provides a clear view of your face. |
| 4. | Use a polarizing filter: If you have an external lens or filter for your iPhone camera, a polarizing filter can help reduce glare and improve image quality. |
| 5. | Adjust the camera settings: Explore the camera settings on your iPhone and adjust the exposure, focus, and white balance to optimize the video quality and reduce glare. |


