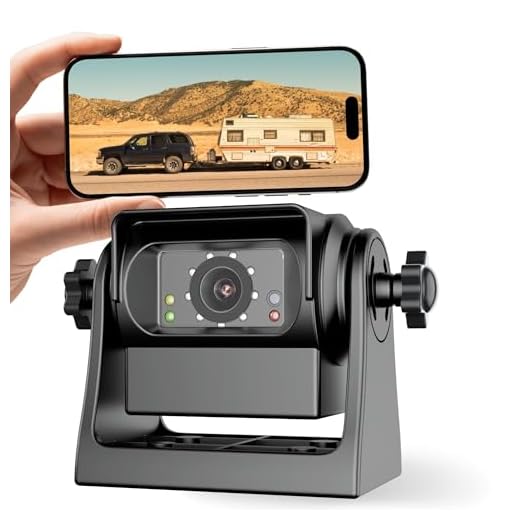


Wireless cameras have revolutionized the way we monitor our homes, offices, and loved ones. With the convenience of a smartphone, you can now keep an eye on your camera feed from anywhere in the world. If you own an iPhone and want to learn how to watch a wireless camera on it, you’ve come to the right place.
Setting up a wireless camera to work with your iPhone is a straightforward process. Most wireless cameras come with their own mobile app that you can download from the App Store. Once you’ve installed the app on your iPhone, follow the on-screen instructions to connect your camera to your home Wi-Fi network.
After the initial setup is complete, you can access your camera feed on your iPhone by simply opening the app. Whether you want to check on your baby in the nursery, keep an eye on your pets, or monitor your front door, having a wireless camera connected to your iPhone gives you peace of mind and convenience like never before.
Step-by-step guide for watching wireless camera on iPhone
Watching a wireless camera on your iPhone is a convenient way to keep an eye on your home or office remotely. Follow these simple steps to set up and view your wireless camera feed on your iPhone:
- Download the manufacturer’s app for your wireless camera from the App Store.
- Install the app on your iPhone and open it.
- Follow the on-screen instructions to connect your wireless camera to your home Wi-Fi network.
- Once the camera is connected, log in to the app using your account credentials.
- Select the camera you want to view from the app’s interface.
- You should now see a live feed from your wireless camera on your iPhone screen.
- You can use the app to control the camera, view recordings, and adjust settings as needed.
By following these steps, you can easily watch your wireless camera feed on your iPhone anytime and anywhere.
Setting up the wireless camera
Setting up a wireless camera for viewing on your iPhone is a straightforward process. Follow these steps to get started:
1. Choose a strategic location
Find a suitable location to place your wireless camera where it can capture the desired area effectively. Make sure the camera is within range of your Wi-Fi network for a stable connection.
2. Power on the camera
Plug in the wireless camera and ensure it is powered on. Most wireless cameras have indicator lights that show when they are ready to connect.
Tip: Check the camera’s user manual for specific instructions on powering it on.
Installing the camera app on iPhone
To watch the wireless camera feed on your iPhone, you need to install the camera app that is compatible with your camera model. Follow these steps to install the app:
- Open the App Store on your iPhone.
- Use the search bar to find the camera app by entering the app name or the camera brand.
- Once you find the app, tap on the “Get” button to download and install it on your iPhone.
- After the installation is complete, open the camera app and follow the on-screen instructions to set it up with your wireless camera.
- Enter the necessary information such as the camera’s IP address, username, and password to connect the app to your wireless camera.
- Once the setup is complete, you can now view the live feed from your wireless camera on your iPhone using the installed app.
Connecting the camera to the app
Once you have installed the app on your iPhone, it’s time to connect your wireless camera to it. Follow these steps:
- Make sure your camera is turned on and within range of your Wi-Fi network.
- Open the app on your iPhone and navigate to the camera pairing section.
- Follow the on-screen instructions to connect the camera to your Wi-Fi network. You may need to enter your network SSID and password.
- Once the camera is connected, you should see a live feed on your iPhone screen.
Now you can start monitoring your camera remotely using your iPhone anytime and anywhere.
Configuring camera settings on iPhone
Once you have successfully connected your wireless camera to your iPhone, you may need to configure some settings to optimize your viewing experience. Here are the steps to configure camera settings on your iPhone:
1. Open the camera app: Launch the camera app on your iPhone to access the live feed from your wireless camera.
2. Adjust camera settings: Depending on the model of your wireless camera, you may have different settings available. Look for options to adjust resolution, brightness, contrast, and other settings to enhance the image quality.
3. Enable motion detection: Some wireless cameras offer motion detection features. Enable this setting to receive notifications on your iPhone when motion is detected in the camera’s field of view.
4. Set up recording options: If your wireless camera supports recording, configure the recording options such as scheduled recording, continuous recording, or event-triggered recording.
5. Customize alerts: Customize alerts to receive notifications on your iPhone when specific events occur, such as motion detection or sound detection.
6. Save settings: Once you have adjusted all the necessary settings, make sure to save them to apply the changes to your wireless camera.
By following these steps, you can configure camera settings on your iPhone to make the most of your wireless camera viewing experience.
Viewing live feed from the camera
To view the live feed from your wireless camera on your iPhone, you will need to follow these steps:
- Make sure the wireless camera is connected to your Wi-Fi network and is powered on.
- Download and install the corresponding app for your wireless camera from the App Store.
- Launch the app on your iPhone and log in with your account credentials.
- Locate the option to view the live feed or live stream within the app’s interface.
- Select the camera you want to view and tap on the live feed to start streaming.
- You can now see the live feed from your wireless camera on your iPhone screen in real-time.
Additional Tips:
- Ensure your iPhone is connected to the same Wi-Fi network as the wireless camera for optimal performance.
- Adjust the camera settings within the app to customize your viewing experience.
Adjusting camera angles and settings
When setting up your wireless camera to watch on your iPhone, it’s important to adjust the camera angles and settings to ensure you capture the best view possible. Here are some tips:
- Position the camera at the desired angle to cover the area you want to monitor.
- Adjust the camera settings for brightness, contrast, and resolution to optimize the image quality.
Tips for optimal viewing:
- Ensure the camera is not obstructed by any objects that could interfere with the view.
- Test different angles and settings to find the best setup for your specific needs.
Recording video and taking snapshots
If you want to record video or take snapshots using your wireless camera on your iPhone, you can do so easily with the help of the camera app that is compatible with your camera model. Here are the steps to follow:
- Open the camera app on your iPhone.
- Connect to the wireless camera’s network.
- Once connected, you should see live video feed from the camera on your iPhone screen.
- To start recording a video, look for the record button within the app and press it.
- To take a snapshot, simply tap the snapshot button within the app.
- You can access your recorded videos and snapshots in the camera app’s gallery or save them to your iPhone’s camera roll.
By following these simple steps, you can easily record videos and take snapshots using your wireless camera on your iPhone.
Accessing camera remotely on iPhone
Accessing your wireless camera remotely on your iPhone is a convenient way to keep an eye on your home or office while you’re away. To do this, you can use the camera’s dedicated app or a third-party app that is compatible with your camera model.
First, make sure your camera is connected to the internet and that you have the app installed on your iPhone. Open the app and log in with your account credentials. Once you’re logged in, you should be able to see a live feed from your camera on your iPhone screen.
Some apps may also allow you to control the camera’s movement, zoom in and out, or access other features remotely. Make sure to explore the app’s settings to customize your viewing experience.
Remember to keep your camera’s firmware up to date and use strong passwords to protect your privacy and security when accessing the camera remotely on your iPhone.
Troubleshooting common issues
If you are experiencing issues while trying to watch a wireless camera on your iPhone, here are some common troubleshooting steps you can take:
1. Check the camera’s power source and make sure it is properly connected.
2. Ensure that the camera is within range of the Wi-Fi network and that the signal is strong enough.
3. Verify that the camera is properly set up and configured according to the manufacturer’s instructions.
4. Restart the camera and your iPhone to refresh the connection.
5. Update the camera’s firmware and the app you are using to access the camera.
6. Check for any obstacles or interference that may be affecting the wireless signal.
7. If all else fails, contact the camera’s customer support for further assistance.


